
Time Town
Collectibles

Immediately drop backwards off the edge.
Father Cog's Patio
Defeat a few Buzzer Beaks down here and then head inside the doorway.
Cog Family Fortune
If you stand on the button in here you'll rotate the large cogs on the wall enough to be able to grab the gems dangling off them. Nothing more in here so turn around head outside and bounce back up to the start.
To the left is a Traptanium Crystal, smash through and activate the moving platform behind it to ride over and grab Soul Gem 1/2 - Rocky Roll. You can see a ledge below but you can't get there right now, it's further into the level. (There are three Da Pinchy statues here for the Trophy/Achievement, another back over where the crystal was and a fifth by a building just past where you meet Da Pinchy)
Grand Approach
Talk to Da Pinchy and then head left ignoring the block puzzle for a moment, go into the building.
Pendulum Bob's House
Hans in here has a game of Skystones Smash to play, the reward is 2000 coins.
Push the left block to the right then up three times and the right block up twice to put both of them on the gears on the ground to get them both rotating.
Moon Gear Rise
Jump up the gears that appear, on the right side is Story Scroll and to the left when you use the bounce pads you can drop off....
Musical Terrace
...and open Treasure Chest 1/3.
Bounce back up and then again to the right. Go through a little diorama scene wall when it flips over.
Chime Hammer Square
Down the slope you'll spot a few Buzzer Beaks and a Cross Crow harassing Da Pinchy, take them out (Cross Crow fires some watery bolts at you, three at a time) and Da Pinchy will go and show you how to open up the way.
Before you do that though go back a bit to the right and drop off the edge, below you'll find a Wilikin called Leyland who has a Quest for Dr. Krankcase Diorama Drama. The quest itself is over in a flash but, similar to Shrednaught in the Wilikin Workshop chapter, it will allow you to access otherwise inaccessible areas. Like behind this diorama.
Wayward Cog Storage
Inside here you'll find a present with Hat 1/2 - Bobby.
Now if you bounce up and go over to Da Pinchy again he'll show you a quick minigame type of mechanic. All you have to do is hit the rotating pipes at the right time so that you hit the pipe sticking out, it gets a little harder later on as missing too many times will reset ones on the pipe you've already hit. Anyway, once that's solved the door will open.
Fight off the Buzzer Beaks along with a bunch of purple melee crows and one Cross Crow at the back. Step on the button that appears and climb up the steps but just before the top jump off to the right down to a diorama for Dr. Krankcase.
Backstage
Jump up the left side and get onto the revolving platform to get over to the Villain Stash.
Main Spring Fly
Bounce up and ignore the Super Bounce Pad, instead go left along some platforms that are moving up and down to get Soul Gem 2/2 - Thunderbolt. Now go use that Super Bounce Pad.
To the right of Florg you'll find Tessa sitting on Whiskers waiting to give a Quest for Cross Crow Skylands' Biggest Fans. This is something you'll have to return later for once you've caught Cross Crow as part of this very chapter.
To help the fans you have to approach each of the ten coils to spin them down. Your first one is right in front of you, the second just over to the left. Smash through some brick walls to the left of that and follow the path up to a bomb, pick it up and walk over to the coil nearby to throw it at the wall behind. Spin down that third coil and then go through the newly blown up wall.
There's a fourth coil just past the wall up on a ledge next to the Shrednaught, after you've spun it grab a bomb and quickly follow the path a bit further to a Super Bounce Pad. It'll land you next to a coil but for time ignore it and the next one as you run around the corner and throw the bomb at a wall. Behind that wall are some enemies and a coil (if you didn't quite make it in time don't worry, there's another more suitable bomb just down at the curve in the path). Go back for the two coils you just skipped and then jump down to the right to get an eighth.
The ninth and tenth are just further down to the right to finish it all off.
To the left of Florg is another of those rotating walls, don't go through it instead step on a button next to it. That'll bring up some platforms that you can climb to reach Winged Sapphire. The teleporter will take you back down, now you can go through the wall.
Sunny Side Narrows
If you'd like to get some upgrades don't let the second conveyor belt here take you down, instead jump up along it to reach an area at the other end. Down below the platform you'll find Persephone.
Go back along the conveyor belt and take out the smaller crow enemies before stepping onto the circular cog with arrows on, walk clockwise but at the top jump off and fall into the gap underneath the cog.
Clockwork Innards
In here you'll have to fight a few of the purple crows while watching out for rocket launching crows up on the platform. They'll jump down once the purple ones are gone but then a few more and a Cross Crow will join to finish the fight. A Treasure Chest 2/3 will be available afterwards. Run the cog upwards and exit through the upper door.
The button down here rotates a large pine cone that you can get on top of for a few coins. Bounce up to do that and then use the rotating cog to actually get up this time.
Go through another rotating wall, down a conveyor belt and you'll reach Da Pinchy again. Before speaking to him though there's an Earth Elemental Gate to the right.
Broken Toe Plateau (Earth)
Attack the enemies and then head into the cave along the stream.
Waterfall Cave
Grab the pickaxe from the corner and start smashing the rocks in here. Push the block to the right and then against the wall where the rocks were for a few coins. Head outside again with the pickaxe and smash some rocks to the left. Watch out for the plants here, they won't directly hurt but they'll bounce you away and knock you off the ledge. Go past the waterfall and over another stream to smash some rocks, you'll need to keep moving to avoid getting pushed off by the water. Before you reach the top there's a few more rocks and you'll get Hat 2/2 - Alarm Clock Hat.
The puzzle next to Da Pinchy is a little tougher than the last one. Use the Super Bounce Pad to get over to a fight.
Clockwork Courtyard
Some Buzzer Beaks to start with but avoid the rockets being fired at you, defeat the purple crows to open up the first monster gate.
To the right is a diorama for Dr. Krankcase to open up.
Retired Clock Storage
This one's purely for the all areas.
After taking out the Cross Crows the rocket launcher will jump down so you can defeat it. Go into the house on the left.
Cogsworth's Bed and Brunch
Another place purely for all areas.
On the right is a block puzzle, push the right block to the right once, the left block left twice, the middle block to the right once and then both remaining blocks over to where the other block is on the gears by the wall.
Stand on the semi-circle and wait for the platform to move down so you can get on. The left side has some food, ignore the top and jump off to the right. You'll find yourself next to another of Da Pinchy's pipe puzzles (a little more difficult again) and your reward is a fight with the Water villain
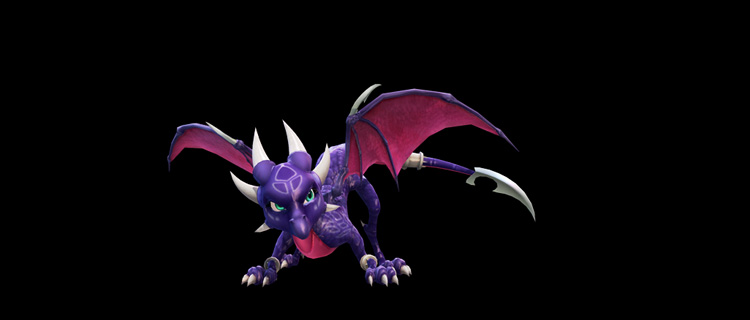
Cross Crow.
He's a fair bit stronger than the other ones you've been fighting, he fires five bolts rapidly instead of three and also has a wide burst multishot attack that he occasionally uses. That and the backup that he's got. Once you've wiped out the supporting characters Cross Crow shouldn't be too much of a struggle provided you recognise when he's about to attack, the fact that he locks into position and won't change direction once he's done that means it's easier to avoid and attack at the same time. He'll give a 1200 bounty along with his Skystone. After beating the enemies
Treasure Chest 3/3 should have appeared at the back.
Get back to the moving platform and ride it to the top position.
Tower Approach
As you fall off you'll enter a fight with one of those larger punching crows, defeating him will merely trigger others and then others and others to fight you. After wiping out the last of the rocket launchers you'll be able to solve Da Pinchy's final puzzle. Don't go inside though, instead turn around and go to the right where there's a Traptanium Crystal to smash.
This leads to a moving platform just like the one near the start, and in fact goes to the ledge below the area you went to before. There you'll finally pick up the Legendary Treasure - Legendary Clock. Go back and through the door that Da Pinchy helped open.
Owl Clock Gallery
Step on the button so that the steps rotate and let you get up the left side. Up there press the button to rotate the steps to the opposite side and then press a button on that side to get them to rotate to the back. Climb them to finish the level.
Skylanders Academy
There's not all that much new this time, you can find the Legendary Clock inside Persephone's Treehouse and Crossbones has another new Skaletones challenger for you to take on, Flynn. To get moving to the next level talk to Da Pinchy up the the purple portal.
Comments
As for the chest maybe you already got that one? It should be visible the whole time behind the locked barrier on the ground floor.

Any idea where is the missing one in the guide

All off-topic comments will be deleted. Please do not use the comments system for conversations, instead use the provided forums for the game.
Please login or register a forum account to post a comment.
 darkspyro
 net
net