
Sunscraper Spire
Collectibles

Viewing Platform
To the right you'll find a Super Bounce Pad to use.
First Quarter Island
Jump down the circular area and you'll be attacked by a set of small blue one-eyed creatures with a spike on their head, let's call them Spikelops, who are pretty much the same as Chompies, easy to kill but there's loads of them. After clearing them out the monster gate will drop.
Head left past some spikes and in the corner here you'll find a Traptanium Crystal with Treasure Chest 1/3 underneath. Go up the steps to where Mags is standing and you'll reach a quick light puzzle. The block is reflective so push it backwards to reflect the beam into the crystal on the right to form a bridge.
If you disrupt the beam the bridge will disappear temporarily but that's not really important here. Cross over and pull the lever next to another light crystal, that'll both remove the barrier and activate a second bridge to cross. A few more enemies will appear including a couple of Cyclops Spinners who are generally invulnerable to damage while they're spinning so move away from them when they're doing that.
Cross this second bridge and at the curve go to the right to talk to Buzz who has a quest for Luminous Buzz Has a Hat?, obviously that'll require you to have beaten the level so come back when you have done to collect Hat 1/3 - Lighthouse Beacon Hat.
Keep going past the spikes to where some more enemies will attack, including a new Cyclops enemy standing on an area above you throwing light attacks at you, you only need to defeat the single spinner on the ground to open the monster gate (but don't go through yet!), you'll have to work your way around to get up there. The Traptanium Crystal here only has some coins inside. Anyway, ignore the door and jump off the right side.
Hidden Path
Down here you'll meet another new enemy, a purple, riderless Cyclops Mammoth. He'll walk up to you and slam his front feet down but not do much otherwise. You'll still want to be watching out for the Cyclops Juggler up there when you're attacking this guy. Before you use the bounce pad make sure to collect the Story Scroll.
The bounce pad will take you up to the juggler but be warned that he still keeps throwing those light bolts at you when you're standing right next to him on this cramped ledge. Terra is standing next to the Earth Elemental Gate.
Crystal Cavern (Earth)
Skip over the first bounce pad (or drop back down if it takes you up) to reach a second one beyond, use that to bounce up to the top and move to land on the right. Bounce over to the right and then push the block off to the left, follow it down and push the block there off to the left also. Step on the bounce pad here to be taken to a bomb on your right, then drop down to the first bounce pad and skip over it, throw the bomb at the blockage to the left of the block you pushed down then push the block into the gap.
Use the first bounce pad to get up to the bounce pad that'll take you to the bomb, pick up the bomb and go back down to the bounce pad that takes you to the top, land on the right but throw the bomb at the blockage to the left. With the blockage clear jump down and bounce back up to reach Hat 2/3 - Light Bulb Hat.
Jump down from the ledge and go into the door below.
Crystal Underpass
While it might look like you should step onto one of the Super Bounce Pads what you actually want to do is walk around them carefully. Make your way over to the Traptanium Crystal with Soul Gem 1/1 - Knight Light hiding underneath. Now you can just use either of the Super Bounce Pads next to you to get up to the exit.
First Beam Control Floor
Another Cyclops Mammoth is here, this time with a Cyclops Spinner who will be happy to climb aboard and start riding it. When there's a rider on a Mammoth it will now charge quite quickly at you. Attacks will knock the rider off but then you have to contend with the mammoth and the spinner. Defeat them along with the juggler at the back (you can just jump up the ledge). Once you've done that pick up a bomb and throw it over the gap by the gate that has now lowered.
Grab another bomb and cross the bridge (careful not to walk into the beam) to throw it at the stone attached to the giant lever. Once that's done cross the next bridge that appears, go past some spikes and Super Bounce away.
Second Quarter Island
Immediately go towards the screen and drop off to where the Villain Stash is hiding below. Jump back up the steps and go into the door.
Under-Island Maintenance Area
The bridge ahead is really the first instance where you'll knock yourself off by accidentally walking through the light, however it is not important as you actually do want to fall down here. Take out the little smurfs on the floor and follow the tracks around to the left, to the right of the pit with some more Spikeclops in you'll find the Winged Sapphire by another short piece of track leading underneath a platform.
With that jump up the steps next to you to get up onto the platform and pull the lever by the crystal once. Jump back down the steps and go up the ones that lead back to the start but halfway up them you'll see a small light bridge that has formed.
Secret platform
On this tiny platform is Treasure Chest 2/3.
Drop down and go up the steps again to pull the lever a second time. Before crossing it though you'll perhaps want to destroy a few Spikeclops and the Chomp Chest sitting in the corner, that'll open a gate which leads to Buzz who wants to play some Skystones Smash with you. Just a 2000 gold reward for winning.
To cross the light bridge you need to jump over the light beam, count five lines on the floor before jumping over it on the sixth one. A small light puzzle on the other side too but it doesn't do anything helpful at the moment.
Jump over the gap and up the wooden ramp to a Super Bounce Pad that'll take you up to a Lock Puzzle. To solve it you want to deactivate one of the two blocks at the top, activate one of the two on the bottom and then move up from that block to reach the exit. Specific directions: Right, Up, Left, Down, Right, Up, Left, Right, Down, Right, Up, Down, Left, Down, Right, Down, Left, Up, Left.
Second Beam Control Floor
Another new type of enemey emerges now, a laser beam firing Cyclops. Not only does he quickly dash around over there but he fires a light beam out of his eye and swings it across the whole area. Jump over it to avoid taking damage but also be aware that if the light beam hits one of the little Spikeclops they too will fire a short laser beam. Kill them all.
If you fall down the hole here you'll fall back into the room beforehand, you can now block the light puzzle from completing its circuit and grab a few coins from beneath the barrier on the floor. Otherwise just Super Bounce back up.
Go through the opened monster gate and up the steps to pick up a bomb, take it over and blow up the weight on the second giant lever. A Super Bounce Pad will appear, step onto it.
Oubliette
Try to grab a few coins as you fall.
Crystal Corridors
Another new type of Cyclops enemy appears! This one has two attacks, one where he charges his axe up and swings it spinning at you for a short time (not as long as the spinners) and another where he charges it it briefly and slams it down to cause a pulse of energy you will want not be standing on (it doesn't go too far). After defeating him the monster gate will open up.
Go forwards and push the mirror block once to the right. Don't bother pulling the lever just yet, instead double back and you'll find that the barrier that was active before is now no longer, letting you access the Dark Elemental Gate behind.
Chamber of Dark Energy (Dark)
Kill off the little enemies then jump up to the back and roll the ball down the slope. Once it lands in the hole a platform at the top will rise up a small distance to let you open Hat 3/3 - Dark Helm.
Now go and pull the lever by the edge to create a bridge. Go over, carefully jumping over the beam, and trigger some enemies to appear. As they do you can just go back over the bridge and move the lever around to kill them either with the laser itself or just by dropping them off the bridge.
Push the mirror block on the other side so that it forms a bridge, cross over the bridge and move the back block left then the mirror block forwards and to the right so that it reflects the light across to the other side of the room. Before advancing jump down where the previous bridge was.
Crystal Canyon
Down here is Treasure Chest 3/3 and, across a light bridge, a bounce pad to bring you back up.
At the top of the stepped platforms is Persephone along the edge if you'd like to buy some upgrades. Kill a few more enemies ahead to open the monster gate to let yourself out. To get past the barrier though you need to stand in the light beam to deactivate it (and kill the enemies on the bridge) and jump to where the bridge is, you should pass through the barrier before it reappears but land safely on the bridge.
Crystal Chasm
You'll want to kill the enemies on each layer before pushing the block into the light beam to disable the floors, otherwise you'll end up with a whole load of enemies all together before you can push the final block to open the last floor. Once you do ignore the bombable wall and just use the bounce pad to get out of here.
Third Beam Control Floor
Pick up the bomb from between the spikes and throw it across the gap to blow up the blocks. Pick it up again and when crossing the bridge step into the light beam to disable the bridge so that you fall down. You'll fall back down into the Crystal Chasm with the bomb still ticking, throw it at the bombable wall from earlier to reveal Legendary Treasure - Legendary Knight Statue.
Bounce back up outside again and grab another bomb, this time crossing the bridge with care. Throw the bomb at the blocks by the third giant lever to reveal another bomb, go over and use that to release the lever. Before using the Super Bounce Pad grab a bomb again and carry it on over.
Fourth Beam Control Floor
Immediately throw the bomb at the fourth and final giant lever (if you miss just use the Super Bounce Pad to go get another one). Use the Super Bounce Pad to the left.
Tricked You Tower
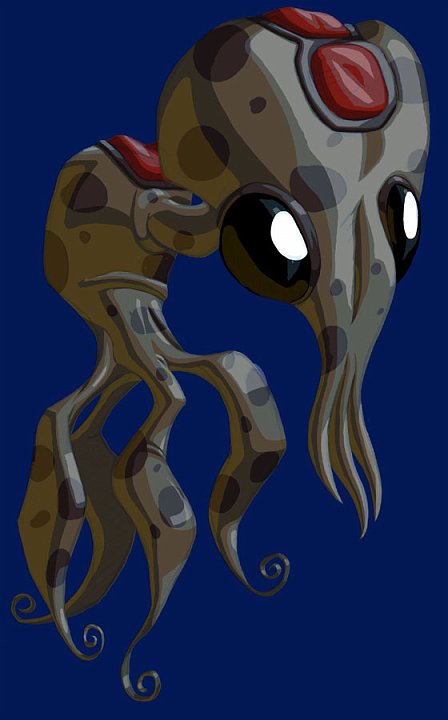
Time to fight the Light villain Luminous. First stage of the fight is pretty basic, jump over (or simply follow around) the light beams until he stops firing them then attack him. Repeat when he reappears. The next part he'll start firing down crystals at you, avoid the red markers but don't hit the crystals that fall with an attack until he puts his shields back up. Each crystal you then hit will take one of his shields off, once all three are down you can attack him for a little bit. He will remove his shields by himself but it'll just take a little longer.
He'll keep doing that same pattern but adding an extra light beam every now and then until you take off half of his health. He will ask you to follow him but you'll go there automatically so don't try and cross the bridge yourself. It might seem like the idea is to smash the statues here but it's actually better to leave them intact as they provide cover from the light beams. Hit the crystals when they fall to speed up the removal of Luminous's shields and attack him as before. Once you beat him you'll earn 2500 coins and a Skystone.
Skylanders Academy
The activation point for the Legendary Knight Statue is up in the Game Room by the water pools.
Comments
 -King Candy/Turbo (Wreck-It Ralph)


All off-topic comments will be deleted. Please do not use the comments system for conversations, instead use the provided forums for the game.
Please login or register a forum account to post a comment.
 darkspyro
 net
net