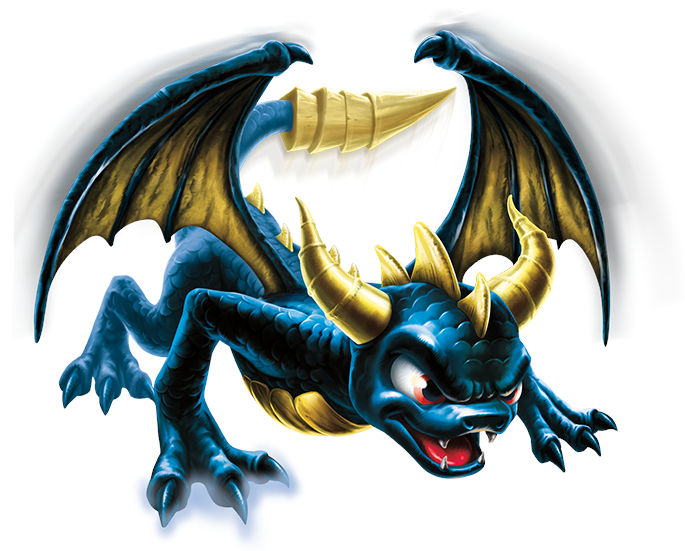

Chapter 10: Boney Islands
Collectibles

Go down the steps to the two Fire Geargolems and take them out, you can run around them to make them attack each other if you can get them close together. Talk to Avril once you're done to get moving.
Frozen Fossil Lane
Slide along the ice to meet a Coldspear Cyclops. These are again an enemy that'll run towards you and try to stab you with its spear. Kill them and then push the yellow block of amber backwards into a hole behind it. Jump up the wooden steps on the left to reach [Treasure Chest 1/5]. Jump back down and follow the caravan.
The caravan will pause to let you attack a Geargolem and a few Coldspears before tackling a block puzzle. Push the near one to the right and it'll slide all the way into the hole. Then push the left one away and the right one to the right into the hole. Push the remaining block right and then down into the hole as well.
Before going through the gate that the caravan shoots open go down the wooden path to the left, it'll lead to a small gap to jump over before reaching [Museum Souvenirs 1/4]. Now go back up and through the gate to a quick block puzzle. Push the first block to the right, then the block that was behind it backwards. Push the far block to the left and then the remaining block into a hole ahead of you.
Go through the next gate where you'll be introduced to the Cyclops Gazermage. These stand still and point their magnifying glass at you, get out of the way of the beam before it turns orange otherwise you'll take damage. With the two of them defeated the caravan will move in, keep on along side and another group of enemies will appear. Take out the Coldspears and the Gazermages that keep appearing until Avril asks you to go find gas.
Gift Boat Row (Water)
Bounce up by the amber and follow the path, as it turns to the right jump off to the left onto some rotating circular platforms. At the top is [Soul Gem 1/2 - Spy Rise]. Get back to the path and follow it a short distance further to see a Cyclops Snowblaster. These stationary turrets fire out blasts of ice directly in front of them, this one doesn't even turn. Get past one of the blasts and by its side to attack freely.
Up the steps to a quick light beam puzzle, or, well, not really a puzzle at all. Push the crystal left and you're done. Through the gate you'll see a couple of Coldspears being helped by an Air Spell Punk, if you walk back through the gate you can lure the Coldspears into the beam of light and they'll take damage from it. Once they're gone push the amber block into a hotspring by the wall. Jump onto it it'll spring upwards letting you reach the higher platform.
There's a Chompy Frostflower up here. When bit by one of these you'll be slowed down for a moment but otherwise they are just the same as the other Chompies. On the left is a Dual Magic and Life Gate.
Frosty Enchantment (Life)
Go up the steps and push the amber block south off the platform, jump down and push it left three times to go over the edge, jump down onto it to ride it up to the next platform and ride the block there up further again. Watch out for the Gazermages above as you clear out the one on the same level as you and the Snowblaster at the back that's slowly rotating. Now start pushing the blocks, push the back one out of the way to the right and then the front one onto the grill back to the left careful not to be stuck in a pushing animation while the Gazermages are focusing on you.
Ride the block up to the top layer and take out the two Gazermages as well as another Snowblaster at the back. Go along to the right side where the present with [Legendary Treasure 1/2 - Geode Glider] is.
Into the house on the right. On the Wii version this room and the puzzle inside it does not exist.
Relic Room (Water)
At the back is a Spark Lock, "Synchronized Sliding". The ticking noise you can hear is the fans turning off and on again, you'll need to do some timing with that in a moment. First get Shock to go through the fan when it's off, you'll hit the purple button at the back. The best time to move is a second or two after the fan turns on. Now go back down to the lowered purple platforms and stand on the middle of the three. Switch to Bolt. Again go past the fan with it off to hit the orange button, if you time it wrong you'll just come back around so you can try again. Take Bolt back down and approach Shock but do not bump into him, instead go up onto the moving platform to get around him. Now you can safely try to go upwards and use the fan to be blown to the right onto the moving platform and let yourself go through the green lightning bolt. Do the same on the right side with Shock and then bring them together along the bottom. That'll solve [Treasure Chest 2/5] (for the Wii version ignore this chest, it does not exist). Head outside again.
Go up the steps between the gate and the building to reach a locked gate and another building to go inside.
McElfy's Diode Shoppe (Water)
A little more of a puzzle this time, pull the lever on the right twice so that the beam of light is going straight to the left. Then push the crystal down into the beam and then right so that it hits the crystal on the door to reveal a key.
Take the key outside, defeat the two Coldspears that have appeared and then unlock the gate.
Curator's Office (Water)
Cross the bridge and head inside. There's a bunch of enemies in here to defeat, once they're clear the door at the back will open and you can pick up the gas can.
Dusty Archives (Water)
There's a few coins in here but not much more, go straight out of the door to meet up with Avril again.
Triassic Turns (Air)
Jump into the caravan and start shooting at the ice blockade. The caravan will start moving along the path and your job is now to shoot the enemies that pop up before they can damage you, the Snowblasters are suddenly a much more dangerous enemy. Just keep on shooting at everything that you can get a lock-on circle on.
Paleo Pass (Air)
Immediately on your left is a Climb Swap Zone.
Amber Ice Climb (Climb)
Again you've got a massive item falling down smashing through the cover, in this case it's fossilised fish, you should be able to hear it from a distance so listen out for that as well as watching out for the red circles of the missiles. Climb to the top to receive [Bonus Mission Map 1/1 - Royal Gems].
Go right over the brown rocks where the icicles are falling, keep out of the way of the red circles as you make your way over to a Snowblaster in the middle. A little past that you'll encounter a Loose Cannon, these are larger Troll enemies with shields that fire out three cannon balls each time they attack. Get up close and circle around it waiting for the third shot before attacking it until it puts its shield back up. Repeat until it's defeated. And a little further on is another Loose Cannon, that'll open up a monster gate ahead. However don't go through it just yet.
Instead go back a little and to the right to jump along a series of ice platforms to reach [Museum Souvenirs 2/4] on top of a frozen T-Rex skeleton. Jump back down and head left to a Magic Gate.
Aurora Way (Magic)
Head down a ramp and push a light beam crystal ahead twice. There's a lever next to it to pull, pull it. Now up the ramp to the right and start pushing some blocks. Push the right one back twice and then the left one to the left twice, then push the remaining block up once and then finally push the crystal here to the right once to finish this bit of the circuit. Go to the right and pull the lever next to the next crystal twice to turn it to face another crystal ahead.
Go to that crystal and pull the lever three times. Jump down to the layer below on the left and push the crystal right twice and then onto the lift which you should lift up using the lever next to it. Go back up the steps and push the orange block left out of the way to finally open up the gate and find [Hat 1/2 - Fishbone Hat].
Now go through the monster gate and attack the Geargolem and his two Gazerbeam pals. Once they're gone more enemies will join including an Air Spell Punk another Geargolem and a couple of Coldspears. With them dead you'll have a quick chat with Avril and Flynn again.
Go to the right of the area and follow the path around through the falling icicles and a Snowblaster to get to [Treasure Chest 3/5]. The icicles will still be falling as you go back to the fight area. On the left side up on the platform is an orange block, push it down off the platform and then far to the right until you get it into the hole. Jump onto it and then off at the top. There's a Dig Swap Zone up here.
Ice Hollows (Dig)
The minecarts in here are moving a lot quicker than before but as they're coming towards you you'll be able to see them and move out of the way just as quickly. First cross the cart tracks to the left and get the first crystal, then you've got enough time to go grab the bonus gem to the right of the start before coming back and heading further down the cart track a little, on the right side should be a path off towards the second crystal and the second bonus gem a little beyond. Get back to the main dual cart track and carry on further down to the bonus gem and then third crystal. The reward for digging up all three crystals is [Legendary Treasure 2/2 - Triassic Tooth].
Go up to the amber block on the left and push it off the edge, follow it down and push it further left up against the steps. Jump onto the block and grab the [Soul Gem 2/2 - Dune Bug] from the ledge above it. Use the block in the hole to get back up to the higher up section and carry on along the path to another amber block. Push that into the hole near it to go up the next ledge and into a building.
Ticket Taker (Air)
Push the amber block off the edge to get it out of the way and then pull the lever on the left to raise the crystal up. Turn the wheel by the crystal on the right three times to open the door.
Go up the steps and across the platforms to a quick battle with a Gazermage. Behind the amber blocks is a path to [Museum Souvenirs 3/4]. Push the left block out of the way and then the right one left and then into the hole. Use it to jump up onto another block that'll jump up to another and then finally to the top. Kill the Gazermages and the Chompies as well as the Coldspears and the Loose Cannon that come running across the bridge to you. Go inside the building across the bridge first.
A timed challenge! You've got to quickly defeat all of the enemies in here to open up the gate at the back and reveal [Story Scroll]. Now back out, across the bridge and into the building.
Security Hutch (Air)
Push the near block to the right four times and then backwards three times so it falls off the ledge. Now the other one off the ledge too so that the light beam hits the door and unlocks it. Go outside. Checkpoint!
On the right is the level's Giant Chest and over on the left side of the caravan is a Rocket Swap Zone.
Ice Cold Flying (Rocket)
The gates in this Swap Zone are not all in a straight line this time, gotta weave through the first section, the second section makes them start rotating as well. To get through those you'll need to either get lucky with the positioning or move sideways through them. Reward for safely reaching the end is [Hat 2/2 - Bearskin Cap].
Talk to the front caravan to get it to shoot the lock on the gate so you can walk through.
Amber Alley (Tech)
Kill the two Gazermages and then push the right of the two left blocks forward out of the way to push the left one into the hole on the right. Now push the first block to the right and then down into the gap ahead. Push the block up on the platform down onto the ice and then over the block you just pushed into the gap.
Cross over those blocks and jump up onto the wooden platform to get rid of the Loose Cannon up there. And at the right end is [Treasure Chest 4/5]. Over to the left side is another block puzzle. First push the middle one to the right and into the gap, then push the one closest to the caravan to the left against the side so that you can push the far one into it and then across on top of the first block.
Glacial Gallery (Tech)
Go through the next gate and then left over an ice bridge to a circle of Chompies. Jump towards the screen onto a wooden platform and then again to find [Museum Souvenirs 4/4]. Jump back to the path and head left into an Earth Gate. In the Wii version this gate is not here, you can find the Winged Sapphire a little further on in the level.
Granite Wing (Earth)
Turn the wheel once so that you can reach the platform to the right, go over there and fight the Geargolem and the Chompy Pod to open up the gate behind them. You'll find a key. Go back to the middle of the turning platform and turn the wheel again so that you can get over to the left side. This one's an Air Spell Punk with four Gazermages shooting really quickly. Again grab the key and return to the central platform to turn it around so you can go to the back section.
Use the two keys on the locked door to get the [Winged Sapphire]. You can just jump down and go back up the ramp towards the exit.
Go up the little wooden ramp and jump onto one of the platforms rotating about the dinosaur skeleton. Grab the key and then jump onto the wooden platform on the left, wait for a second platform to come around before jumping on and then straight back onto the same wooden platform with the key from it. For the third one jump on again but ride it to the wooden platform at the far end.
Take out the two Loose Cannons and before you use the three keys on the locked gate go down the steps to the left and into the building.
Pull the right lever to lift the right block into the air. Push the left block up one and then right one onto the wooden lift and then pull the left lever. Now push the bottom left crystal (the one facing left) to the right so it's in the light beam. Next push the other crystal left twice and then down once into the beam to unlock the gate. [Treasure Chest 5/5] is behind there (in the Wii version the chest is found further on in the level).
In the Wii version of this room you push the near crystal to the right so that it is in the light beam and redirects the light to the left, then push the other crystal to the left and align the first crystal with it so that the amber block isn't blocking. Behind the gate at the back is the [Winged Sapphire] you missed in the Earth Gate.
Open up the gate with your three keys and follow the path along to a Chompy Pod, a few Coldspears and a Loose Cannon up on a platform at the back. With them gone take the Fossil Fuel can and start collecting the three keys from the next set of rotating platforms, same thing as before but get rid of the two Gazermages first. In the Wii version you can get the final [Treasure Chest 4/4] by jumping up a series of platforms to the left of the Gazermage platforms. Get back to the caravan to go into one last shooting section.
Fossil Frostway (Tech)
Shoot the purple eyes of the two dinosaur skeletons on either side to clear up the bridge. Now get ready to shoot everything you can target as the caravan dives down the icy path. There are mines, barricades, more purple eyes, enemies and loads of crates to hit. All the way to the end of the level.
Woodburrow
Absolutely nothing new to do in Woodburrow this time, just go talk to Sharpfin to get moving to Winter Keep.
Comments


All off-topic comments will be deleted. Please do not use the comments system for conversations, instead use the provided forums for the game.
Please login or register a forum account to post a comment.
 darkspyro
 net
net