Thumpin' Wumpa Islands
| Story Goals | Collections | Dares | |||||||||||||||||
|---|---|---|---|---|---|---|---|---|---|---|---|---|---|---|---|---|---|---|---|
|
|
|
 |
 |
 |
 |
 |
 |
 |
 |
1/12 - Wumpa Jungle Vibes
Forwards into the jungle. Just before the turn to the right into a kind of green forcefield, you can go to the left and bounce up some crates to reach an XP ball.
2/12 - Infamous Choir Statues
This puzzle requires you to remember a very short sequence of colours, the statues remain those colours so it is easy to see when you're bouncing anyway. Press the triangular button on the floor to have the statues play their tune Pink, Blue, Blue, Pink. Then just bounce on the drums in that order.
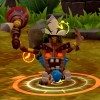
After successfully matching the pattern the place will brighten up and the platforms at the back will start moving. Jump up them to be introduced to a dancing Chompy and a crab with some bongos on its back. The Chompy is a little different to regular ones in that it'll glow red and leap even when you aren't near it, which means that they're a bit more dangerous to walk around as they aren't triggered by getting close. The crabs attack in time with the music but aren't much of a threat.
 |
Boom Box 1/5 |
|---|---|
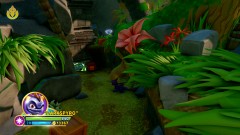
| Follow the lower path to the right to find the first Boom Box, hit it to fix it and bring light to the area. |
Don't worry about the one that the Chompy and Crab were next to and head up the steps in the middle.
3/12 - Jiving Falls
 |
Treasure Chest 1/6 |
|---|---|
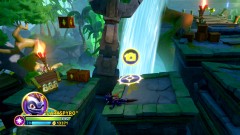
| Take a path to the left where there's a [Selfie Spot] and just past that is the first Treasure Chest. |
Carrying on you'll reach a second drum challenge. This time there's an extra note to remember Pink, Blue, Pink, Pink, Blue. Same as before the place will light up and the platforms at the back will start moving.
4/12 - Wumpa Valley
 |
Boom Box 2/5 |
|---|---|
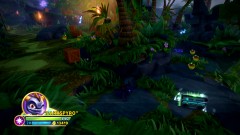
| After dropping down walk back towards the screen and to the right, you can find [Boom Box 2/5] in the darkness down a little ledge. |
There's an [Imaginite Chest] down here too.
Keep on going towards the village, you'll encounter a snapper plant. This plant cannot move and does not actually bite you but instead it shoots out a mini snapper plant that lands and then sits there snapping at you. Destroy the main snapper plant to get rid of the offshoots. Once you've defeated it and the horde of Chompies a gate will lower ahead.
5/12 - Pau Pau Village
Keep going to the right past the [Selfie Spot] over a bridge with a gap in the middle and into a hut on the right.
6/12 - Wumpa and Buster's
In here you can play a game of [Creation Clash] against Cello to unlock a cage with a load of coins inside.
Head out and you'll be attacked by a couple of bongo crabs, defeat them then head into the main hut at the back.
After talking to Mags and Spyro you can get an XP ball at the top of the room. Make sure to go out the glowing doorway on the left side, don't go out the right yet!
Behind the crates out here is a bounce pad that leads up to a cave.
7/12 - Dance Party Cave
In the cave are loads of Chompies, defeat them all along with the giant Chompy (he won't do anything until you hit him so be careful if you don't want to be fighting a million little Chompies at the same time). Clearing the room will get you an [Imaginite Chest].
Back outside go to the left where there's a Lock Puzzle. Solve for the [Imaginite Chest] with: Up, Right, Down, Left, Right, Up, Left, Down, Left, Up, Right, Up, Right, Up, Left, Up, Left, Up, Left, Down, Right, Left, Down, Right. Then to finish just go: Up.
Inside this hut is an [Imaginite Chest] at the top of the platforms. Head back out and through the main hut going out the right side.
After talking to Banjo jump down the ledge along the front and smash the pile of crates to find the Mixtape, bring it back to light the place up.
8/12 - Smashin' Rockers
The rock faces will glow red just before they pop out so it should give you plenty of time to get out of the way. If you do get pushed off you'll just have to go back a short distance and bounce back up to the path.
As you leave the rock face area you'll be introduced to a witch doctor that has a glowing clock underneath him, this indicates that he casts a spell that speeds up enemies (they'll have a stopwatch floating above them) much in the same way an Air Spell Punk does. He doesn't do any damage directly so you can either attack him first to get the enemies to slow down or just defeat the other enemies and then deal with him after.
After defeating the witch doctor and couple of snapper plants will appear. Kill them off too and head up the stepped platforms at the back.
9/12 - Upper Wumpa Valley
At the top of the steps is Fife, he's standing next to a portal that will only open up if you're using Crash Bandicoot. Once it's open you can switch to any Skylander and still use it though so don't feel pressured to actually use him for the challenge inside.
The Chili Pepper Run is an automatic running segment towards the screen. You have to weave around obstacles that pop into view while trying to get as many crates as you can.
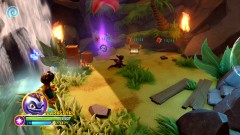 |
Treasure Chest 2/6 Soul Gem 1/2 - Dr. Neo Cortex |
|---|---|
| If you get 25 crates you get a Treasure Chest and if you get 50 you get a Soul Gem. |
There are only a few extra crates so you can't afford to miss more than two or three (the crates at the top before you eat the Chili Pepper do not count). If you fall off into the water you'll return to either the start or the last checkpoint you passed, this gives you a chance to try to get a crate you've just missed but be warned that if it's too far back the boulder chasing you will likely have smashed it.
The first crate will be on the left side of the path. Before the first checkpoint there are twelve crates. Between that and the second checkpoint there are an additional 17 (29). And before the end there's 26 more to bring the grand total to 55 crates that you can get. If you've missed more than five you can re-enter the run once you've exited back to the level and try again. Unfortunately there's no way to exit the race mid-way through so even if you're aware you've missed more than five you'll have to finish the run to try again.
Go to the right along a new series of rock faces, this time they're smashing down instead of pushing out so they'll actually do some damage this time if you're not careful. There's also no safe area below so don't go falling into the gaps.
At the end you'll meet up with Spyro, and if you're playing as Dr. Neo Cortex you'll be able to play a game of Cortex's Peril (again he's only needed to open it, any Skylander can play once it's open).
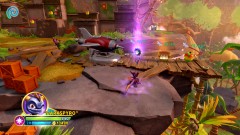
This shoot 'em up minigame sees you flying a spaceship while you try to destroy loads of other little spaceships. You have two attacks, the basic laser fire that you can hold to continuously shoot, and a burst attack that damages all the enemies around you that you can only do every so often - it is pretty much vital for getting to the target.
 |
Treasure Chest 3/6 Soul Gem 2/2 - Crash Bandicoot |
|---|---|
| It's 60 enemies for the Treasure Chest and 75 enemies for the Soul Gem, for some reason the objective says 80 but you can ignore that. |
The larger ships will take more hits to destroy but if you get close you can use the blast attack on them too.
10/12 - The Funky Climb
 |
Boom Box 3/5 |
|---|---|
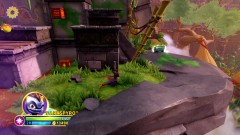
| To the right of the steps is a Boom Box for you to fix. |
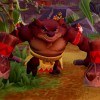
Go up the steps to meet a Thump Grumps. This large bear enemy has two hammers that he smacks the ground with, each one will cause a fiery shockwave that you will want to jump over in quick succession. Take him out and then a trio of snapper plants and some crabs to get the Monster Gate to drop.
Before you go to the second Chili Pepper Run next to Mags you might want to go to the left where there's a free [Imaginite Chest].
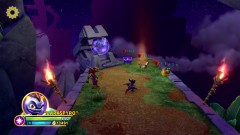
The second Chili Pepper Run should be a bit easier to get the target as you're going forwards this time.
 |
Treasure Chest 4/6 |
|---|---|
| It's only 25 you need to get the Treasure Chest, but getting 50 will earn you an [Imaginite Chest]. |
To the right is another line of rock faces this time with a mix of smashing down and pushing out, make your way under them to the far end.
 |
Boom Box 4/5 |
|---|---|
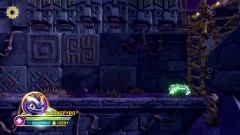
| Below the last set of faces at the end you can find a witch doctor as well as a Boom Box. |
11/12 - Celebration Hall Vista
A bunch of enemies to defeat as you go past a [Selfie Spot] and then over a rickety bridge through the fog.
12/12 - Wumpa's Grooving Stones
 |
Treasure Chest 5/6 |
|---|---|
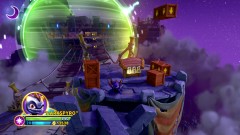
| On the bridge after talking to Mags and Spyro jump to the right then go back towards the screen on that second bridge. It'll lead to a Treasure Chest. |
The next musical puzzle requires you to push a set of blocks to specific positions. Press the button to see where they should go then hit each block to wake it up so you can push it into position. Push the left two twice, the third one three times and the one on the right just once.
After the pattern has played a few times the gate at the back will open to let you through.
There's another game of Cortex's Peril here, pretty much the same as the first one.
 |
Treasure Chest 6/6 |
|---|---|
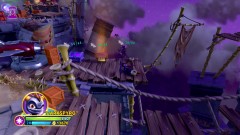
| Defeat 40 enemies in here for the last Treasure Chest and 60 for an [Imaginite Chest]. |
Cross over the bridge to the right to reach some enemies. If you defeat the enemies here you can get an [Imaginite Chest] from behind the bamboo poles.
 |
Boom Box 5/5 |
|---|---|
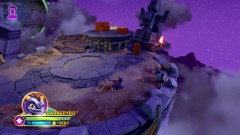
| Behind some crates on the right is the last Boom Box to fix. |
Past the rocketship are some more Thump Grumps, you can use the platforms to stand above their blasts, and maybe take out the witch doctor first as he'll be slightly speeding them up.
Cross another rickety bridge to reach a second block puzzle , this time with eight blocks. You can press the button as many times as you like to remind you of the pattern, it won't reset any blocks you've already pushed into place.
Push the first block on the left once. Push the second block twice. Third once, fourth three times, fifth three times, sixth once, seventh twice, and finally the one on the right twice. Head up the path at the back to get to the boss fight.
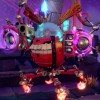
For the first part Fake Crash will slowly waddle towards you then start spinning, if you get out of the way he'll tire himself out and be stunned for a while giving you time to attack. He'll get back up and slowly walk after you, performing a small slam when he gets close. After that he'll get back to spinning. Repeat until he's at about 75% health.
At that point the area will be filled with Wumpa Fruit and a couple of food items before the floor starts glowing. You don't get much time to move off the squares that darken just before they turn into red glowing damage skulls so make sure to keep moving.
After a bit of that Fake Crash will rejoin the fight, this time with a new fireball attack that moves slow but will bounce off the edges and last long enough that he will have two of them bouncing around. Keep on damaging Fake Crash when you can, at around 25% health you'll move to the third part of the fight.
In the final part not only will you have to attack Fake Crash but you'll also have to keep an eye on the floor as it'll keep going to skulls throughout. Luckily after a bit it'll just start repeating the same pattern over and over so if you see it forming lines of skulls you can be reasonably sure that the next will be another line next to it moving from the center outwards and from the edge inwards. So basically just stay out of the very middle of the arena at the pattern start.
Repeatable Imaginite Chests
- Chest to the right after dropping into Wumpa Valley
- Chompy Dance Party cave
- Inside the Lock Puzzle hut
- Chest to the left of the second Chili Run
- 50 crates in the second Chili Run
- 60 enemies in second Cortex Peril
- Defeat enemies to the right of second Cortex Peril
Comments


All off-topic comments will be deleted. Please do not use the comments system for conversations, instead use the provided forums for the game.
Please login or register a forum account to post a comment.


 darkspyro
 net
net