To begin you need to select one of three difficulty settings: Beginner, Adventurer, or Expert. If you find it too easy or too difficult you can change it at any point by going to the options in the pause menu. The difficulty level changes the amount of damage it takes to defeat an enemy, the amount of damage that each hit of theirs does to your Skylanders, and the amount of health you get from food. You also get more XP when you defeat an enemy.
Once you have completed the story you will unlock the Nightmare mode, this cannot be switched to in the same save file so you will have to start a new save to use it. And be aware that the difficulty setting cannot be changed in a Nightmare save file once started. As they are saved to the profile you will find that the items you have unlocked in your first save will already be unlocked in your Nightmare save, and any items you unlock in Nightmare mode will also be unlocked in the previous save.
Cradle of Creation
| Story Goals | Collections | Dares | ||||||||||||||||||
|---|---|---|---|---|---|---|---|---|---|---|---|---|---|---|---|---|---|---|---|---|
|
|
|
 |
 |
 |
 |
 |
Place your first Skylander or Creation Crystal on the portal to get started (a brand new Creation Crystal will require you to set up the class and design your Imaginator before you can get going, remember that choosing a battle class is a permanent decision for that crystal and cannot be changed by any in-game method (you can however use the 3DS Skylanders Spyro's Adventure or Skylanders Giants to reset it if you happen to have one of those)).
1/14 - Primordial Plateau
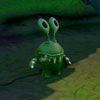
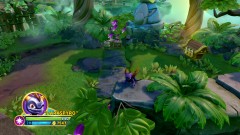
Smash through the crates and barrels in the back right corner and advance along the path, jump up the tiny step to reach a pair of little green Chompies. Yep they're back again, the most basic Skylanders enemy.
On all difficulties it doesn't take more than a single hit to defeat a Chompy so they only really get dangerous if there's a lot of them attacking you at the same time.
 |
Treasure Chest 1/3 |
|---|---|
| To the right of the Chompies is a Treasure Chest that you tap open to get a few hundred coins. Chests in later levels will have more coins in them. |
Each level has three chests to find and open as part of its Collections task. Once you have found a chest in a level in a subsequent playthrough of the level there will instead be a gem worth 100+ coins (the exact value depends on your character's Luck stat).
To the left behind where the Chompies were is a fence made of bamboo, you can smash through that by using your basic attack a few times. As you walk over the bridge it'll fall down, push the stone block forwards into the gap so you can use it to cross over to a Chompy Pod.
Adventurer enemies have approximately double the health of a Beginner difficulty level enemy, Expert triple, and Nightmare enemies have five times the health of a Beginner enemy.
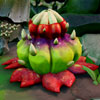
A Chompy Pod is a plant that spits out Chompies, to get it to stop sending them out you have to attack it directly (although it is also worth noting that a single Chompy Pod can only have three active Chompies spawned at a time, no more will appear until you defeat some of them), it's got a lot more health than a Chompy does so it will take quite a few hits before it explodes into little glowing XP balls. Make sure to pay attention to the Chompies that will be attacking you while you do this.
Behind the Chompy Pod is a tower of two stone blocks, push them both over the edge so you can cross over them to the next area.
2/14 - Voracious Clearing
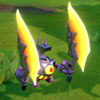
As you approach the Chompy Pod another new enemy type will drop in.
This small enemy is a bit more dangerous than a Chompy as it actually has health. It'll pause for a second and then swipe its two swords in a pincer movement, you'll want to move out of the way of that.
After defeating the enemies in this area the "wings with a sword" marker on the doorway to the left will disappear and the door will open. That's a "Monster Gate" that only opens once you have defeated all of the nearby enemies. Quite often you will be able to skip groups of enemies but if your progress is halted by one of these you'll know what you have to do.
3/14 - Wheel of Augmentation
Inside you'll see a purple Imaginite Chest high up on a platform and a ring of coins at the back of the room, if you walk to the coins and start moving to the side you'll be able to use it like a hamster wheel, doing that will spin down the platform that the [Imaginite Chest] is on so you can reach it.
Most Imaginite Chests contain a single item that can be used on your Imaginators, ranging from body parts that can completely change its look to bits of gear and weapons that improve its stats.
While the chests are set as to where they appear in the levels their contents are usually random (there a few exceptions, like when you defeat a boss for the first time). And it is worth noting that you only have three incomplete sets going at a time, you won't start finding parts from other sets until you complete one of them. Unlike the Treasure Chests there are no collection stats for finding the chests themselves, instead your overall percentage completion is affected by how many complete sets of parts you have.
Open up this chest (which will actually always include a common rarity weapon) and then grab the key that Spyro sets down before heading out of the cave.
Use the key on the locked gate and step onto the blue glowing bounce pad behind it, that'll shoot you upwards.
4/14 - Cliffs of Emergence
Smash through the bamboo fence on the left and walk towards the pile of treasure, you'll fall down. Walk towards the screen.
5/14 - Lost Ledge
 |
Soul Gem 1/3 - Ambush |
|---|---|
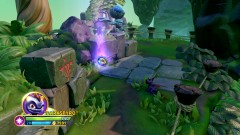
| On your left is the game's very first Soul Gem. |
Soul Gems are an extra upgrade for a Sensei or Imaginator that you must find in a specific location before you can unlock and use. To find out which level your character's Soul Gem is hidden in go to their Upgrades or Powers screen and then highlight the Soul Gem ability. Skylanders from previous games automatically have their Soul gem unlocked so there's no need to be looking for Stealth Elf's anywhere in this game.
Jump over the ropes and use the bounce pad to get back up to the top of the cliffs. On the right is a little block puzzle. Push the left block forwards, then the middle block to the left and then the back middle block off the edge. Ahead you can see a large ball with a purple imaginite core, roll it down the hill by walking into it. It'll smash through a barrier up ahead and, unless you're very unlucky, defeat a few Chompies for you at the same time.
6/14 - Stone Hollow
In this area you'll be told by Master Eon that "Water Skylanders are stronger here". What that means is that if you use a Water Skylander (including Imaginators) you'll get a bonus to your attacks (approx 15% to begin with). The Elemental Power stat is still around although not visible, to improve it you just add more Skylanders of an element to your collection (unique Skylanders only, multiple versions of the same character will only count as one) with each extra one adding about 4%.
Unlike SuperChargers the elemental alignments are set in stone and do not change which means I can note them in the walkthrough. While most areas that have an elemental alignment have at least a few enemies in them there are several that don't, because that makes them entirely pointless I will be marking those sections as if they did not have an element.
Defeating the three slicer enemies (you can just push the ball into them) will lower the fence and allow you to roll the large ball into the hole at the back. Getting it in there will bring a bridge up, dodge the rolling balls that appear as you walk up.
 |
Brawler Shrine |
|---|---|
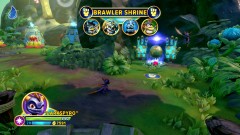
| At the top of the opened dragon head is the Brawler Shrine. |
This "Shrine" is where any Sensei of the Brawler class should come to unlock their Sky-Chi attack. Sky-Chi is a very powerful extra move that Senseis have at their disposal that they can use every so often (it regenerates as you defeat enemies). You must use a Sensei on the shrine to unlock their ability individually, just having used King Pen on this shrine will not unlock the Sky-Chi ability for Crash Bandicoot, but you can have several Senseis activate the shrine one after the other, so no need to wait for a second go through if you've got them all at hand.
7/14 - Balcony of Formation
To the left of the shrine is a trio of Chompy Pods, take them out one at a time while keeping an eye on the Chompies swarming at you. After the third one is defeated the floor will give way after a moment and a doorway will open up.
Directly ahead of you in the path is a glowing ball, this is some free XP. At this point in the game it is likely that it will boost your Skylander up a level but it's a specific amount of XP so depending on your Skylander's level it's not guaranteed to do so. Keep advancing forwards to enter a small maze area.
8/14 - Maze of the Mind
Stepping on the buttons in the maze will rotate the barred walls around so that they open up a different path. This maze is fairly straightforward in that aspect as each time you open a path it leads to exactly one button. Keep on going until you exit out the right side.
9/14 - Circle of Ascension
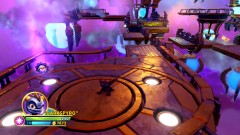
For Sensei areas all of the new Senseis and Villains will get a damage bonus. This is simply calculated by using the same bonus as you would in an area that matches that Sensei's element. It is not based on how many Senseis you own.
 |
Battle Gong |
|---|---|
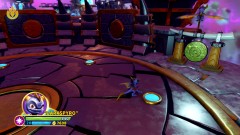
| Jump down into the circular area and Spyro will show you your first Battle Gong. |
This is an optional battle (well, it counts for the Dares Star but you don't need to do it to progress through the level) that only Senseis can take part in (not even Imaginators can be used). It throws loads of enemies at you and expects you to be able to defeat them all and survive.
If your Sensei dies or is removed from the Portal you will fail the challenge and get no reward, if they are defeated your Sensei is actually defeated for the rest of the level like normal so it's not something you should be doing if you're low on health. There is an Achievement/Trophy you can get here, "What? No Damage???", which wants you to complete the Battle Gong without getting hurt, if you do get hurt you can just remove your Sensei from the portal to start over and try again.
In the top right corner of the screen you can see your progress through the battle, the green dots are enemies you have defeated, red dots are enemies currently active, and the darkened blue dots are enemies that have yet to appear. Once you've turned them all green you get some XP, some gold, an [Imaginite Chest] and can leave the area.
This battle is mostly made up of Chompies and the sword cyclopses but there will also be a few egg-shaped robots with mohawks that have a long ranged attack, they will stand still and the large bullets they fire are quite slow moving so if you're paying attention it shouldn't be too difficult to avoid taking damage from them while you clear out the smaller enemies.
Once cleared (or ignored) head through the gate to the left.
10/14 - Puzzle of the Id
A quick little sort of 2D section, jump onto the lower bounce pads to get up onto the moving platform above them with another bounce pad on. Use that to get the three green discs that are floating higher up in order to open up the exit at the top, you'll need to move towards the door as you jump as otherwise you'll just keep on bouncing. Outside is an [Imaginite Chest] which, for your first trip through the level, will contain Driftwood Arm Guards. Drop off to the right into a teleporter to get back to where the battle gong was.
11/14 - Path of Adaptation
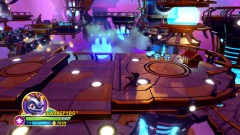
Down the middle path now. Wait for the first moving platform to move into position so you can jump on it. If you jump over the barrier that'd otherwise push you off if you stand still you can grab a couple of gems on each platform.
 |
Treasure Chest 2/3 |
|---|---|
| To the right after getting off the second platform is another Treasure Chest. |
Approach the next set of moving platforms, cross the first one to a second one.
Get back on the moving platforms to head over to the [Imaginite Chest] which for its first opening contains Squire's Greaves. And teleport back to the start again.
12/14 - Bridge of Regression
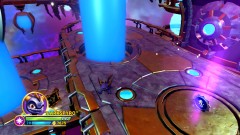
Taking the right path now, bounce up onto the top. Cross the first piston.
 |
Soul Gem 3/3 - Sorcerer |
|---|---|
| If you wait on the second piston and let it take you down you'll find an area below that has the Soul Gem and some Chompies. |
A Class Soul Gem is an extra ability for all of your Imaginators of that class, they still have to actually purchase it just like regular Skylanders.
 |
Legendary Selfie Frame - Sorcerer |
|---|---|
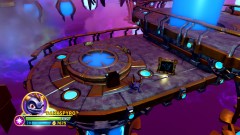
| And instead of immediately riding the piston back up, jump down to the left to find the game's first Legendary Selfie Frame. |
This Legendary Selfie Frame is an item that you can use a bit later in the Academy to boost the stats of any Sensei or Imaginator of the Sorcerer class.
The rest of the lower areas are just filled with Chompies and a few extra coins so feel free to skip them and head straight for the [Imaginite Chest] at the end of the path, this one has the Driftwood Pauldrons in to complete the Apprentice Set and also unlock the Ornate Shield.
13/14 - Visualization Chamber
The teleporter will have now turned into a bounce pad that takes you up to a fight with a set of three of those mini cyclops swordsmen. After defeating them a pair of the egg shaped robots will appear, you may have already fought some of them in the Battle Gong fight.
Imaginator strong areas are just like the Sensei areas, you get the same bonus as you would in a matching elemental zone when using your Imaginator.
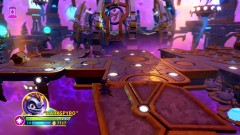
After defeating the enemies here Spyro will popup to get you to perform some "Mind Magic" to form a bridge. This can be performed by any Skylander.
 |
Treasure Chest 3/3 |
|---|---|
| To the left at the top of the mind magic bridge is the last Treasure Chest. |
If you've found every collectible in the level you'll notice a popup in the corner telling saying "Chest Added to Vault!", this is because when you get a star on a level you get a chest as a reward and getting all of the collectibles in a level is one of those three stars - it also means that if you're replaying a level to find something you don't have to go all the way to the end just to get the reward, you get it as soon as you find the missing item.
To the right is a set of hexagons moving up and down a lot, jump along them to where there appears to be an Imaginite Chest, if you approach it it'll turn into a Snail and run off. Follow closely behind making sure to pick up all of the little yellow pieces of Imaginite. If you get them all before they disappear (there's a total counter in the corner of the screen but no visible timer, they just disappear soon after the snail drops the last piece) you get an [Imaginite Chest] as a reward. This is available to get on replays of the level so it is worth it to keep on completing these Snail Challenges.
Use some more "Mind Magic" to lower the bridge to the boss fight.
14/14 - Eye of Mastery
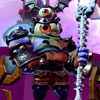
The Sorcerer Doomlander starts the fight with a basic ranged attack, he'll rapidly fire three purple balls at you and then take a quick break leaving you a gap to attack him in. To avoid the attacks you can hide behind the purple blocks littering the area although they only take two hits so the third ball will hit you if you just stand there. Oh and it's worth noting that for all Doomlander fights your Imaginators will have a damage boost so if you're having trouble using Sensei or older Skylanders it is certainly worth trying with your Imaginators.
Once you've got his health down to about two thirds Kaos will give him a new move known as a Secret Technique. This gives the Doomlander a charge up attack that rolls an energy ball towards you, move out of the way but keep an eye on it as it will turn to try to hit you again. He'll also be firing four purple balls at you rather than three. Keep attacking the Doomlander until Kaos interrupts the fight at about a third health.
The last addition to the fight will be the ability for the Doomlander to summon some of those mini sword cyclops enemies to help him. Keep on attacking the Doomlander while occasionally attacking the smaller enemies, while they don't have any more health than regular they do a little bit more damage than they did out in the level (about the same damage as the Doomlander's shots). Oh and he's now firing five shots.
Once you've finished him off you'll get some XP, coins, and an [Imaginite Chest] with six items inside. They'll be the Secret Technique for a Sorcerer class Imaginator that the Doomlander just used, Catchphrase Start "Be Afraid of", Catchphrase End "The Bananas", Doomlander Sorcerer Pauldrons, Doomlander Smasher Leg Armor, and a Sorcerer Weapon Deathclaw Staff. Return visits will net you three random items instead.
Skylanders Academy
The Imaginite Vault out front is just an alternative way to access the same thing you have in the pause menu, it'll be translucent if you don't have any chests in there so it's a good reminder to open them up if you can see a pile of solid purple chests.
Inside the Academy follow Hugo to the Library, on the door is a Lock Puzzle. Similar to the jetpack lock puzzles in Trap Team you press a direction and the Lockmaster Imp slides as far as it can in that direction, what it also does is move the purple imaginite shards. If you can get all three shards touching each other you get an [Imaginite Chest] and they disappear. To do that in this first puzzle is not that tricky, Left and then Down will do it, but on later ones it will get quite complicated.
Make sure to join the shards before you slide the Imp into the horned receptacle as that'll end the puzzle (although I don't think you can actually solve this particular one without joining the shards anyway). To solve from the position mentioned above just go Left and then Up but again this one is trivial compared to later ones.
While you can't ever repeat this specific puzzle you can do so on other puzzles in the main levels, it is worth noting that you only get a chest the first time you join the shards together, on repeat tries you don't get a chest so at that point you can just skip straight to getting the Imp into the hole. The chest earned is placed in your Imaginite Vault so you'll have to remember to go open it.
Inside the Library go up the slope ahead to a pushable set of stairs, push them all the way to the right, climb them and press the button up there. Go back down and push the stairs all the way to the left to push a second button over there. Now push the stairs to the middle. At the top of the slope there's a circular platform to the left that's moving, jump aboard when it gets close and let it take you over to a Snail Challenge for an [Imaginite Chest] along the pink carpet. There's nothing else here so go straight into the Lock Puzzle blocking the path.
To get the three shards together you want to get the top right shard into the bottom left corner with the other two (this one you can finish without joining the shards so be careful not to accidentally solve it). Go Left, Down, Right, Down, Left, Up, Left, Up, Right. That'll get you the [Imaginite Chest] and leave the Imp at the top in the middle. To solve from there it is just Down, Right, Down.
Dead ahead is a book-stacking device that is really just a turret, fire it at the large books piled up on either side of the gap and they'll automatically fly into position to form a couple of bridges.
Before you get too close to Flynn go up the books to the right to get one of those XP booster balls. Talking to Flynn will teach you all about Selfies and how to take them, there are specific points in levels where you get some bonus coins for taking a Selfie but they are entirely optional and do not count for anything (although you'll want to take at least one Selfie of each class to hang in the gallery for the stat boosts).
The game will next ask you to go talk to Persephone to learn how to upgrade your Skylanders. She'll open up the upgrades menu where you can purchase upgrades to your abilities, but in this game you can do that from anywhere you like at any time so this may be the one and only point you ever talk to Persephone directly.
You'll get thrown back out onto the M.A.P. and pointed in the direction of the next level, the Mushroom River. Before doing that I'd suggest you go to the right and into the Card Shack to learn how to play the game's version of Skystones as you'll won't be able to play it in the next level otherwise.
Card Shack
Talk to Madame Weebleton to play your tutorial game of Creation Clash, it is almost entirely indentical to the original version of Skystones except that you get given a specific set of Skystones to use and can see which Skystones your opponent still has to play. That gives you the ability to plan your moves so that you are certain that your piece cannot be taken.
If you are new to Skystones entirely then this is how it goes: when you place a Skystone on the board if the number of spikes along the side adjacent to an enemy colour stone outnumbers them you'll flip that stone to your colour, although if it is less you do not lose the stone you place even if you have no spikes on that side. The point of the game is to get more stones in your colour at the end of the match, but as the opponent goes first they also go last so you must do more than simply exchange one for one each turn. If a stone has been covered on all sides it is no longer available to flip, which means it can be a valid strategy to simply protect another stone by covering it up before your opponent can take it.
Another feature that you will see later on is a Class square, if you place a Skystone with a matching class in that square it will boost the spikes on it to four on each side meaning it will claim just about any adjacent Skystones and cannot be claimed as four is the maximum number of spikes a Skystone can have on one side. Placing an incorrect class in the square just means that it cannot be used for that purpose, there is no penalty for doing so.
This first match is fairly easy to beat as all of her Skystones have just one spike on the left while only one of your stones has a gap there (so I'd recommend using Chopscotch along the right side of the board if you can) which means you can easily take hers but yours will be impossible for her to take (aside from Chopscotch).
Winning a game of Creation Clash will earn you an [Imaginite Chest] that will be placed in the Imaginite Vault (only on the first victory against that character, future victories get you nothing). But don't worry if you lose, they are willing to keep replaying and replaying until you win. Once you've done that you can go to the chest in the corner to start a Snail Challenge around the room for another [Imaginite Chest] and then either go further into the hall to defeat a some tougher Creation Clash players or you can head back to the M.A.P. and proceed to the Mushroom River, it's across the bridge to the south.
Repeatable Imaginite Chests
- Wheel of Augmentation (always contains a Common Weapon)
- Battle Gong
- End of path 1
- End of path 2
- End of path 3
- Snail Challenge before the Doomlander
- Doomlander (x3)
Comments


Nice job with the screen shots.
All off-topic comments will be deleted. Please do not use the comments system for conversations, instead use the provided forums for the game.
Please login or register a forum account to post a comment.


 darkspyro
 net
net
so is