Dragon Temple
| Story Goals | Collections | Dares | ||||||||||||||||||
|---|---|---|---|---|---|---|---|---|---|---|---|---|---|---|---|---|---|---|---|---|
|
|
|
 |
 |
 |
 |
 |
To get to the Dragon Temple you have to take a short ride on Sharpfin's ship near the well.
1/12 - Floating Foothills
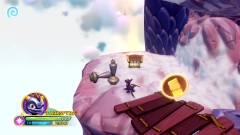
A sheep will walk into a tripwire to demonstrate how they work... they hurt you if you walk into them. To the right is a wooden bamboo bridge sticking out to nowhere, you can go over there and pick it up to place it in the bamboo bridge gap on the left. You may be familiar with this from previous games.
You can't pick the bridge up again so just cross back over and start pushing the blocks, each one will reveal a bounce pad that will bounce you up to the next one. At the top go to the right, smash a vase and use the bounce pad under there to get to a Lock Puzzle.
This Lock Puzzle introduces the red imp, an enemy that moves when you move that will cause you to lose if you touch him unless you currently have the sword pickup. You can only hold the hammer or the sword, not both, so make sure you haven't accidentally got the hammer if you try to get rid of him (which is not essential, you do not need to defeat him to progress and you get no bonus for doing so). To get through to the other side you will first need to get the hammer. To get the [Imaginite Chest] you can go: Up, Left, Down, Left, Up, Right, Down, Right, Left, Up, Left, Down. And to safely get to the end from there: Left, Up, Right, Up, Right, Up, Left, Down, Right, Up, Left.
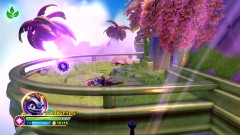 |
Soul Gem 2/2 - Bowslinger |
|---|---|
| On the other side of the Lock Puzzle is this Soul Gem. |
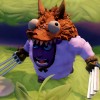
Back out go to the left at the top of the bounce pad stack to encounter a bunch of enemies including sheep in wolf clothing that melee attack in close combat. After the first few are defeated a whole load more will appear along with a sheep mage who holds a glowing red crook and fires a small ball of energy at you.
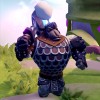
After clearing that second wave you'll be introduced to the Baa-barian enemy type. This large enemy will walk towards you and slam his sword down or swing in in an arc in front of him. Both types of the attack can be avoiding by either stepping back or behind him. You get an [Imaginite Chest] for defeating him. Use the bounce pad at the back that opens up.
2/12 - The Fork of Fire and Ice
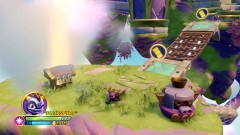 |
Treasure Chest 1/3 |
|---|---|
| Go down the steps and drop off the bottom, to the left past the bounce pad is a metal bridge, on the other side is a Treasure Chest. |
If you plan to go into the Ice side then you might like to take the metal bridge with you when you bounce back up.
You can only go through one side per play through of the level so make sure to remember which way you go so you can go the other way the next time for the All Areas checkmark.
3/12 - Trail of Fire
This room is a load of jumps across moving platforms, wait patiently for them to move into positon so you can jump on them (but don't wait on the crumbly ones!). There's a [Selfie Spot] halfway through with a sheep mage on the same platform, and a second sheep mage on another platform a bit further. If you turn and go back towards the screen at that point you can get an [Imaginite Chest] that's just sitting there.
4/12 - Trail of Ice
Jump off the edge to the area below, next to a [Selfie Spot] is a bounce pad that will take you up to the frozen block high above. Push it off to the right. If you brought the metal bridge in put it in place on the left to go get an XP ball.
Follow the block down, push the two blocks to the right of the moveable bounce pad out of the way so you can push it to the right. Bounce up and push another block with a bounce pad on it off.
Finally push that block down and to the right so you can get on top of it and bounce out of the cave.
5/12 - Stepping-Stone Isles
Cross the metal bridge outside and pick it up to place in the spot straight afterwards.
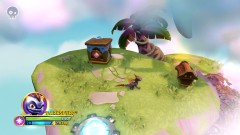 |
Treasure Chest 2/3 |
|---|---|
| Push the block at the left side off the edge and follow it down to where the Treasure Chest is hiding. |
Bounce back up then up again and jump left onto a small platform with another block you can push off, it'll raise the platform you're on up. From on there bounce upwards again and then one more time to a platform with just a block on. Push that block off to rise up to the top where you can simply jump to the next bit.
The chest here is a Snail Challenge, follow it up the ramps to get your [Imaginite Chest]. Fight off a few sheep wolves before reaching the top.
6/12 - The Fork of Brains and Brawn
As with the Fire and Ice paths you can only go one way per go through the level, make your choice and remember which one you chose for later. Left is Brains and right is Brawn.
7/12 - The Trail of Brains
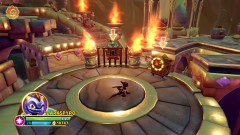 |
Troll Radio |
|---|---|
| At the top of the first set of steps is a Troll Radio that rewards Country Music and Minibot Voice Effect. |
Next to the radio is a Lock Puzzle that you'll need to solve to proceed.
To get the [Imaginite Chest] you can go: Right, Down, Left, Down. And from there to finish it's just to the Right.
And up the stairs behind the puzzle is a mandatory game of [Creation Crash] with Flynn. He's got some stronger Skystones than previous mandatory players but your own stones are still stronger so just keep an eye on what Flynn has still to play when placing your stones.
8/12 - The Trail of Brawn
Go up the steps to take part in a fight with a load of sheep. Defeating them all will open up the Monster Gate at the back and give you an [Imaginite Chest].
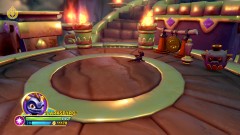 |
Battle Gong |
|---|---|
| Up the steps after the Monster Gate. The full 40 enemies, luckily most of that number are Chompies. Just be careful of the sheep mage attacks getting lost in the crowd. |
And exit up the steps.
9/12 - Alpine Ascent
Straight on to a bounce pad that'll take you to a wooden bridge, cross over it then pick it up to place down again immediately. Take the metal bridge up the bounce pad to place it then bounce back down to get the bamboo bridge. Bounce up again and cross over the metal bridge to place the bamboo one. Go back down and grab the wooden bridge.
No more need for any of the bridges now. Bounce back up and continue forwards along the main path.
10/12 - Frozen Heights
A large open area for a fight. After wiping out the first set of enemies a couple of Baa-barians will attack, defeat them to get an [Imaginite Chest] and open the Monster Gate.
Behind there is a very quick gong assembly puzzle, push the two halves next to each other and hit it to open the gate up to the Dragon Temple.
11/12 - The Dragon Temple
Time for the Bowslinger Doomlander fight. His first attack is a low wide attack that slowly fans out in front of him, you can either jump over or walk through the gaps. He teleports around a lot so you'll have to keep an eye on where he pops up to go attack him. Unlike the first Doomlander battle the objects in the arena are solid and won't smash no matter how many attacks him them so they are safe to hide behind.
His second stage has a triple homing arrow, lure them into the obstacles to get it to detonate early if you can but they're quite slow and fairly obvious so you should be able to outrun them.
The sheep mages that turn up during the third stage do reappear after a while if you defeat them but it is still worth getting rid of them for a safer time attacking the Doomlander as their attacks are very direct and quite fast.
The set rewards are the Bowslinger Secret Technique "Slow Shot", Catchphrase Start "All Hail", Catchphrase End "My Ultimate Awesomeness", "Doomlander Archer Leg Armor", "Doom Bow Arm Armor", and the Bowslinger Weapon "Doom Bow".
The game doesn't really tell you how to use the dragon wings but all they do is glide, hold forwards to glide forwards and hope you get to your destination. You can cancel out of a glide early if you think you're going over by pressing the Attack 2 button. Anyway, head out the big glowing doorway to get outside.
12/12 - Aerial Descent
Before you start the descent there's a quick [Selfie Spot]. There is an Achievement/Trophy for landing on every single island on the way down, that'll require some specific direction choices but if you're just trying to get to the end just go forwards as far as it looks like the glider will take you.
M.A.P.
Before you can go to the next level you must first assemble a cake. To do that you will need to do some missions for Pop Fizz, you can also find a few pieces just sitting around the M.A.P.. Each time you complete a mission you have to go talk to Pop Fizz again so that he can offer you two to choose between, kind of a pain but that's how it is. After you complete a mission and get an ingredient you'll be able to find a few parts on the M.A.P., in total you'll only need to do two missions as there are six dotted around (he will sometimes point you to them as sort of a third choice but you don't have to wait for him to do that to get them).
- First piece is on the ramparts above the dungeon.
- Second on the watery area beneath the Life Realm over near Shellmont Shores.
- Third in a cave you have to blow up the entrance by Shellmont Shores.
- And a fourth in a rat hole in front of the cannon to Shellmont Shores.
- A fifth one is to fight the vultures wandering around by the well.
- And the sixth is in a cave you have to blow up the entrance to on the Sky Fortress island.
Once you have 8 parts return to Pop Fizz.
Repeatable Imaginite Chests
- Defeat first Baa-barian
- Chest in the Trail of Fire
- Snail Challenge before the Trails of Brains and Brawn
- Trail of Brawn, defeat the enemies at the Monster Gate
- Gong Battle in the Trail of Brawn
- Monster Gate before the gong puzzle
- Doomlander (x3)
- Chest on island with wooden bridge during descent
Comments


All off-topic comments will be deleted. Please do not use the comments system for conversations, instead use the provided forums for the game.
Please login or register a forum account to post a comment.


 darkspyro
 net
net