Fizzland
| Story Goals | Collections | Dares | |||||||||||||||||
|---|---|---|---|---|---|---|---|---|---|---|---|---|---|---|---|---|---|---|---|
|
|
|
 |
 |
 |
 |
 |
Fizzland's entrance is over the bridge opposite the Academy.
1/12 - Front Access to the Fizz Lab
This level features a world switching feature, similar to a few previous levels in the series like Darklight Crypt and Wilikin Village, where you use a large potion bottle to switch between the normal world and fizz world. The difference being that some fizzy surfaces become solid and some items become accessible.
For example over to the right is a large round bottle that you can push around, if you roll it towards the trees and switch to the fizz world it will start spinning on fire and burn down the trees. All it gets you here directly is a few coins but there is an Achievement/Trophy "Fizzy Landscaping" that wants you to burn down 9 of those trees so it's a start for that.
In the normal world go through the doorway at the back.
2/12 - The Codd Memorial
There is a block puzzle in here but all it leads to is a [Selfie Spot] and a few coins. To solve it you have to switch to the fizz world using a potion, you'll then be able to push the blocks into position so you can use them as a bridge between the platforms.
To get back outside go to the normal world, but then immediately go back into the fizz world to go up the stepped platforms to the right. Switch back to normal world to access the Lock Puzzle.
To meet the shards for the [Imaginite Chest] you can go Left, Up, Right, Up. And from there just go Up, Left to finish.
Back into the fizz world to cross the purple vats of liquid over to meet up with Pop Fizz again.
3/12 - Fuzzy Forest Pass
In the normal world roll the large potion towards the row of trees then switch to the fizz world to burn them down. Go back to the normal world to go through the door on the right.
4/12 - Carbonation Chamber
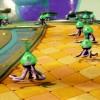
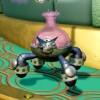
Attack a few octopus bottles that you find in here, another Chompy replacement.
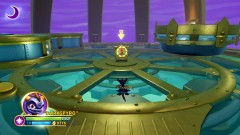 |
Troll Radio |
|---|---|
| In the middle of the room is the Troll Radio to win Guitar Effect and Maxibot Voice Effect. |
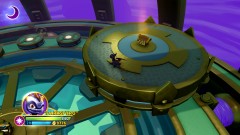 |
Treasure Chest 1/3 |
|---|---|
| To get to the Treasure Chest up on the platforms go up the slope and stand on a button, it'll raise up three platforms you need to quickly jump across. |
Back outside, up the slope are some more of those little potion octopus enemies and then next to Pop Fizz at the top is a larger bottle walking around carrying a key, it'll fire a bouncing energy ball at you to avoid. Defeating it will get you the key and an [Imaginite Chest].
Switch to the real world and drop off the edge at the back, down below is a doorway.
5/12 - Mixing Lab
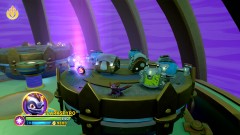 |
Soul Gem 1/3 - Flare Wolf |
|---|---|
| Just a case of jumping along the platforms to reach the Soul Gem. |
Bounce back up still in the real world to use the key on the gate, then switch to the fizz world to push the blocks out of the way.
6/12 - Bubble Farm
 |
Egg Rescue |
|---|---|
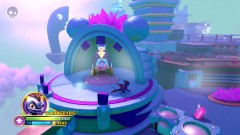
| At the back left corner of the area is the Egg Rescue machine, to get up to it push a block into a dip in the fizz world. |
In the right corner (if you push the blocks from the entrance to the right you can use them to get an XP ball from on top of a tree when you switch back to the real world).
 |
Treasure Chest 2/3 |
|---|---|
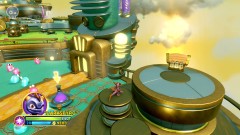
| Switch to the real world to jump up to the Treasure Chest to the right of the building. |
In the real world go inside the building at the right end of the area, defeat a couple of flamethrower wielding enemies and start traversing the maze by pressing the button. The twist for this one is that you will need to switch to the fizz world in order to turn on some jets of fire that destroy blocks. After the block has been destroyed return to the real world to get past the flames.
Do not stand on the red button at the end just yet!
Now that you've got that you're safe to press the red button at the end to leave (you can't come back in for some reason so make sure to get it before you do so!).
For the globules minigame you can either suck up 20 of one colour and then switch to pick up 20 of the other or you can quickly change between colours to grab them like that. I prefer doing all of one colour then all of the other.
A group of enemies will turn up next to the Egg Rescue machine, once you defeat them you get an [Imaginite Chest] as well as a bounce pad up to the next layer.
Roll the potion towards the tree then switch to the fizz world to destroy it. Stay in the fizz world to push a couple of blocks out of the way before you switch back to the real world and roll another bottle towards a row of three trees. Back in the fizz world to destroy them and use the vat behind them to get up to the next layer.
 |
Swashbuckler Shrine |
|---|---|
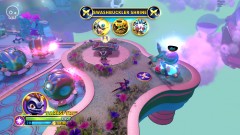
| Next to Creation Clash on the right side of the field of flaming balls. |
And you can play an optional game of [Creation Clash] with Flynn for an [Imaginite Chest]. Carefully cross the field of flaming balls so that you can push the block out of the way (you can push it all the way through them to the far end to get up to an XP ball if you want). Switch back to the real world with the potion at the left end to use the Lock Puzzle on the gate.
This introduces fire and water, you need to grab the water before you touch the fire as it'll otherwise kill you, and once you've got the water you can safely slide right through the fire putting it out which will let the shards go through. To get the [Imaginite Chest] you can go: Down, Right, Up, Left, Down, Right, Up, Right, Down, Left, Down, Right, Up, Left, Up, Left, Down, Left. And to get to the end from there go Down, Right, Up, Left.
7/12 - Carbonation Crossing
Switch to the fizz world to cross the vats.
8/12 - Fizz Enhancement Testing Area
 |
Legendary Selfie Frame - Ninja |
|---|---|
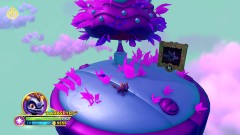
| As soon as you've crossed go to the right, there on a platform is the Legendary Selfie Frame. |
Go down the slope to the left, switch to the real world and head into the room.
9/12 - Tasting Room
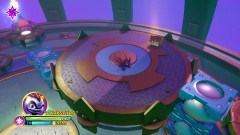
Switch to the fizz world straight away and push the three blocks into their final positions (the one on the right needs to be pushed in a little further than the long push takes it), switch to the real world to press a rune button that raises up the platforms on the left.
 |
Treasure Chest 3/3 |
|---|---|
| Jump up the platforms and you'll find the chest on the large platform with a block on it. |
 |
Soul Gem 3/3 - Ninja |
|---|---|
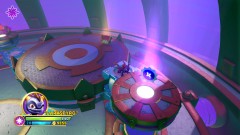
| In the Fizz World push that block off to the right to reach the Soul Gem. |
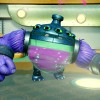
Go back up the ramp outside and enter the wide open circular area to begin a large fight, they'll introduce the Bottle Beast after you clear out all the smaller enemies. This big guy pauses and then fires a stream out of its head in front of it, it will turn to try to face you but quite slowly so you can get behind it to attack. You get an [Imaginite Chest] for defeating him and the bounce pad unlocks.
 |
Battle Gong |
|---|---|
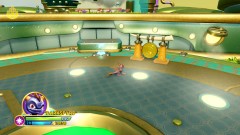
| Appears after defeating the Bottle Beast. It's a wide open area with plenty of room for fighting the 32 enemies (which does not include another Bottle Beast). |
10/12 - Syrup Sorting Section
To sort the globules you have to tilt the platform so that the blue ones roll into the blue pot on the left and you have to fling the red ones up to the right. You lose progress if you get them in the wrong colour pot so you've got to be careful, but you do not lose progress if you completely miss.
You can see which colour is next by looking at the dispenser in order to prepare for it. If you manage to get them out of order (eg a red on the left side of the tilter and a blue on the right) just tilt it so that it's rolling all the globules to the right to get rid of them (I suppose you could try to save the red one once the blue has been dumped). As long as you just keep steady doing one globule at a time it should go quite smoothly. Basically if a blue gets to the right you might as well just dump it off the edge rather than try to mess around getting it back to the left.
Afterwards there's a [Selfie Spot] to the right. Pull the lever on the left side to destroy the barrier then go attack the enemies standing in front of it.
11/12 - Gauntlet of Danger
Grab the XP ball then in the real world bounce up the platforms to the boss fight.
12/12 - Fizzlab Front Entrance
This area is a little odd in that unless you walk to the right you'll only access it at the end of the fight (the Imaginitor bonus applies anyway so it doesn't really matter very much).
The Ninja Doomlander's first attack is to throw out a load of exploding bats on the floor, they don't actually injure you until they explode so it is safe to cross over them straight after they land. Move out of the way of the tiny circles to avoid taking any damage in this part as he does not have any other attacks yet.
For the second part he'll actually become a bit more dangerous, he'll throw bats out but sometimes they'll now be in a circle in the air doing constant damage if they hit you. It depends on how close you are to him the pattern that he throws, if you're very close he'll do a figure eight coming straight out of him (so move back to avoid it) but if you're further away he'll do a single circle in front of him coming out of the side (again move back a little if you're in range of it).
And the third part adds in a part where he'll create some clones that attack you with a direct bat while he hides off to the side. Destroy the four to reveal him (if instead you damage him while he's invisible all the clones will vanish immediately) so you can attack him for real.
The set rewards from the [Imaginite Chest] are the Ninja Secret Technique "Invisibility", Catchphrase Start "Master Of", Catchphrase End "Evil", "Ninja Shoulders", "Totally Metal Hat", and Ninja Weapon "Doomed Bats".
Card Shack
Before you can go to the next level it's time for a game of Creation Clash against Baron von Shellshock in the Card Shack. If you haven't learned how to play yet talk to the Mabu at the table before you go further in.
He's a bit of a pushover, his Skystones are weak compared to the ones you get to use. After defeating him go back to the M.A.P..
Repeatable Imaginite Chests
- Defeat the bottle enemy holding a key
- Defeat the enemies after sucking up the globules
- Defeat the Bottle Beast before the Battle Gong
- Gong Battle
- Doomlander (x3)
Comments

All off-topic comments will be deleted. Please do not use the comments system for conversations, instead use the provided forums for the game.
Please login or register a forum account to post a comment.


 darkspyro
 net
net