Lost Imaginite Mines
| Story Goals | Collections | Dares | |||||||||||||||
|---|---|---|---|---|---|---|---|---|---|---|---|---|---|---|---|---|---|
|
|
|
 |
 |
 |
 |
 |
 |
You'll need RO-BOW in order to unlock the Lost Imaginite Mines level, it's located over a bridge on the left side of the Adventure Pack area of the M.A.P..
1/11 - Wandering Ramparts
Straight ahead through the archway and up the steps and you'll almost immediately reach a rail to grind along, but it's not a challenge. On the other side you'll meet up with Blobbers who will give you a magnet to use, pick it up and imaginite objects will start to move towards you. Go slightly to the left to pull out the bridge that Blobbers is talking about.
2/11 - Polarity Plaza
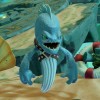
The magnet is similar to things from previous games where you can toggle its polarity to repel imaginite objects instead, you'll need to do that to get through the doors on the other side of the bridge. Through it you'll find a few enemies to defeat like the Slicers from Cradle of Creation and an Eel from Shellmont Shores up on the left. You can use the magnet to defeat the Eel by switching to attract and moving close to the Eel, a large boulder behind will roll forwards and smush it.
Through the Monster Gate that opens up you'll next have to use the magnet to lower the lifts so you can get onto them then go to purple to raise them up once you're on. Go up to the left and into the door.
3/11 - Claims Office
 |
Imaginite Chest - Blue Plate Special |
|---|---|
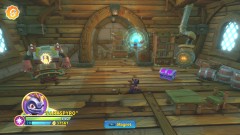
| In here we've got a game of [Creation Clash] with Card-Bot and an [Imaginite Chest] with the Blue Plate Special Set inside the first time you open it. |
Back outside go down and to the right onto the lifts.
 |
Treasure Chest 1/3 |
|---|---|
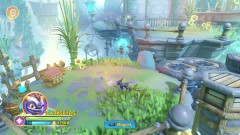
| At the top of the lifts go to the left to get a Treasure Chest. |
Going to the right will enter you into a battle with a few more Slicers, Egg Bots, and an Eel. Ignore the Eel and take out the others as the gate will open once they're dead, to get the Eel bounce up the bounce pad and then drop back down to the right. You'll also find a door to go in here.
4/11 - Magnetic Hideaway
 |
Troll Radio |
|---|---|
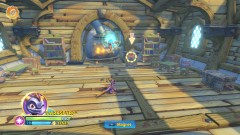
| All there is in here is the Troll Radio which gives you the 8Bit Skylands Music for your Imaginators to use. |
Bounce back up the pad outside and go over to Blobbers with the magnet set to attract, it'll pull in the islands so you can jump onto them.
5/11 - Lost Mine Access
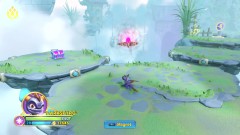
Repel the gates open and then pull in another island to get into a very quick battle with some Slicers and an Eel. With them defeated the gate on the right will open to let you pull in another island, and again repel the gates on it. On the next island you can pull in two islands, one to the left and one to the right.
 |
Imaginite Chest - Special Delivery |
|---|---|
| On the left one island is an [Imaginite Chest] with the Special Delivery Set inside on your first opening. |
The right island has a chain you can grind on (again with no challenge).
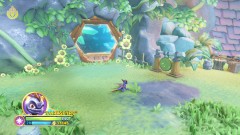
Defeat the Bad Bouncer that's guarding the door to get it open and cause the [Battle Gong] to appear.
 |
Battle Gong |
|---|---|
| The battle is 22 enemies: a load of Slicers, some Egg Bots and a single Bad Bouncer. |
Time to go into the mines.
Follow Blobbers down the slope to get yourself a brand new magnet.
 |
Treasure Chest 2/3 |
|---|---|
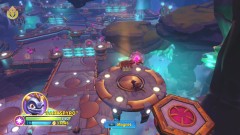
| Double back up the slope and go to the right at the corner. Go up the lifts and you'll reach the second Treasure Chest. |
Jump down and push the first mine into the crystal barrier blocking the way and then pull a second mine from behind the second barrier.
6/11 - Crystal Approach
Through here you'll want to use the repel aspect of the magnet to push a mine into the small crystal barrier, use attract to get it into a good position first just don't let it get too close. You'll have to do the same thing in the next section, pull a mine off the ledge and push it into the crystal barrier.
After that you'll get to a slope, pull a mine off the side and push it up the slope. You'll probably hit some of the enemies at the top with it so defeat whoever is left and go get another mine to roll up the slope and blow up the crystal barrier with. Take out a couple of Eels on the other side and then start trying to get a couple of mines into the mine shaped holes at the back. Try them one at a time as they will explode if they hit each other. Doing that will slightly raise up a platform next to where one of the Eels was standing.
Defeat an Egg Bot and head up the slope to take out an Eel and a second Egg Bot. A few more Slicers will appear as will a Bad Bouncer. Once he's defeated a Monster Gate leading back to the left will open for you.
7/11 - Magnetic Pylon Field
Walk along the lifts with the repel mode on.
 |
Imaginite Chest - Night Owl Armor |
|---|---|
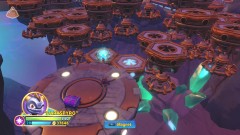
| Towards the screen on the lifts you can find a platform with an [Imaginite Chest] on it, you'll get the entire Night Owl Armor Set the first time you open it up. |
To get up to the controls that Blobbers wants you to use you'll find a few platforms too high to jump to when up or down, so a couple of times you'll have to switch between attract and repel to jump from one to the other while they're still moving. Follow Blobbers along the path that's moved into position below.
8/11 - Crystal Storage
Approach the crystal to plug your magnet in.
9/11 - Escape Path Alpha
Jump onto the crystal to get it moving, as it gets closer to the enemies ahead start attacking them. Once they've been cleared out jump back onto the crystal to ride it further along. It'll stop moving once you reach a platform with an Eel on it, defeat that Eel and then stand on the button on the platform to open the gates. Before you go that way you might want to go to the left to take part in an [Imaginite Snail Challenge] and take a picture at the [Selfie Spot].
10/11 - Escape Path Beta
Bounce back up and ride the crystal up the slope, near the top you'll encounter some Automated Defense Turrets, you can't directly attack these so just try to avoid their rather weak shots. Defeat all the other enemies and bring the crystal up to the top where the trio of Eels were standing next to a cube, once the crystal is near the cube can be pushed onto it.
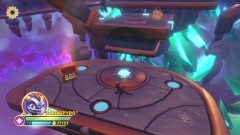
Jump back on and ride the crystal with your own turret on it, it will attack the enemies but unless you're on Easy you'll probably have to give a bit of help. Defeat a Bad Bouncer and ride the crystal all the way to the top where you will need to use it to get to a button that opens the doors.
 |
Treasure Chest 3/3 |
|---|---|
| Before you go through the doors jump off the crystal and head towards the screen to fall down to a platform below with the final Treasure Chest. |
Bounce back up and ride the crystal through the final door.
11/11 - The Final Extrication
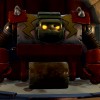
Time to fight the Rubble Maker! Jump over the shockwaves from the fist slams a few times and the robot will have to take a pause, it's at that moment you can attack a little. It won't sit around for long so attack it as quick as you can. Repeat this a few times and it'll move to Phase 2. Pick up the magnet and repel the mines that drop into it so you can attack for a brief moment. Be very careful not to get hit by the mines when doing this. If you've got a low attack this will take an awful lot of repetition to get it down to 50% health.
Phase 3 will start at 50% health, the Rubble Maker will start firing shards of imaginite from the air, just run ahead of the targets to avoid getting hit by them. And again you've got a tiny window to attack before it shields up and starts firing shards of imaginite again. It'll also occasionally send in a few Slicers and drop in a mine for you to repel and take out the shield for a brief moment. This third phase lasts all the way to the end of the fight.
Finish the robot off by smacking the imaginite a few times.
Repeatable Imaginite Chests
- Chest inside the Claims Office.
- Chest on left island before chain to the mine entrance.
- Battle Gong
- Chest on platform in lift area.
- Snail Challenge to the left of the first button in the escape sequence.
- Chest down to the right after the first gate in the escape sequence.
Comments


Let's hope that this was not the last Skylanders walkthrough...
All off-topic comments will be deleted. Please do not use the comments system for conversations, instead use the provided forums for the game.
Please login or register a forum account to post a comment.


 darkspyro
 net
net