Spyro: Adventure  Walkthrough
Welcome to my walkthrough to Spyro: Adventure. Walkthrough1) The Professor's Secret Lab
 Taken blindfolded to the Professor's Secret Lab you begin the game. He shows you the Peephole machine and tells you about another thing which isn't quite ready to be shown yet. He points you in the direction of his Virtual Playground which will get you through the basics of gameplay and get you used to the controls of the game.
 Basically the challenges train you how to breathe fire, how to charge, how to jump, how to glide and how to get that last little bit of height at the end of a jump. The challenges may be slightly more difficult if you aren't quite used to Spyro on the GBA but they should be quite easy anyway. Once completed return to the Lab to continue the game.
The Professor will now show you what wasn't ready before, his robot Butler. The robot still doesn't work so this will be your first boss battle in the game. Quite a basic one this though as all it involves is luring Butler to the electrical machine to the south of the room. This will trigger the Peephole machine to malfunction and expand. The Professor will tell you about Hearts of Lands and to collect them to enable him to take control of the machine again and close it up. He also tells you of a warp machine of his which will allow you to travel to all the different lands with ease.
But before you can do anything Ripto comes through the hole and steals it. He then tells you his entire plan and warps you off to Dragon Shores away from him and his evil plan. Luckily though this will now allow you to start the real adventure...
2) Dragon Shores
a) Dragon Nests Region Now you can fully explore most of the Dragon World. There are gems aplenty in this area and several Quests for you to complete, all of which will take most of the game to complete so don't worry about the finer details of the Quests given to you.
The first Quest will be given to you by Elder Terry; he's a big pink dragon with yellow wings and stomach. If you look on your map (L+R) he is found just north east of a pineapple on the green bit. He will give you a quest to find lots of toys that have been stolen by Rhynocs. In return for finishing this quest he will give you the Heart of the Dragon Shores.
Moving on, when you find Moneybag's Vault, you will be able to open it quite easily by stepping on the two red buttons before the time runs out. His vault is situated slightly north of the second beach area.
The next Quest (although it will never appear as a quest and you won't get a heart out of completing it) is to find all of the Dragon Toddlers which have gone missing. You should find these easily along your adventure so there is little point in concentrating on searching for these. This challenge will be given you by Elder Hedgewick who is slightly northwest of Moneybag's Vault.
Past Hedgewick you will find a new area with lots of room. Moneybags is around here willing to sell you a Spyro Action Figure, one of the missing toys, but it'll cost you 300 gems and you don't have that much yet so move on.
Petal the Toddler is located on the slope towards the Fairy Library and should be easy to spot, and if not you'll probably bump into her without noticing. She will also give you an item which is very useful as it will serve as part of a Quest in the next land you go to. The Fairy Library is situated right in the top left-hand corner of your map and so shouldn't be too difficult to find.
3) Fairy Library
a) Foyer A few Gems in this area but it's mostly just an area to pass through. To get through it you'll have to do a few things first. First flame the bug to get a lift and as soon as you are above your target area (the bugs cannot be controlled by you, they have a set course) press A and jump off. Repeat to the second area and then fire up the boiler. Doodles will give you a spell book which will now allow you to use Ice Breath. To switch between Ice and Fire press Select. Then again use a bug and fly off to the exit of this part of the Library. But before exiting make sure you flame the Ripto banners to get a gem out of them.
b) Main Hall
Lots of Gems here. When you come in talk to the fairy on your right and she'll tell you about a load of books on fire and tells you to put them all out. She'll give you a nice prize for completing the challenge but it's not a Quest. Also there's no hurry so don't go running around looking for them. Just find them as you explore. Oh, and to put them out use your new Ice Breath.
Locations of Burning Books
- In the bottom right corner of the platform you start on.
- To the right of the starting platform near to the water.
- To the left of the platform near a fairy who goes on about banners.
- Just round the corner from #3.
- On the third corner on the water edge from the right.
- A bug ride up to a pink platform on the far left of the map.
- Just south of Moneybanks' Vault in the Library.
- A bit further on from Moneybanks' Vault and in the south corner.
- During a bug ride that starts by a button for Moneybag's Vault drop off onto a platform with Gems and a Red Box on to get this book.
- Above where you started and in the corner a bit.
- Directly above the last book.
- Southwest of the Green Box in the north of the map.
- Dropdown from the location of #12 to get to this one.
- Catch the bug from #12 across and it is on the lower platform on the right.
- Just southwest of the Pink Box in the north of the map.
- On the first long platform over water right at the south end of it.
While you are getting the books, you can do other stuff. One is to get the Library Quest off of Zoe. She is in a section up on the big platforms which has only got access to by a green book and is right in the middle of the map. Her quest is to find bits for a machine to help with the upkeep of the Library. You should already have the Book-B-Gone Storage Unit from the toddler outside the Library.
To get into Moneybag's Vault this time will require a little more effort then in the Dragon Shores but not much. Go to the red button that's on a platform above the door to the vault and run off to the other button down by the door and around the corner. Simple. In his vault you'll find the Ripto Action Figure and a Red Chest. This one's locked for the moment but you'll be able to return with the Red Key later in the game.
Next leave the place and catch a bug ride part of the way to the next location and drop off onto a hidden section which is out of bounds by any other method. Another Red Box here and some more gems. Now go back to the bug and this time go all the way to the end of its trip and drop off there.
Here you'll find more gems, and more books along with a Green Box. You'll need a Green Key to open this one but that'll have to wait for now. And again catch the bug on a little hop across to another platform with yet more gems. Again flame the bug and go across to above Moneybag's Vault where you couldn't reach before. Another box, this time Purple (looks more like Pink to me) which you can't open yet is here.
You should now be able to glide all the way down off of the big platform place and back to the main floor. Now go to the most southerly part of it and then jump off onto another platform across some water. Some more gems, Rhynocs and a book is over here, as well as something unreachable for most of the game. Another bug ride will take you to further away platforms to get more Gems and if you look carefully you'll see some footprints, remember where these are for later. And again take the bug over to the next platform.
It's now time for a big boss battle in the XYZ Section which is located on the ground floor right in the middle. It's through a door by a fairy so shouldn't be easy to miss:
c) XYZ Section
This is a boss battle for a spell book that will allow you to transport right back to the middle of the Dragon Nests Region. To get it you have to battle a big caterpillar thing which Ripto sends after you. This requires a simple bit of following and flaming. Then once you've beaten it grab the book and go grab the gems that are in this room. To get to them go by bug which is in the northeast section of the floor.
Up here you'll find a Red Box which is locked. This location will need to be revisited later when you get the red key. but since you don't have the Red Key yet collect the gems and leave the Library to go on to new lands.
4) Dragon Shores
a) Dragon Nests Area Back here again; you should now be able to pay Moneybags for the Spyro Action Figure for 300 Gems, he's just south of the exit from the Library.
Next go to your Start menu and select Quick Escape. This will now take you to a previously unreachable part of the Dragon Nests Region. Collect the gems there and move on to the next area which is located through the arch in the top left hand corner of the map.
b) Stormy Passage
If it wasn't for the Gems here you'd think this section was really pointless, well at the moment it is. Just go through after collecting the gems.
c) Dragon Coast Region
This area is basically a big area full of gems, but it does also have several exits to different locations. However there is also a Dragon Star which is a yellow plant growing right at the top of the most northerly section of this area. Collect it and go to the boat by the fairy which is located in the middle of the two big platforms in the water area.
Once you reach the destination, collect the few gems there are and go straight to the Yeti Serengeti.
5) Yeti Serengeti
a) Frozen Hills Region The door in the hill you come to can't be accessed properly yet as it's too dark inside so you'll have to wait a little while to get in. To progress a bit further jump up onto the big ice platforms, freeze the Springboks and move them so that Douglas can get back to his dig site. Do this two times and follow him to get your reward of a Yeti Lamp, just the thing for that dark room before.
Go back to the room and grab the gems then go past Douglas this time and through the doorway to the next part of the Serengeti.
b) Frontier Region
Before getting to the main part of this section you'll have to go through a tunnel with lots of gems in. Also a nice Red Box which is still inaccessible. Exit the tunnel to get to the main area of the Yeti Serengeti.
Now is the time to start running wild! Well not really. Grab gems as you go past them and glide over to an almost blocked off section with a Moneybags button on as well as a Red Box! Ignore the button for now and carry on down to the icy part below. To kill the Rhynocs around here just flame them as they land. Manoeuvre the Springbok into place so that you can get up onto a higher platform just past the Vault. Collect gems and stuff there too. Up here you'll find the second Vault button, a Red Box as well as Bentley.
Talk to Bentley to get a brand new Quest in which you have to find loads of climbing gear. When you've done that press the button and jump down to the area where the other button was and press it to open the vault.
Inside the Vault you'll find loads of Gems, a Sheila Action figure and a Red Chest which is still unlockable! Leave the vault and head back up to the top section. This time go southeast from where you jump up and jump down to another section with a Springbok. Freeze it to get to another area and gather the gems there and use the next Springbok to get up to the next section.
Up there you'll find a Purple Chest (Pink!) and loads of Gems. That's all there is in this north section (except for a doorway on the ground to the north but I'll cover that in a minute). Now head to the ground again and jump over the water onto some platforms in the southwest section of the map.
The first platform has an ice platform on which has some gems and some more footprints (useless for now), so again jump over to the next section and carry on with this trend until you reach the end and a Lettuce for a Quest.
The last part of the Yeti Serengeti for now is the Whistling Caves. They are in the northeast area on the ground floor, just go through the big black hole in the wall.
c) Whistling Caves
The order of the whistling statues must be remembered and charged in order for the door to open. The order for the first room is 1, 2, and 3. Charge them and go through to the next room.
The order here is: 3, 1, 3, 2 and 1. The next room is: 2,1,1,2,3,1,3.
Once through the third room you'll be in a bigger room with lava in. In the middle of the lava you'll find a nice medal for you. This is yet another item for yet another Quest you have yet to get. In the rest of the room there are some Gems and of 2 Red Chests and a Green Chest, and still you can't open them. That's all for Yeti Serengeti for now so leave and go back to the place where the boat landed, we're off to Byrd Barracks which is through the other doorway.
6) Byrd's Barracks
a) H.Q. Perimeter Go up to Private Flap and talk to him. He'll tell you to freeze the Walrus, do so. This is a very useful way of getting around, whenever you have to travel by Walrus you have to freeze him first with your Ice Breath and then while on him, manoeuvre him with your Wind Breath.
After getting him across (don't hit any of the ice at the sides!) he'll give you a Super Breath Mint which will allow you to use a more powerful version of your Ice Breath by holding down B and then as you power up letting go to fire a bigger blast. You can use this to freeze large patches of water that you are allowed to freeze; these are identified by their being a single colour rather then a water pattern on them.
To move on use the ability over the ice patch he tells you to freeze and move on to collect more Gems! Finish off this area by going through the door on the top of the platform to get to the next part of the game.
b) Camp Headquarters
Collect the Gems around here again, and to get yourself yet another Quest jump up to the platform right at the start and use the fish to get to the top of it. There you'll find Capt. Beek who will give you a Quest of finding loads of lost Medals, you should already have one of them.
After getting the Quest move on to the end of the platform on the ground level and freeze the Walrus that pops up every now and then. Use it to cross the water and when you land, go south and jump over some water to a larger island. As soon as you land you'll see a dark purple patch of water, Super Freeze it and run along it as fast as you can as this one is really long and by the time you get to the end it will be disappearing. You'll rescue a penguin (you'll be told why by someone a bit later) and also you should collect the flower that's lying nearby. Collect the gems and go back to where you ran from.
Now head south again and you should see two more purple patches. Go over them both after freezing them to rescue some more penguins. Once you've set them free head even further south and onto a large part of the island where a lot of tents are situated along with all the rescued penguins and if you talk to the one in the middle he'll give you the mission you are already doing. Head slightly north from there and cross another bit of water you need to freeze to get to another island. If you want from here you can jump to another small island which has some mysterious footprints on, but there is little reason for that yet so just head straight back. Now for the final penguin, on the far southeast side of the map. Freeze the water and free the penguin. Then head back to collect your reward of a nice uniform for use in a Quest.
Head back to the small island which was right after the Walrus. This time go north instead of south and jump over the water onto yet another small island. From here go west and use the Walrus for a ride over the water. Grab all the many gems around here and when you get to a place above Moneybag's Vault jump down to it. Right around here is an air vent for you to 'explore'.
c) Rescue Mission
This is your first adventure into an air vent, the prize for completion will be half a Red key! You now take the guise of Sgt Byrd and have to complete a small section of rescue missions. To fly you have to keep tapping A and to fire use B, to fire larger missiles press L or R. To heal, return to the tent and you'll get healed and receive a full load of missiles again.
First collect the gems flying around here then head down to the right. Shoot your first baddie with the B gun and go left shooting any other baddies as well as you go past them. When you get to the bottom you'll have to take out the next baddie carefully as one of the penguin cages will block you. When he's gone destroy the cages and you can now either take them out one by one or both at the same time. Your choice. To pick 'em up simply fly slightly above their hands and they should pick up. To get the other simply fly the one beneath you above the other one to carry each other. Return them to base camp (a handy arrow will help you if you are lost) and start out again.
When you go down this time go right instead of left and you should easily spot a penguin trapped, rescue it then return here. Now go right and get the penguin out of the cage. Fly up killing things and rescue another penguin as well. And if you shoot the flashing red button you can rescue a third as well. Take them all back to base camp and return to the bit where you rescued the third penguin so far. Now instead of going right, go down this time to where you will find yet more gems and more penguins along with more baddies.
When you meet the big orange guys hit them with the missiles from the L or R buttons for a faster kill. Search around this area for the last four penguins and all the gems and then take them back to base camp (two by two I would recommend as four at a time is a bit much) to complete the level. Then go talk to Sparx and he will give the newly found key half to Spyro.
d) Camp Headquarters
Now you're back in the real world, freeze a Walrus to get back, and then jump on the button, go across slightly north and then jump on the next button to open the Vault. Freeze a new Walrus and head back into the Vault. Inside there you'll find an item to help with the Library Quest along with Gems and two Red Chests which you still can't open, even with half a key.
Go back to where the second button was and get all the Gems, then talk to the penguin standing there to get yet another mission. This one requires you to fly around shooting things!
Basically you drop bombs on Rhynocs; I can't be bothered to tell you exactly where each one is but it just requires you to be able to see what is coming and to be able to drop a bomb using the B button. Oh, and don't press the Start button, it cancels the challenge while you're in it. There are a few tricky ones but it should only take you a few goes to complete this challenge. You get a nice Sgt Byrd Action figure for your troubles.
That's all you can do on this land so use your Quick Escape Option and head straight back to Dragon Shores.
7) Dragon Shores
a) Dragon Nests RegionNothing new here so just head straight up to the Stormy Passage section through the northeast doorway.
b) Stormy Passage
As soon as you try to get to the steps leading out of Stormy Passage, Butler will burst out of the wall and begin a new attack on you. To beat him this time requires you to lead him under three storm clouds to get electrocuted. However the clouds can also get you so watch out. This battle is a little more difficult then before as he needs to be got three times and the clouds aren't always firing lightning so it may take some time.
As soon as you beat him the rocks blocking the way will explode and a new exit will be available to you. Go through the hole in the wall to get to the Thieves' Guild.
8) Thieves' Guild
a) Secret Cave As soon as you get in you notice one of the toddlers with a thief. Chase down the thief to free the kid. He will give you a magic bag which changes your skin colour, pretty much useless for actual gameplay but nevertheless you can use it if you want. Collect the few Gems that are lying about and exit the cave via the southwest exit.
b) Main Guild Hall
To start off collect gems! They are everywhere, just pick 'em up. To get into Moneybag's Vault you'll have to chase down two thieves to get the buttons, the first is in the big yellow area near the start and the second is in the area right next to it (in the southeast direction). In the Vault you'll find the usual Gems along with a small jar containing a silvery powder which is used in a future Quest. There are also two Chests, one Green the other Red.
Straight out of the door of the Vault and a bit south you'll find a Thief Teacher and she will give you a racing challenge. This one requires you to take as many shortcuts you can possibly make and of course to beat the other two, they take about 1 minute to finish the track so you gotta hurry! My record so far is 57 seconds. She'll give you one of the Medals you need.
Move on back to the area where the second button was and carry on down the path there. Jump over some water in the south to reach a small island with a few gems on, and some footprints too. Then go back to the main island and carry on along the path collecting gems on the way. When you get to the end, near some giant steps of platforms, go left carrying along the ground level to get to the Master Thief who will give you a new Quest! You have to find his tools to open the safe the Heart is stuck in.
Go back to the steps, go up them and jump across the gap to another large platform. Jump across a larger gap to get to Moneybags. Pay him 600 Gems to get an item for the Library Quest. Then carry on past him to get to an air vent. Send Sparx down it to start a new mission.
c) Stealth Mission
This ones an Agent 9 mission requiring stealth. The controls here are shown in the Introduction + Basics section of the guide.
Replace the first two guards sneakily and then run up on the third whilst he's going the other way. To get the two that keep popping up and down, jump in between them when they are looking in opposite directions. Then just jump up and free the first monkey. The next guard requires a jump and fire to get him, then get the one on the level below as well. Grab the Red Key in this level and then go left and sneak up behind the guard. Hide behind the big apple until the camera has started to look the other way and then get that too with the gun thing. To get the flying guard, stay down until he turns round and goes back then jump up and fire on him. Again when the guard in the hole is looking the other way, get him.
Go up to the Red Gate and shoot the Guard right away. Set free the second Monkey and save your progress via the fairy below it.
Hide behind the Pencil to wait for the flying guard to come along then get him. Then jump across the gap and sneak up on the guard. Then get the one in the hole the usual way, then use the Grappling Hook to get across the larger gap and get the one in a hole right away before he can raise the alarm. Then get across the next gap and get the sleeping guard and free the third monkey.
Go back to where you jumped over the gap and go down this time. Make sure to land on the left side of the large block as there is a guard patrolling the other side. As soon as his back is turned get him. Use the Monkey Bars to get across the next gap and then jump on the floating platform to get to the next Fairy. Get onto the next floating platform and grab the guard in a hole right at the end and jump off. Grab the flying guard and jump off after the Gem.
At the bottom, use the Monkey Bars to evade the mines on the floor which will kill you. They are the flashing things by the way. use the Grappling Hook again and then shoot the Gem Vase. Again use the Grappling Hook to get to the next Monkey. Be careful about the next leap as a Camera may see you. Use the looking feature (L button) to see when the camera is not looking. Also watch out for the Guard too. Get them both when you can and move on to get the next guard in a hole. Jump over to get the 5th Monkey and to get a nice welcome save from the fairy.
Jump down the hole to get to the bottom of the level. Get the flying Guard right away and grab the key at the far left. Then use the Grappling Hook again and watch out for the guard patrolling. Grab him and use the grappling hook again, and again watch out for a guard. When you've got him, move on, get the three final guards and release the 6th Monkey, and also grab the Green Key.
Return most of the way back to the start until you get to the place with a Monkey behind a blue barrier. When the camera is not looking open the gate and grab it, along with the Monkey. Then return all the way back to the start of the level and jump past the vent where Sparx is. Open up the locked Green Door and free the final monkey. He gives you half a Red Key for you to use. Now you have a full Red Key!
All Red Chests are available for you to open now! Once exited the Vent go to the Vault and open the Red Chest there to get a whole bunch of gems. Now head to the door that is located right in the middle at the top of the map.
d) Fast Eddie's Turf
All you have to do here is catch Eddie to get an Agent 9 Action Figure. That's all for this level so exit the level via the door you came in through and back out onto Stormy Passage. Head north out of this place until you get as far north in the Dragon Coast as is possible. Head down the rabbit hole there.
9) Rabbit Habitat
a) Rabbit Hole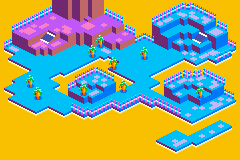 Another simple dark cave to go through, just collect the Gems.
b) Land of Wonder and Amazement
As you enter the main area, Uncle O'Hare will ask you to put him back together, but as soon he says this two Rhynocs come along and steal each side of him.
The first half of him is to the southwest of the place, by some giant carrots. The other half is in the top northeast part of the area. Take his head to his feet and he'll be back together. He'll give you a nice Spinning Top which will make your Wind ability stronger, and now known as a Tornado Ability for obvious reasons.
This new ability will help you through this level as it requires it! Collect any gems and kill any Rhynocs you find on the ground level. Now head to the northwest where there is a Thief standing. Don't bother talking to him, he'll just tell you that to get rid of the moles use your new Tornado ability, then to use them to get up to the next platform, you should jump into the hat and then it will shove you back up and out, then just glide to where you wanted to go.
Position the Hat there just below the platform above and use the tornado, jump up and open the Red Chest to receive one of Bentley's boots.
Next move on up the nearby ramp and kill the dancing Rhynoc whilst avoiding his attacks on you. Grab all the gems around here, and get the second Rhynoc and go talk to Bianca. She is standing next to a Pink Chest which is still unopenable. She'll give you a brand new quest to complete before she can give you the Heart of the Rabbit Habitat. You should already have about three of the list she gave you by now.
Afterwards, jump down to where you can see the gems and open up the Red Chest to get a part for the Fairy Library. Now jump down off here and move to the northeast of the place where there is a large platform place. Move a Mole as near to the corner as possible and use it to get up onto the platform. Use the next Mole to get right up to the top and grab all of the gems around.
Next go to the southeast part of the island and go through the doorway which is right at the bottom of the big platform there, you could probably go up there right now if you wanted but it's best to do that a bit later.
c) Rhynoc Infestation
This little minigame will require you to run around a little making sure that when each of the Jack-in-a-Box toys pops out you need to flame it as fast as possible. Do this fifty times to complete. For completion the monkey outside will give you a Medal for the Quest.
d) Land of Wonder and Amazement
Back in the real world, grab the gems on the big platform now, getting up there via the nearby mole. When right at the top, walk over the button for Moneybag's place and run to the platform just a bit west of there using the second mole to get up to it. Jump on the button to open Moneybag's Vault.
Inside the Vault you'll find loads of Gems and a stethoscope for the Master Thief's Quest, and a nice Pink Chest as well. That's all for this level, it's time to leave! Use the Quick Escape for the level and return to the Dragon Shores.
10) Dragon Shores
a) Dragon Nests RegionWhen back in the Dragon Shores, head south, if you look on your map, in the bottom left corner you may be able to see a slightly different coloured path in the water, head there and use you Super Ice Breath on it.
11) Banana Savannah
a) Jungle's Edge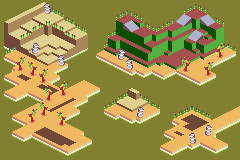 Talk to the Monkey as soon as you get in to get a task to do to help you to get through the level. This is a simple training exercise and teaches you the ways of the jungle. To complete it, simply flame the large Smiley plant that is just round the corner. he'll leave a nice little prize for you over the other side. It is a nice Hot Banana Pepper which gives you Super Flame ability! You can now fire bolts of fire at things in the same way as you can use the Super Ice Breath ability. If you go back and flame the Smiley thing again, the plant will take you to the platform above the smiley thing to allow you to collect up some gems. Flame the Smiley thing whilst up there and jump into the plant again to get to the entrance to the main area. When ready, go through...
b) Primate Plantation
As soon as you arrive talk to Albert the monkey to get a level-long mission to do. His mission will be for you to shoot all of the Rhynoweeds in the plantation to stop them interfering with the Banana Plants. You will need to use your newly acquired Super Flame for this one.
Locations of Rhynoweeds:
- Behind the monkey at the start of the level.
- At the end of the path on the first platform, near after a Rhynoc
- End of another path leading off the first platform going south this time
- Second platform using open flower on first platform in the NE corner
- South from the entrance to the third platform
- Right in the SE corner of the map just next to the jutting out bit
- Go as near to the middle of the map as possible
- South of where you first arrive on the fourth platform
- On the first corner on the fourth platform
- After the big plant on platform four
This third platform is a load bigger then the previous two as it is the main land for this level. Flame the Rhynoweeds that are around and collect the gems.
When you reach a monkey standing next to a big flower, he'll give you a Quest for getting a Heart. His Quest will involve you getting some ingredients to help fertilize the bananas in the plantation.
Up by Moneybag's Vault, you will find a door which you can go through. In that room you will find several gems and a green locked chest.
Head back to where the Quest monkey was and use the flower just south of him to get to a fourth platform.
Collect the gems as usual and flame the big flower, then jump on the open flower that is just south of it to get transported up to the ledge above. Go along to the big flower, flame it then jump to the small ledge below. Travel along and then jump in the flower to go up to the next ledge. Up here you will find the Ape Grapes for Bianca's Plant Quest. Also further along you will find a Red Chest which you should be able to open, it contains a Nail File for the Master Thief's Quest.
Now jump back down a ledge, flame the big plant and go into the flower that took you up a ledge before. This should now take you across to the third platform, but on the ledge above the Vault. Grab the gems and then take a look at the Green Chest, still locked. Now, before running off to open the vault, go inside the Air Duct to open an Agent 9 mission.
c) Stealth Mission
Agent 9 has again got to rescue 8 hostages:
From the start go right and grab the four guards sleeping there. Then hide behind the banana or grab the next guard straight away. Then free the hostage and jump up into the pipe.
Grab the guard there (hide behind the things there if you need to) and then Grapple Hook your way across twice and then hide from the camera. You won't be able to get this camera so just sneak past it and then swing across another gap, freeing a hostage as you land. Again jump up into the pipe.
Head left from where you land and let the fairy save your progress. Jump up onto the moving platforms and head left. Watch out for both the flying Rhynoc and the camera. Grab the Rhynoc as soon as you can and free the hostage, and grab the Green Key if you want.
Head back to before the fairy and swing across to the Green Door, which you can now open. Swing across the gap, then climb across the gap to get the Red Key. Now head back to the moving platforms and this time go right, and jump up the pipe.
From here, jump onto the moving platform and grab the two Rhynocs that hide. Then free the next hostage. Now jump down to the bottom and cross the gap via the moving platform. Go across another gap and then hide behind the banana and wait for the guard to be catchable. Next jump down at a time when the two Rhynocs are facing away from you so that neither will raise the alarm. Grab them. Now jump over the divider and get the next two in the same way. Proceed to the fairy.
Use the moving platform to go up, grabbing the guards up there and freeing the fifth hostage. Then go back to the platform and use it to go down. Cross the razor wires by using the platform and then use the vines to cross the minefield that you can see. Then free hostage number six. Cross another minefield and some more razor wire to free another hostage and grab a White Key. Then jump up into the pipe above. (The key may be blue, it just looks white)
Free the final hostage to get a key half, then open the blue door and talk to Sparx to give Spyro the Green Key Half. Not complete yet though.
d) Primate Plantation
Now you've got that key half, press the Moneybags button and then jump down and race off to where the other button is. You'll have to go north to get off the current ledge though.
When it opens, go into the vault where you will find gems, a Pink Chest and a ring, which will be useful later on. Now journey back to the start of the level and talk to the monkey again. He will now give you an item for the Fairy Quest if you have completed his task.
Quick Escape the level and head north through Stormy Passage and Dragon Coast Region. Here, head to the pink beach and to where you can see a sign and a target in the water. Use your Super Flame on the target to raise a platform, now allowing you to get to Kangaroo Hoodoos!
Before you can actually get there though, you've got to take care of the mole, use your Tornado Breath on the hat and then jump in it to use it to fly up to the ledge.
12) Dragon Shores
a) Underground Pass Jump down from the platform here and you'll meet up with Ripto who seems to want a fight. He will then start attacking you with clocks. Dodge these and when he throws bombs, charge them into the playing cards blocking him. Do this three times and he will lose the battle and leave you the Heart of Rhynocs and Clocks.
To move on to the next level, jump onto the platform at the north corner of the room and jump onto the platform after it. This bit can sometimes be a bit tricky but all you have to do is jump three times while holding the direction. This should get you up there.
Now head out and into the Dragonfly Oasis Region.
b) Dragonfly Oasis Region
Here, grab a load of gems and explore everywhere. There are several islands to the south. When you go through the doorway in the north, you will find several things; a Red Chest with gems in, gems, a toddler (Chip is its name) who will give you a mechanical arm for the Fairy Quest.
The next place to go will be Kangaroo Hoodoos, which is got to via an ice bridge. Use the Super Ice Breath on the dark blue water next to the SW most island.
13) Kangaroo Hoodoos
a) Outlook Region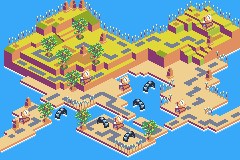 When you arrive, hit the targets in order to cross the water. Then help the kangaroo by hitting another target. Talk to her again to get a glowing kangaroo which will give you the 'Butt Slam' power, to use, jump then press L. Jump onto the platform beyond her and gather the gems. There is also a Green Chest here, but you still can't open it. Then leave the area via the door to the south.
b) The Outback
As soon as entering the place, you get given a mission to destroy ten TVs around the level, do this by using your Butt Slam ability. Here are the overall locations of all the TVs in the level:
- Right next to the kangaroo who gave you the mission
- Next to Sheila after the first hedgehog
- Directly in the centre of the map, near a green hedgehog and just after Sheila
- Right next to number 3 but on a higher platform
- Directly above the entrance to the cave after Sheila
- Next to a giant R and kangaroo on the big platform above Sheila
- In a little corner behind a tree in the north most part of the platform above Sheila
- On the platform above Sheila and up after the green hedgehog smashed statue
- Top right-hand corner of the map
- Southern island of the map, the middle, right next to as giant tyre
Once you get to the next part of the level, collect gems! There are flying Rhynocs in this area so watch out for them as they throw bombs. To kill them, just jump up and flame them.
Whenever you see a green hedgehog on the ground, you can be sure that there is a smashable statue nearby. In this case, it will just require a simple flame, and charge into the statue on it's left. Jump up onto the newly open platform and go talk to Sheila.
She'll give you a new Quest to get the Heart of her land which will involve you gathering several artifacts for the Museum. You should already have a few of these by now.
From here, enter the cave to the right and gather the gems in there. There are also two chests, a Green Chest and a Pink chest. Both locked of course.
Continue past the cave now and jump down onto the next platform where you can see several Ripto banners. The green hedgehog here will require you to push it down to the right and then up to the right to get it to smash the statue. Gather gems and jump up onto the platform you just opened up.
Up here, go left to a huge area full of Rhynocs and TVs. The green hedgehog there will require you to hit it three times. Just hit it towards the pillars each time and then up towards the ramp to smash the statue. Explore this place and then jump up there.
On this next platform you will find a blue rose for your collection of Quest items as well as another TV and some gems.
Now head back to the place where you originally jumped up from and this time head right, use the hedgehog to get up to the next platform where you will find a TV and some gems. Nothing else.
Now you've done that, go back down to the wide open space on ground level and head south following the road, then go left and jump over the water. Here you will find the final TV to destroy as well as the second Moneybags button. Press it and run off back to the first button to open up the Vault. In there you will find the usual gems as well as a Pink chest and a Lava Lamp.
That's all of the main area finished, move on now to a new part of the level which is accessed by a doorway on the right-hand side of the map.
This small area plays host to a small puzzle which will require you to butt slam some tiles to make a picture. Use the following table to correspond the random sequence of letters afterwards, C being the square closest to the statue face:
|A|B|C|
|D|E|F|
|G|H|I|
DABC
Butt Slam those four tiles in order and the kangaroo head will spit out a nice new medal for you to wear.
That's all there is to this land now, move on back to the start to get your prize for smashing the TVs and head back out of the level to mainland. The prize being a Quest item.
14) Moneybags Mansion
 The only place to go now is to Moneybags' Mansion which is located in the top right-hand corner of the map when you exit Kangaroo Hoodoos
a) Foyer
When you get in, pay Moneybags 2000 gems and he will let you look around his Mansion. That is until you get an unwelcome guest! Butler attacks again!
This time you will have to short him out using the fountains nearby. To activate the just stand on the button next to them. To get rid of Butler this time, lure him to the fountains and then tread on the buttons. Repeat for each of the three fountains and you beat him. Moneybags will then give you a dynamo which will allow you to use Lighting Wind Ability. A super powered wind ability, use it just like the other two.
Now to make use of it...
Head into the newly made room. In here you should watch out for spinning Rhynocs which are generally hard to kill before you can kill them as they draw you in quite strongly. Anyway, make your way to the top of the room and use your new power on the yellow machine to power up Moneybags' door. For some reason a pick-axe will suddenly appear which is then added to your Quest for Bentley.
Head out of the door here to get to a previously inaccessible part of the main land. Here you will find gems, a Green chest and an air vent. Use it to access a Sgt. Byrd mission.
15) Dragon Shores
a) Rescue MissionFrom the start head right and kill the robot thing, free the penguin and take him back to base camp. Head back to where you got that hostage and carry on further right this time. Take out the big red robot and carry on further. Eventually you will find another robot that is blocking passage to the second hostage. Wipe him out and rescue the hostage.
Go all the way back to where that hostage was and this time go down instead of into the place where the cage was. Right at the bottom is another cage, and just left of it is another, this time guarded, but you can take it out with a bomb this time. Take them both back (watch out for spikes on the roof).
This time go straight down from the base camp and take out the four robots there to free the caged bird. Then fly down to the right a bit to get another one as well. Take them both back to base camp. Four to go!
Go back down and head left to the edge and then go down further. If the red button is flashing fire at it to open the blocked passage below you, and head right down to the bottom and free the caged hostage. When you come back, instead of going left, go right at the bottom. Watch out for the big red robot and free another hostage. Leave it for now and head further right, kill all robots you come across as none of them are friendly. Carry on until you get to the end and can go down to free another hostage. Take them both back to base camp now. Just the one hostage left!
Head back to the area with the buttons (the bottom-left of the area) and shoot the blue button. Now head back to base camp. Go right until you get to the second drop down, go down here and through what was previously blocked. Free the hostage, then go up through the teleporter and collect the gems there whilst taking care of the robot. Go back through and take the hostage back to base camp. Now talk to Sparx to give a key half to Spyro. You will now be able to open Green Chests! (If you have the other half that is, which you should have).
As if just as a treat, there is a nearby Green Chest, open it to find out what's inside! It's an item for Sheila's Quest.
Head back into the mansion and this time go through the main doorway into the main part of the level. Talk to Moneybags on the way in though to be set a sort of Quest of getting 3500 Gems to get his Heart. This basically is the rest of the gems in the game so you won't be back for a while.
16) Moneybags Mansion
a) Hall of MajestyThe first room is just a gem room, so go through into the hall. When you get in here, just past the first spinning Rhynoc is a small island you will have to jump to, to get some gems. Go back to the mainland and carry on.
When you get to the area with Minibags in, use your Wind Ability on the white cat and lead it to sit on the button next to the spinning drill. To leave it there simply jump away or make it run into a wall. If it has worked, the drill should have vanished letting you go up to the next platform which has a Vault button on. Over to the right is another level in an air duct, yet another Agent 9 level for your fun.
b) Stealth Mission
As soon as you get started, move right and grab the three guards sleeping. Then move on again and when you get to the large gems, wait for the guard to return before running out and grabbing him. Move along here hiding and grabbing until you get to the fairy. Free the hostage there (not the one behind the red door) and grab the two cameras.
Next you will have to grab several of the popup Rhynocs and then a camera as well. Hiding from the camera works well so use the gems, the popups will not really require hiding from. Move along and swing across making sure to time it so the flying Rhynoc won't spot you. Then as soon as you can grab him.
Swing across to the fairy and use the monkey bars to cross the minefield and grab the popup Rhynocs. After that grab the sleeping Rhynoc and swing across again and free the hostage. Now grab the flying Rhynoc and jump down the hole.
To get the next Rhynoc you will have to get off the moving platform and wait for it to popup before you can grab it. Then carry on going downwards. Right at the bottom you will find a spiral of light which will turn you invisible for a short period of time, when invisible jump up into the pipe.
As soon as you land grab the guard and hen move on to the next pipe. Grab the next guard and the gems and then go up the next pipe. On landing grab the popup guard, swing across and free the third hostage, then jump into another pipe!
You land on an open platform with two moving platforms on either side as well as a flying Rhynoc below you. Jump onto one of the platforms and grab the Rhynoc. At the bottom, go left and grab the patrolling guard there. Move on to the fairy who will save your progress.
The next platform holds a lookout Rhynoc with a telescope so use the monkey bars to get across and then grab him. Jump down to the bottom of this area to free a hostage as well as view another one of them behind a green door, along with the green key. Ignore it for now and head back up to the top and carry on going left. Watch out for the camera though as it may spot you. When it's not looking move across and past it making sure to grab the popup Rhynoc as well.
Another camera lies just past here so hide being the gems until you are ready to move. Jump over two gaps to get to free hostage number 5. Then head back slightly and jump down the hole with no wire in. Down here grab all of the popup Rhynocs grab the blue/white key. Carry one past it and grab all of the Rhynocs here as well. Another bout of invisibility is here, so use it and jump up into the pipe.
The first area only has a flying Rhynoc in so grab it and move on to the next pipe area. This too only has a flying Rhynoc in and so grab it and move up though the pipe system. Here jump onto the flying platform. Make your way over the razor wires using the platforms and monkey bars to get across and free hostage number 6 and to get the green key which will let you out of there.
Use the key and start heading back to the beginning of the level, but as you go through you will notice a blue doorway which you can now open with that blue key of yours. Cross the minefield using the grappling hook, free the hostage and pick up the red key. Now head back to the start of the level. When you get back to the part where the first fairy was, you will see a red door with a hostage behind it. Free that hostage. Now head all of the way back to Sparx to give him the Pink key half.
c) Hall of Majesty
Back in the real world. Use your wind breath on the cat and make it go onto the button nearby to stop the drill. Then use the next cat to get to the next part. Grab the gems up here as well as the Money tree for Bianca's Quest. Go back down to the previous cat part and jump up the money to the next section of the level. Grab all the sneakily hidden yellow gems there as well. Go down to the large area down the ramp and open the Green Chest to free a medal for a Quest. Hypnotise the cat to sit on the button so that you can get rid of the drill which will now allow you to reach the Vault button, when activated run back to the Vault and jump on the button next to it. In the Vault you'll find both a Yellow and Pink chest as well as a painting for a Quest.
That's all folks. Now exit this level and go onto the beach of the Dragonfly Oasis and fire up the boat using your Lightning Wind Breath!
17) Cheetah Spot Spa
 Jump aboard the float to get there. Grab the usual gems and head through the doorway.
a) Lobby
Help out the helpless cheetah by charging a bomb into the vending machine (kill the bird first) and he'll give you a free Health Bar which will increase your hits to four. When finished in here move on to the Fitness Centre
b) Fitness Centre
Go talk to Bruiser to get your level long mission, this time it's fixing exercise machines with your Lightning Breath Ability. As usual, here are the ten locations:
- Just past Bruiser but further on, in the south of the map
- Middle-left side of the map, ground platform
- Next to Moneybags' Vault
- On the platform just above Hunter
- On second tier platform, next to button directly above Vault
- Right in the middle of the map, on the second tier platform
- Next to the Agent 9 air vent
- Right up on the top level in the left-hand corner
- Up by Moneybags
- Past Moneybags and a statue
Around the bottom platform is Hunter who will give you the Quest for the Heart of the Cheetah Spot Spa. Collecting cool stuff.
Use the bombs to get up to the next platform; the one I'll be using is the one furthest to the right on the map. Here you will find some gems, the 4th exercise machine as well as another statue to blow up. Blow it up.
Jump up to the next platform. Here you will find a couple of exercise machines and a button for the Vault which you should ignore for the moment. Also up here is another Agent 9 mission for you to complete.
c) Stealth Mission
Another eight hostages to free here.
Three sleeping guards to the left of where you arrive, grab them all! Now jump down the end and either hide behind the can as it tells you to or just grab that nosey Rhynoc! Use the grappler to get across the razor wire and jump up the first pipe. Not the second. The first.
Free the hostage and utilise the monkey bars to cross some more razor wire. Watch out for the lookout Rhynoc at the end though as well as the flying one. Jump down after the gems and the fairy will save your progress. Use the monkey bars there to cross the mines (grab the Rhynocs as well) and free the hostage at the end. Now head back over the mines and jump down the hole. This will take you right back to the start so get to the place with two pipes and this time use the second one.
Jump down two thingys and grab the popup Rhynoc there. Then jump up onto the middle platform bit and free the hostage as well as grabbing the flying Rhynoc. When jumping down the next bit, use the monkey bars to get over the barbed wire and get into the middle before dropping down. Get your progress checked by the fairy.
Watch out for the flying Rhynoc as well so grab him! As you do so, you will probably fall down onto a platform below (if you don't, do so) swing across the gap to the popup Rhynoc and grab both him and the red key. Now jump down to the left and immediately grab the guard there. Free the hostage and then go get the lookout Rhynoc as well. Now jump down the small gap and continue down to the start of the level. Now that you have the red key, go open that door and jump up the pipe there.
When you arrive get the gems and then swing across the wire and grab the flying Rhynoc. Then free the hostage by swinging across again. And then again to get the green key, then swing back to the start and jump back up the pipe and this time open the green door and use that pipe.
A fairy will save your progress. Swing across to the gems then jump over to the hostage and free him. Jump down to the floor and grab the patrolling Rhynoc. Jump down the end and grab another one. Monkey bar over the mines and then jump down to the fairy who will save you again. Go across to the invisibility thing and then continue down. As you descend on the platform, grab the camera.
Jump across the gap and get the Rhynoc and repeat with the next one as well. Get onto the platforms and take out the cameras if you want to, it's not essential really. Get up onto that middle platform and ride the floating platform up. Free the hostage and get the white/blue key. Use the pipe.
Free the hostage and use the key to escape and now go back to the start of the level to talk to Sparx. To get back use either the first or second pipes.
d) Fitness Centre
You are now the proud owner of half a yellow key! Drag a bomb up to the nearby statue and move up to the next layer. Up here is a green chest which will give you a crowbar for the Master Thief.
As well as that, if you go right to the middle, there is a cheetah there just giving away a free mission for you. All you have to do is flame a load of Rhynocs whilst flying to collect a medal to add to your collection. This flying one is easier than the previous one as you use your own flame and therefore get a larger range of where your attack goes.
OK? Go over to the Vault button and jump on it, then jump down and jump on the next one to open the Vault. Go in there to find a few gems and a Pink chest.
Exit the Vault and head over to the left side of the map, blow up the statue and jump up onto the platform. Up here you'll be able to pay Moneybags 1000 gems for some dynamite! Pay him. Blow up the statue nearby to get up to the final bit of the level where you will find the final piece of Bianca's Quest items. That's all there currently is to do in this place so head back to the start to get your prize for fixing the exercise machines. A travel brochure for Sheila's Quest. Now just Quick Escape back to the main part of the world.
Head to the beach with the Training Pod on and use your Lightning Breath on the yellow thing next to a blue circle. Then jump down the hole.
18) Professor's Secret Lab
a) Prototyping Section When in here, just look around if you want, the hole is still there to Rhynocs and Clocks, but ignore it for now and jump down the other hole at the top.
b) Research Section
That was quick. Okay, the first part of this place is just running around collecting up gems so do that.
When you've got all you can be bothered to find, jump on the two Vault buttons to open, you guessed it, Moneybags' Vault! In the vault you'll find a boomerang for a Quest, gems and a Yellow Chest. From the exit of the vault, you can see a nice Red Chest which contains a dragonfly wing for a Quest as well as a Yellow Chest. There is also another Red Chest a bit further south of there which contains an item for the Banana Quest.
If you go to the top left corner of the room, you will find one of those yellow power things which needs a bit of Lightning Breath to get it started. So go through the door to the Zoo.
c) Professor's Zoo
 As soon as you enter, you will be told to rescue the dragon toddler. This is your challenge on this map! This level is designed to use all of the previous level's challenges on you in one go. The first show of this is the Walrus in the water, freeze it and use it to get to the middle of the map and jump off onto a platform with a green hedgehog on. Smash the statue with the hedgehog and move along.
Next up is a Springbok which you have to freeze and move to the north. Then comes yet another challenge, the bird and the bomb one. Jump on the button to let the dragon move down a little.
Next, jump onto the button and again let the dragon move a bit further down. Heat up the bug thing and it'll take you across to an area you couldn't get to before. Amazing, there's a Yellow Chest here as well. Now go back again and this time jump down to where there is a mole in a hat and use it to jump up to the platform at the opposite end.
Up here you'll find a Green Chest to open, it contains a sledgehammer for the Master Thief. Flame the big plant and then go back to the part with the bug. Now jump into the plant there and you will be teleported further along. Jump onto the button to free the dragon, who will leave a snowboard for you. Jump down off here onto the next layer. You will now need to jump around the drill bit to get off here and repeat with the second drill bit as well. Grab the snowboard!
That's all for this level at the moment. Head back to the first bit of the Professor's Lab and now jump into the vortex.
19) Rhynocs n' Clocks
a) Rallying Point Upon entering the level, a dragon will request your help in getting down. To do this, run past him and up a slope to a bird with a bomb. Use that bomb to blow up the thing that the dragon is sitting on, you will need to do this five times to completely destroy the pillar. He will give you some new antenna for Sparx which will allow him to get gems that are further away. Now that that's done, go up the slope again and jump over the gap to collect the gems over there.
Now go through the doorway into the mainland.
b) Rhynoc Retreat
Now we're getting somewhere. There's another couple of green hedgehog 'puzzles' for you to 'solve' so do so. There is also a nice challenge of clearing out a room for you to do if you go up to the right-hand corner of the platform. There's only 50 things to clear out, shouldn't take too long to complete. Just stand in the middle of the six things and flame them as they popup. For your services to the monkey, you receive a nice, new medal. This medal should finish off your collection for you.
Jump aboard the flower over by the Vault button to get transported over to a platform. Use the hedgehogs to get up to the next level of this place again. Up there you will find a Pink Chest as well as an entrance to Chateau Ripto, which we will be ignoring for a short while. Up the hedgehog smashing statues you will find an air vent for a Sgt Byrd mission.
c) Rescue Mission
Head to the right to get a quick rescue for the first captive. Carry on past that bit again to find another two guarded by a huge gunship, which will require a few more shots than usual to destroy. If you then head further up you will find yet another cage, then head left to find two more and the green button to open up the blocked green way. Take those three back to the camp and return to the place where the green thing opened. Go up there and take out the several huge robots that are flying around and take the one captive up there back to the camp.
Go back again and this time, go through the portal. Here shoot the robots and free the two caged hostages here before returning to camp. Now head back to the teleporter again and instead of using it, go further left. You will be required to shoot a red button to carry on past here now. Shoot it and proceed downwards to free the final hostage. Now check around to see if you have missed any gems, if not go and talk to Sparx to give him the final part of the pink key! Now you can open up Pink Chests! (Or rather 'purple' chests as they say in the game)
d) Rhynoc Retreat
At the top of the platform is a nice Pink Chest to test your new key out on. All it has in are gems. Jump into the flower and you'll get transported to the other platform again. There are two Yellow Chests here and one Pink One which holds some white powder for your banana Quest. Now head back through the flower again.
Flame the big flower and jump down to ground level. Jump onto the Vault button and then race over to the flower you used to get to this platform originally. Now jump onto the close by button and the Vault opens! Back through the flower with you and now into the Vault. In here you will find gems and a yellow chest.
Nothing more to do in this land for a while. Head through the door to Chateau Ripto.
20) Chateau Ripto
a) Ripto's Main Gate One of those impossible puzzles here again.
|A|B|C|
|D|E|F|
|G|H|I|
C = the north slab
Butt Slam them in this order: EDA
It will then open a door for you. Head through that very door.
b) Ripto's Grand Expanse
Collect the gems around here then use the flying bird's bomb to blow up the Ripto statue. Go up there and down to the left, following the path. Now drag one of the mole hats back up to where the statue was and use it to get up a bit further. However, you should first use it to get up to the air vent on the left.
c) Rescue Mission
The final Sgt. Byrd mission of the game. What a shame. Head right from the start and up. Free the caged bird and take him back to base camp. Just left of the camp is another cage for you to destroy. Head higher then that one next and free the next two birds.
After that go up a bit from the last position and as far left as possible. You should then find the fifth bird to rescue and if you carry on up, you can get the sixth as well.
From base camp, head straight up and a little to the left until you can go no further. Destroy the big machine and shoot the green button to allow you to go left out of there to get the next two birds. Return to the green button room and use the red teleporter to transport across.
Destroy the big machine and smaller one and free the two remaining birds. Shoot the big red button and fly away with the hostages to the end of the level.
Talk to Sparx and give the yellow key half to him. All keys are now completed!
c) Ripto's Grand Expanse
Open up the chest in front of you and collect the colourful powder. Bring a hat back to the same area as before, but in front of the other platform this time. Open up the pink chest full of gems and then go jump on the Vault button, run off the platform again and down to the other button.
When open, enter the vault. In the corner is a pot made by kangaroos of the past. Also there are two chests, pink and yellow both containing gems. Head back to the hat place and this time use the bug to fly off to the next platform.
Jump over the water to get some more gems. Carry on along the path and up the slopes. You'll meet up with Moneybags again who wants paying 1600 gems. Pay him to get some bonus gold dust which turns you gold.
Next go into the doorway by the penguin. Defeat the monster by flaming it a few times. If you wish to fight Ripto now, and beat the game then skip past the following information right to the bottom of the walkthrough (part 36) for fighting Ripto, however if you want as much percentage as you can before fighting him, read on...
21) Professor's Secret Lab
a) Research SectionBack into the Research Section to finish up the level. I won't go through the entire levels anymore, just the locations of the chests and other stuff that you need to get to be able to complete the levels.
Pink Chest - In the bottom right corner of the island, brown powder inside for the banana Quest
Yellow Chest - Top right corner of the map, loads of gems inside
Pink Chest - Top middle of the map, lots of gems inside
Yellow Chest - In Moneybags' Vault, lots of gems inside
b) Professor's Zoo
Pink Chest - Directly in the middle, ignitable fuse for the Master Thief
Yellow Chest - Reachable by the firebug, Phoenix Glasses for getting more gems
Phoenix Footprints - Bottom right corner of the map next to the big glasses sign
Lab Complete
22) Byrd Barracks
a) H.Q. PerimeterNothing in here, just pass through
b) Camp Headquarters
Heart of the Land - in the corner bit right at the start of the map, Captain Beek
Phoenix Footprints - on small island just off the middle right island
Red Chest - Inside Moneybags' Vault, lots of gems inside
Red Chest - Inside Moneybags' Vault, lots of gems inside
Red Chest - Middle of north most platform, Bentley's helmet
Byrd Barracks Completed
23) Rabbit Habitat
a) Land of Wonder and AmazementYellow Chest - right on top of the right-hand platform, colouring agent for banana Quest
Pink Chest - Next to Bianca, loads of gems inside
Pink Chest - platform in middle of map, Bentley's second left shoe
Pink Chest - inside Moneybags' Vault, loads of gems inside
Heart of the Land - from Bianca on left platform
Phoenix Footprints - Small island in bottom-right corner of map
Rabbit Habitat Completed
24) Dragon Shores
a) Dragon Nests RegionPhoenix Footprints - right-hand beach
We will return here once the Quest has been completed a bit later.
25) Fairy Library
a) FoyerNothing here, just pass through
b) Main Hall
Red Chest - Moneybags' Vault, loads of gems inside
Red Chest - middle of map reached by firebug, Bianca doll
Green Chest - right-hand platform, Yeti Rope
Pink Chest - left top platform, light organ for cheetah Quest
Red Chest - XYZ section on the platform, loads of gems inside
Phoenix Footprints - small island to south of map
Return to Fairy Library later
26) Yeti Serengeti
a) Frozen Hills RegionNothing here, just pass through
b) Frontier Region
Red Chest - in opening cave, loads of gems inside
Red Chest - platform just out of the cave door, Hunter Action Figure
Red Chest - platform in middle, brush/vacuum for Fairy Quest
Red Chest - Moneybags' Vault, loads of gems inside
Pink Chest - furthest right most platform, green powder for banana Quest
Red Chest - inside Whistling Cave, loads of gems inside
Red Chest - inside Whistling Cave, loads of gems inside
Green Chest - inside Whistling Cave, loads of gems inside
Phoenix Footprints - island to the south, blue bit
We will return later for the Heart of the Land
27) Dragon Shores
Return for the Heart of Dragon Shores from the dragon near the right-hand beach.Dragon Shores Completed
28) Fairy Library
Return for the Heart; collect from Zoe who is near the centre of the mapFairy Library Completed
29) Banana Savannah
Green Chest - inside room next to Vault, loads of gems insideGreen Chest - platform above Vault, left glove of Bentley's
Pink Chest - Moneybags' Vault, lots of gems inside
Heart of the Land - Talk to Lance on the far left of the map
Phoenix Footprints - Platform above the Vault and next to air vent
Banana Savannah Complete
30) Chateau Ripto
Phoenix Footprints - small islandChateau Ripto Complete
31) Rhynocs n' Clocks
Yellow Chest - Moneybags' Vault, loads of gems insideYellow Chest - top right hand corner of map, colourful bag
Yellow Chest - On top of the green platform, green bag
Yellow Chest - on top of the green platform, loads of gems
Phoenix Footprints - small island in the middle of the right side of the map
Rhynocs n' Clocks Completed
32) Kangaroo Hoodoos
Pink Chest - Moneybags' Vault, loads of gems insidePink Chest - platform at far left on map, loads of gems inside
Pink Chest - cave near Sheila, loads of gems inside
Green Chest - cave near Sheila, hand drill for Master Thief
Red Chest - top right-hand corner of map, Bentley's right glove
Green Chest - Outlook Region on the platform behind the kangaroo, loads of gems inside
Phoenix Footprints - top right-hand corner of the map
Return later to collect Heart off Sheila
33) Yeti Serengeti
Return to collect Heart off of Bentley.Yeti Serengeti Complete
34) Thieves' Guild
Pink Chest - dark purple platform on left side of map, electric trophy for the Cheetahs QuestGreen Chest - Moneybags' Vault, loads of gems inside
Phoenix Footprints - small island to the bottom left of the map
Thieves' Guild Completed
35) Cheetah Spot Spa
Pink Chest - Moneybags' Vault, loads of gems insidePhoenix Footprints - platform just above Vault
Heart of the Land - Cheetah
Cheetah Spot Spa Complete
36) Moneybags' Mansion
Pink Chest - top right corner of the map, primitive drawing for Sheila's QuestPink Chest - outside of the Vault, loads of gems inside
Pink Chest - Moneybags' Vault, loads of gems inside
Yellow Chest - Moneybags' Vault, loads of gems inside
Phoenix Footprints - top right corner of the map
Once you have all the gems in all the lands, (which you may have now) talk to Moneybags and get the Heart of his Mansion for 3500 gems
Moneybags' Mansion Complete
37) Kangaroo Hoodoos
Return for final Heart off Sheila.Kangaroo Hoodoos completed
38) Ripto's Throne Room
Time for the final battle with Ripto. Return to Chateau Ripto through the Rhynocs n' Clocks level and carry on past the place where you fought the Rhynopede.Once you enter the room, a short speech by Ripto will occur and then the battle will begin:
To hurt Ripto, all you have to do is use the corresponding Super Breath next to each of the different statues. Red for Fire, Green for Lightning and Blue for Ice. By yourself you will be unable to actually hurt him, you have to get him to fire back at you, which he will do after being hit, and for him to hit the statue of the type of attack you just used. This will then take one hit off him and you will be well on your way to completing the game.
The story will wrap itself up with you picking up a Warp Device and the Heart of Chateau Ripto. Ripto will also attempt to kill the Professor but luckily Butler will save the day and trap Ripto. Spyro will then warp them both away somewhere.
You will then see the credits and when you go to the title screen, you will be able to access all of the Sgt. Byrd missions for multiplayer.
100% of game completed
Comments

It took me 20 hours to finish the game but with this I got done in 9 hours ! 

to Jezz: get up to the bird jump wile blowing fire the egg will drop then you push it to a statue or whatever you need to blow up. 

I am missing 75 gems in Dragon Shores too. HELP!!

I'm really stuck. How do you make the bird explode? I've tried a lot of different things and I can't figure it out!
Im really stuck im 102 gems down to buy the heart of moneybags but i cant find the 75 Gems at dragon shores and the 27 at cheetah spot spa!HELP PLS!!!!
Hi its me again!!!
Sorry to bother u , but i hav completed almost everything but i am 75 gems short in Dragon Shores . Wot do i hav to do? is it in the Vent? if so, please reply!!!!!
thanx
becky x
Sorry to bother u , but i hav completed almost everything but i am 75 gems short in Dragon Shores . Wot do i hav to do? is it in the Vent? if so, please reply!!!!!
thanx
becky x
Thanx alot!!!
i really loved completing this game and the walkthrough really helped. Thanx again
xxx
i really loved completing this game and the walkthrough really helped. Thanx again
xxx
Just exit via the menu and go back in.
hi everything works but i cant get the other pink key (the first half) because Agent 9 won't jump high enough to get to the red key !!! by the way, i really like the walkthrough and thanks for it. do u ever reply to these coz out of all the ones ive looked at there is never an answer. anyway, pleez help!!! xx
hi again just a quick note to say Iam still 10 gems down in cheeta spot spa what have I done wrong I have gone over the agent 9 mission three times and I still cannot find any gems please respond to this message
wot can u do after the game is completed?? apart from the byrd missions on the menu, is there anyhthin actually u can do in the game...??
this is so awesome after the advice you gave me I HAVE BEEN FLYING and there is ju st one more thing I am still 10 gems short at cheeta spot spa and I have gone through the minigame twice after I heard what you said and I am still only 9 gems short
this is so awesome after the advice you gave me I HAVE BEEN FLYING and there is ju st one more thing I am still 10 gems short at cheeta spot spa and I have gone through the minigame twice after I heard what you said and I am still only 9 gems short
:)
how do i get t the bit behind where you fight rhipto it says you have to jump 3 times but its not working !!!
All off-topic comments will be deleted. Please do not use the comments system for conversations, instead use the provided forums for the game.
Please login or register a forum account to post a comment.
 darkspyro
 net
net