Shellmont Shores
| Story Goals | Collections | Dares | ||||||||||||||||||||
|---|---|---|---|---|---|---|---|---|---|---|---|---|---|---|---|---|---|---|---|---|---|---|
|
|
|
 |
 |
 |
 |
 |
 |
 |
1/7 - Lonely Cove
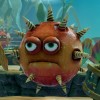
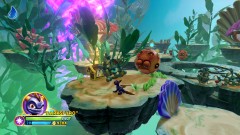
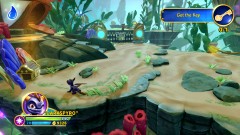
Jump forwards along the slowly rotating platforms, you can attack the mine fish after it spikes but not before.
 |
Treasure Chest 1/3 |
|---|---|
| At the fork in the path where Jet-Vac is waiting go to the left to find the chest behind some junk next to another mine fish. |
Go down the right path onto a large rotating stone wheel, hitting the button in the middle will reverse its direction but first you may want to jump down to an island off the right side to grab the first of five bananas for an Achievement/Trophy "Banananas!".
Switching the direction of the wheel isn't essential but it will mean you aren't slammed into the mine fish to get to the platform behind it. The second bunch of bananas is ahead where you are attacked by several clam enemies (the level's Chompy) and then a couple of yellow ball cuttlefish enemies that expand and squirt out a wave of ink beneath themselves, jump over it to avoid taking damage.
 |
Treasure Chest 2/3 |
|---|---|
| To the left of the steps up to the building Blobbers comes out of. |
2/7 - Blobbers' House
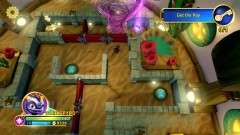
Step on the button to switch the wall around in order to move forwards.
 |
Soul Gem 1/3 - Mysticat |
|---|---|
| Before you hit the next button follow the brain-storm to the back in order to sneak into the gap to the side where the Soul Gem is sitting. |
Wait for the twister to go to the far end before you hit the button in order to trap it there. Then hit the next button to reach the key. If you retrap the twister you can just walk straight back out.
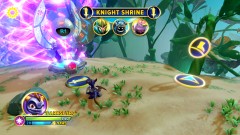 |
Knight Shrine |
|---|---|
| To the left after opening the locked gate. |
And on the right is a [Selfie Spot] before you take on the [Grind Challenge]. It has a tricky fourth piece of imaginite as it is in-between the two tracks right after the second track appears but just off the top of the screen so you only see it the moment you need to be jumping across. If you miss it and want to try again jump back to the left side and you'll fall off after a while if you just stay there. The fifth one is on the left side and then the rest are all on the right with the very last one requiring a jump to a new right vine as soon as you join up with it, if you miss that one though there's no way to redo without restarting the level.
3/7 - Sandy Shores
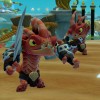
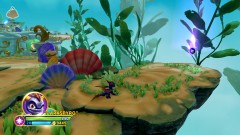
Take out the three floating mine fish so that the area is clear for the fight, a few new shrimp enemies with swords will attack, they are like the purple spear guys in that they get their swords stuck in the ground after they attack. After a cuttlefish there'll be another load of shrimps with one more cuttlefish before the Monster Gate opens and you get an [Imaginite Chest] reward.
 |
Soul Gem 2/3 - Swashbuckler |
|---|---|
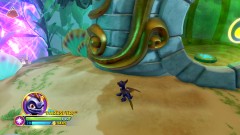
| Pick up and take the barrel back to the right where you can explode some ruins to reveal a Soul Gem. |
The timer that you see on the barrel is not the time until it explodes it is the time until the fuse line is lit, which then takes a bit of time to catch up to where you are so you do have more time to place it than it perhaps looks.
 |
Treasure Chest 3/3 |
|---|---|
| Take the barrel again and this time go down the slope and to the left to blow up another object which is hiding the chest. |
You'll also be able to eat the third banana bunch in front of it.
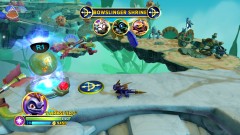
Get the barrel one more time to blow up the green glass blocking a button at the bottom of the slope. Pressing it will activate a Gillman elevator for you to ride up.
 |
Bowslinger Shrine |
|---|---|
| On the left at the top of the Gillman elevator. |
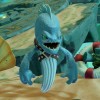
Further on there's another new enemy, an eel that flings long ranged energy ball attacks at you with the usual red marker showing you where they'll hit.
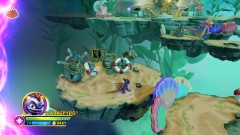
On the first stone wheel jump off to the islands on the right at the top to have a game of [Creation Clash] with Grumus.
 |
Legendary Selfie Frame - Swashbuckler |
|---|---|
| And off the left of the second wheel is the Legendary Selfie Frame behind a load of junk. |
4/7 - The Kelp Forest
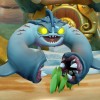
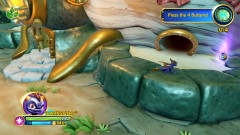
On solid ground again you'll be attacked by a few enemies (with the fourth banana bunch over on the left side) a few at a time until the door opens and you're introduced to a new large enemy known as a Tube Shark. Run away from his left arm when he tries to suck you in and then dodge out of the way of the right arm when he spits stuff back out. Defeating him will earn you an [Imaginite Chest].
 |
Soul Gem 3/3 - Dr. Krankcase |
|---|---|
| Once you're inside go to the right, ignoring the buttons, through a doorway back outside to get the Soul Gem from a ledge that you could see during the fight. |
Going out the left side will get you an XP ball.
Back inside press each of the four buttons as quickly as you can then run and jump up the stairs before the timer runs out. At the top there's another [Selfie Spot].
Outside just walk past the targets on the floor straight into another door.
5/7 - Upper Spire
A trio of eels to defeat in here before the Monster Gate on the left lowers.
 |
Egg Rescue |
|---|---|
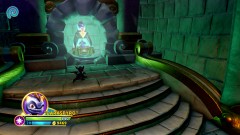
| Before you bounce up make sure to go play the [Egg Rescue] game at the back that's appeared as you won't be able to get back down for some reason. |
 |
Troll Radio |
|---|---|
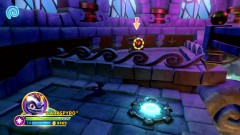
| On the second bounce pad jump over the little fence to get to the Troll Radio that rewards you with Electronic Music and Burpy Effects. |
Outside the door at the top is a [Grind Challenge] to earn an [Imaginite Chest]. There are 26 pieces to collect but they're all in pairs so it's not as many as it seems. There are plenty of points where you can let yourself run into a mine fish and fall off if you miss any and want to try again. It's mostly just switching the moment you can and then quickly back to get the majority of the difficult ones.
6/7 - Heart of the Vortex
Go forwards across the titled platforms to where there's a platform that is moving back and forth to carry you to a second platform which takes you up to a Snail Challenge for an [Imaginite Chest].
 |
Battle Gong |
|---|---|
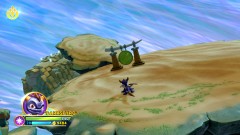
| This one has 35 enemies that are made up of all the types of enemies you've seen in the level, with just the one Tube Shark |
Go up the ramped platform onto a large rolling barrel platform, it'll start moving up so try to stay on the top while it does that. Once it stops walk towards the screen to find a circle of platforms, one with a free [Imaginite Chest] on.
Go along the barrels to a Monster Gate and the fifth and final banana bunch. After defeating the last two eels the gate will open up and let you bounce away to the inside of a rolling barrel kind of thing. Just go straight ahead, there's not really any point at which the thing rotates into a position where you need to wait very long. One last XP ball before you bounce to the Doomlander fight.
7/7 - Top of the Vortex
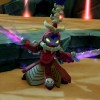
The Swashbuckler Doomlander's initial attack is to run towards you and start swiping, she'll get locked into a direction once she starts the combo so if you just run around her you can safely attack from behind right away. After that she'll do a spin to close the distance if you get far away, with a dizzy pause afterwards which is good for attacking too.
The new move for the second part is a tornado, keep away from her while she's doing that and it's not much of a threat.
The third part adds lightning strikes that will keep you on your feet a little more but without any extra enemies (unless you count the harmless mine fish) it's just the same as earlier. The set rewards from the [Imaginite Chest] are the Swashbuckler Secret Technique "Bladenado", Catchphrase Start "Fueled By", Catchphrase End "Disaster", headgear "Bonier-Tail", backpack "Skeletal Spine", and Swashbuckler weapon "Doomed Skeleswords".
Repeatable Imaginite Chests
- Grind Challenge after the locked gate
- Defeat enemies after the Grind Challenge
- Defeat the Tube Shark
- Grind Challenge after Troll Radio
- Snail Challenge near Battle Gong
- Gong Battle
- On an island towards the screen at the large barrel platform
- Doomlander (x3)
Comments
 Thought I'd fixed that, thanks.

All off-topic comments will be deleted. Please do not use the comments system for conversations, instead use the provided forums for the game.
Please login or register a forum account to post a comment.


 darkspyro
 net
net