Gryphon Park Observatory
| Story Goals | Collections | Dares | |||||||||||||||
|---|---|---|---|---|---|---|---|---|---|---|---|---|---|---|---|---|---|
|
|
|
 |
 |
 |
 |
 |
 |
1/26 - Observation Island
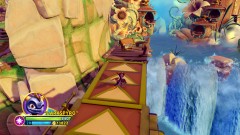
Go straight ahead following the mud path.
 |
Treasure Chest 1/3 |
|---|---|
| Go straight past the Observatory to a bridge that leads directly to a Treasure Chest and nothing else. |
Turn around and enter the Observatory.
2/26 - Tower Accommodations
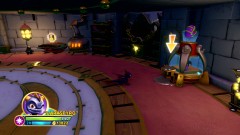
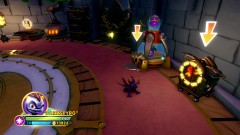
Go down the stairs to find a game of [Creation Clash] with Rizzo (to learn how to play go to the Card Shack on the M.A.P.).
Along the wall past him is a locked gate, there's no key here.
 |
Egg Rescue |
|---|---|
| There's also an Egg Rescue machine... |
 |
Troll Radio |
|---|---|
| ...and a Troll Radio that rewards Haunted Effect and Canyon Voice Effect. |
To find the key for the locked gate head back outside and start turning over the plant pots, under one (it's random which one) you'll find the key.
3/26 - Arboretum
After unlocking the gate you'll find an area with a sort of light puzzle, if you use both lights on the flowers they'll change to become passable which is the best thing for getting some bonus coins in later parts of the level.
There's now also a [Selfie Spot] here. Get a [Imaginite Chest] from a Snail Challenge on the right then head upstairs.
4/26 - Observatory
After talking with Tessa look into the telescope and turn it to face the right. You can do them in any order you like, that's just the way the walkthrough is going first.
To the right of the telescope is a safe with three buttons in front of it. A circle, a triangle and a square. If you listen carefully you can hear some Morse Code beeping away which is telling you the combination for the lock through numbers. There are three codes being used here, the code for 4 (....-) which refers to the Square button (4 interior angles), the code for 3 (...--) which refers to the Triangle button (3 interior angles), and the code for 0 (-----) which refers to the Circle button (0 angles). So really you just need to count the quick dots to determine which number is being spelled out.
As it's random you'll have to work out the pattern that it's sending yourself (turn off the music in the options if it's a bit distracting), or you can just do trial and error and guess your way to success. And for all that it only gives you a few coins.
5/26 - Jungle Trail
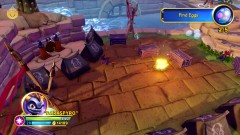
Outside cross the bridge that previously led to a Treasure Chest to reach a block puzzle. All you need to do is get past them, there's nothing else fancy to do with them. Push the right block forwards twice, the near right block towards the screen, the block to the left of it to the left, the one up from there up twice and then the one to your right to the right.
That will get you to a Lock Puzzle. To get the [Imaginite Chest] go: Down, Right, Up, Right, Left, Down, Right, Down, Left, Up, Left, Down, Right, Down. And then from there's it's just to the Right to finish.
6/26 - Ancient Tunnel
Straight on through the tunnel. If you hug the left side Tessa will say something about it being too dark, that's a clue that you have to come back in a moment. Just outside the exit on the wall is a Torch, if you pick it up and walk back into the dark tunnel you can now find an area along the left edge.
7/26 - Tunnel Side-Chamber
There's nothing here except a few coins but it is important for the All Areas checkmark. Leave the cave again.
8/26 - Crumbling Pathway
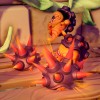
Jump on the green and pink leaves to reach a wooden section with a bunch of little spiky enemies on, these can only be damaged while they're bouncing so if they sit still just wait for them to get up and start moving again.
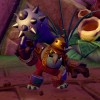
There's a troll with a hammer after the wooden section, he'll slam it down into the ground and fire a ranged attack from it - move from the target to avoid getting hit. He's standing next to an egg you can pick up. Jump up the green and pink leaves to the left of that egg.
9/26 - Jungle Brook
Smash through some rocks on the sides or wait for the sheep to munch through the red plants in the middle to grab the egg at the back. Continue off the right side down a waterfall to the camp area.
10/26 - Ancient Ruins
Defeat a couple more trolls.
Grab all the eggs before you use the grind rail at the back of the area.
11/26 - Jungle Ruins Nesting-Site
Over here there's a whole load of trolls including new ones with shotguns, defeat them all and then wait for the sheep to eat through the red plants so you can then place the eggs you've got into the nests at the back. There's also a free [Imaginite Chest] for you here. Once you're returned five of them you'll open up a grind rail at the very top, do not use it just yet! Instead grab a torch to the left of the grind rail and take it down off the edge at the end of the mud path below.
12/26 - Underground Ruins
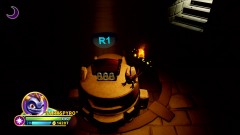 |
Treasure Chest 2/3 |
|---|---|
| Carrying a torch you can jump up the middle to reach the Treasure Chest. |
Exit via the steps at the back.
Now you can go use the grind rail at the top of the nests.
5/26 - Jungle Trail
I wouldn't bother picking up the wooden bridge straight away as it'll just get reset in a moment. Defeat the Baa-barian enemy and follow the muddy path down to the left, grab a torch and wait for the sheep to start munching through the red plants.
13/26 - Lost Ruins
In this cave, if you've got the torch, you can find a safe to open at the back. Simply input the correct combination (remember it's telling you the four buttons in Morse Code: ....- for Square, ...-- for Triangle, and ----- for Circle).
Outside go grab the bridge and put it in place to get back to the Observatory. This time point the telescope towards the middle area.
14/26 - Waterfall Caves
Cross the moved bridge and enter the caves. Follow the dark path along as it curves to the left until you spot a couple of shotgun trolls shooting at you. Defeat them and grab the torch from the second one.
Double back a short distance along the path to go down a dark passage on the left side, you'll need to jump up a little ledge to get in.
15/26 - Hidden Nook
You can smash through some crystals in here but there's nothing else.
Continue past where the trolls were, when you reach the water keep along the left edge.
16/26 - Subterranean Waterfall
If you jump up a little ledge you can find another dark passage that leads to a waterfall. Again nothing else.
Back out in the water defeat another couple of shotgun trolls and go to the left at the fork. Smash through some crystals and push a block forwards down into a little hole. Go back around to get to the other side of the block but before you do go up some platforms in the water on the right side.
17/26 - Secret Ledge
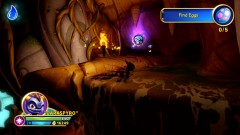 |
Soul Gem 1/1 - Air Strike |
|---|---|
| On top of a small waterfall to the right of the blocks. |
Once you've got that go push that second block so you can use it to get through to the next part.
18/26 - Mineral Grottos
You'll be in darkness here aside from the light from the mushrooms you walk over. Go to the left to find a camp where several more shotgun trolls are waiting next to a load of eggs. There's also a torch you can pick up at the back to help light the area.
With the torch double back to the watery area with the glowing mushrooms and go down a passageway along the right side.
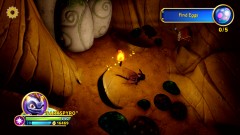 |
Treasure Chest 3/3 |
|---|---|
| In a cave along the right side of the water just before the eggs. |
Gather the remaining eggs and push a block at the back away then go around and push it back to get out.
19/26 - Cliffside Nests
Place the eggs in the nests then use the grind point next to a [Selfie Spot] to leave.
20/26 - Cave Chute
There's a few coins across the metal bridge, pick it up on the side you started on and place it to the right. You're now back on the path below the Observatory, take the metal bridge up through some red plants that the sheep will eat and place it in an empty spot along the right side.
On this little island if you've used the light beam in the Arboretum to make the thorns into flowers you can get an [Imaginite Chest]. Return to the Observatory and turn it to the left side.
21/26 - Mountain Trail
Over the moved bridge and into a cave entrance. You can get an egg from one of the tents here before you cross the wooden bridge. Pick it up as you go and take it along the path past a few enemies up and around the corner. (There is a spot for a metal bridge just off the edge here but it's entirely optional to come back with one although it does have an XP ball for you as well as an egg).
22/26 - Rocky Spires
Ignore the first wooden bridge spot and instead place it in the one just past it next to the Chompy Pods (defeating them will get you an [Imaginite Chest]).
Over the bridge take the metal bridge from the left of the [Selfie Spot] and put it on the metal bridge spot that's leading towards the cliffs at the back. Go over to a bamboo bridge so you can move it to the other bamboo bridge spot on the same island.
Grab the metal bridge and take it over the wooden bridge so you can place it on the spot in front of the Selfie Spot. Don't bother crossing it yet, instead go grab the bamboo bridge and then cross over the newly placed metal bridge.
23/26 - Firefly Landing
Placing the bamboo bridge here will lead to an [Imaginite Chest] on this little island. Take the bamboo bridge with you as you go, place it back where you last put it then after crossing it put it back where you found it to begin with.
Go up the slope past some more Chompy Pods to an area where a large Cactopus enemy will come out of a cave. If you haven't already fought one in the Gong Battle then this guy just flops onto the ground creating a green shockwave for you to jump over. Defeat him for an [Imaginite Chest] and for a large rock to fall over.
Jump onto the rock via the island to the left and head up the slope (don't go into the cave yet). Push the block forwards then continue straight on over the edge down to where there's a bounce pad and a torch.
24/26 - Secret Spire
If you jump down to the right you can get an egg and an [Imaginite Chest] on this secret island. Bounce pad back then bounce up and go through the blocks and down the slope into the cave.
25/26 - Mountain Den
Now that you can see you can fight off a lot of Chompies, once you've wiped them all out you'll get an [Imaginite Chest].
26/26 - Mountaintop Nests
Go back up the slope and push the block so that you can bounce up to the nests at the top and place the eggs in the nests.
That's all for the level. Grind back to the Observatory and talk to Cali outside to finish it up.
Repeatable Imaginite Chests
- Snail Challenge in the Arboretum
- Gong Battle
- At the nests in the right-hand area
- On metal bridge island opposite the Observatory
- Defeat Chompy Pods in the bridges area
- Chest on Firefly Landing island
- Defeat large Cactopus enemy in front of Mountain Den cave
- Defeat Chompies in Mountain Den cave
- Chest on the Secret Spire island
Comments


All off-topic comments will be deleted. Please do not use the comments system for conversations, instead use the provided forums for the game.
Please login or register a forum account to post a comment.


 darkspyro
 net
net