Sky Fortress
| Story Goals | Collections | Dares | |||||||||||||||||||||
|---|---|---|---|---|---|---|---|---|---|---|---|---|---|---|---|---|---|---|---|---|---|---|---|
|
|
|
 |
 |
 |
 |
 |
The entrance to the Sky Fortress is accessed via the launcher to the left of the Fire Realm, which is to the left of the Academy.
1/12 - Skybaron Docks
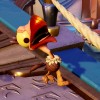
Go straight forwards to attack a few baby vultures as well as an adult vulture with a jetpack who will jump into the air and blast fire beneath it, they only move forwards a little bit while doing that so you can easily avoid taking damage.
After defeating the enemies hit the button on the creationtron to create a couple of robots who will build a missile for you. You can use it to smash into the dropship (that's the large metal vulture, not the ship it's sitting on), while it's not necessary it will reduce the number of enemies you have to fight back there.
Walk back to the ship and defeat a few more vultures, once they're dead a tilting platform will appear next to the [Selfie Spot] on the vulture ship. Walk along that to a second one and down to some more vultures.
2/12 - Tugboat Anchorage
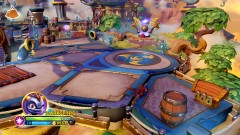 |
Treasure Chest 1/3 |
|---|---|
| Immediately to the right upon landing. |
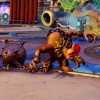
Fight off some more of those jetpack vultures and baby ones popping out of the funnels. A new enemy, a large vulture with a ball and chain will also attack, he comes out of the large crate at the back. His attack is to leap towards you smashing the ball and chain down in front of him. An [Imaginite Chest] will be awarded for clearing them out.
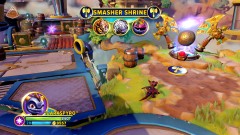 |
Smasher Shrine |
|---|---|
| At the back right. |
3/12 - Skybird Crane Yard
Grab the XP ball as you jump up the crates up to the area behind. Go to the left, there's a [Selfie Spot] beneath some crates before you head through the open door.
4/12 - Dockside Powerhouse
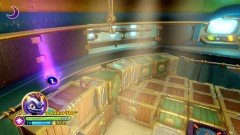
The puzzle in here is that you can't walk through the beams so you have to move the blocks so that the light beams are blocked. To begin move the first one in one, that'll let you get around to one at the back right. Pushing that will let you get up onto the left raised part, push the block off and jump down off the left side so you can push a block into the main beam and then shove it towards the back of the room. Return to the first block you pushed and now continue pushing it to the right then to the back and into the beam on the right.
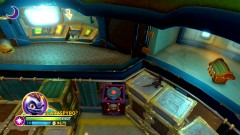 |
Treasure Chest 2/3 |
|---|---|
| On the right as you go up the steps. |
Pulling the lever.
 |
Soul Gem 1/3 - Knight |
|---|---|
| As you leave walk along the left edge of the room. |
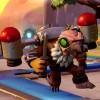
Going outside you'll be introduced to Squawk and Awe, an even larger vulture that carries a baby vulture on its back. It doesn't do much more than slowly walk towards you and swipe with its claws though. At about half health the smaller vulture will disappear and the larger one will switch to doing a charge attack rather than a swipe attack. While fighting the enemies out here you can use the targets on the ground to get Jet-Vac to perform an air strike in a line directly across from the target you activate for a bit of free damage. You get an [Imaginite Chest] for defeating the enemies.
Don't use the crane just yet, instead go into where the Squawk and Awe came out of.
5/12 - Hawkeye Customs
In here you've got a game of [Creation Clash] with a Sky Baron Robot, a Snail Challenge for an [Imaginite Chest] and...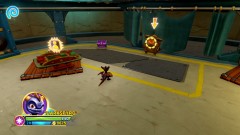 |
Troll Radio |
|---|---|
| At the back of the room, unlocks Ska Music and Sci-Fi Effects. |
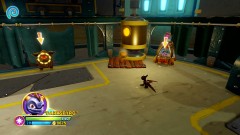 |
Egg Rescue |
|---|---|
| To the right of the Troll Radio. |
When you go out to use the Crane you might want to try to get an Achievement/Trophy "Wrecking Baller". To do that you have to destroy every crate on the deck which is not all that difficult to do but it is quite easy to accidentally miss as the game moves to the next part as soon as all of the explosives have exploded. So try to leave one TNT crate for last. You should get it at the point where the vultures start walking.
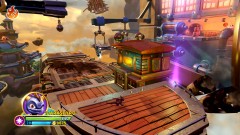 |
Soul Gem 2/3 - Starcast |
|---|---|
| Once you're finished hitting the vultures you'll drop out onto the ship, on the right is the Soul Gem. |
Defeat a few vultures at the far end of the ship before jumping along a couple of tilting platforms.
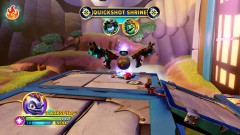 |
Quickshot Shrine |
|---|---|
| Take the path to the left to reach the Shrine. |
Go back down and to the right this time to go inside.
6/12 - Main Hangar
There's an XP ball off the edge before the tilting platforms if you want. Otherwise continue along the first two tilting platforms and then stop.
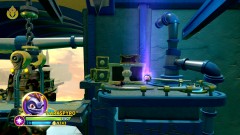 |
Soul Gem 3/3 - Blaster-Tron |
|---|---|
| Smash up the barrels on the blue circle to reveal a lever that you can pull. Then walk along a line of tilting platforms to reach the Soul Gem at the far end. |
Teleport back and cross the final tilting platform down onto the Battleship.
7/12 - Main Deck
After defeating the Squawk and Awe here the door will open to let you in.
8/12 - Engine Room
Jump down and push all the blocks into position to form a circuit. After that's formed a platform will start revolving, jump onto it as it turns and jump to both sides to pull the two levers. Once you've got that go back out the door you came in, a blue button will be active to lower the lift.
Remove the clamp.
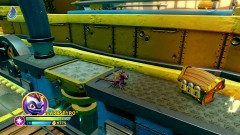 |
Treasure Chest 3/3 |
|---|---|
| In the barrels on the left is a blue button, stand on it to lower a lift on the right that you can ride up to the Treasure Chest behind some barrels. |
A few more vultures to defeat (with an [Imaginite Chest] reward) before Jet-Vac will open the next door.
9/12 - Shock Cannon Control
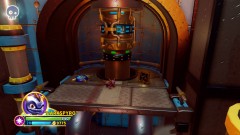
First thing to do in here is defeat a Squawk and Awe. After that move towards the screen to find a blue button that lowers an elevator. Push the missile into the centre, it'll turn to face the front and you can now push it forwards and then to the right.
Do the same with the missile on the left before going back out on deck again.
A big wide area for a fight with a load more vultures (and you can have Jet-Vac perform an attack here too, should be easier to actually get it to hit enemies here) that rewards you with another [Imaginite Chest].
The two blue buttons will raise up a couple of platforms next to them. If you press the one closest to the clamp first and then quickly press the second one you should have enough time to jump up the platforms and into the funnel with the food hoving above it.
10/12 - Auxiliary Gizmo Room
Uncouple the clamp then go straight on and unclamp the fourth clamp. Ignore the button on the ground for the moment and carry on along the deck.
11/12 - Aft Staging Area
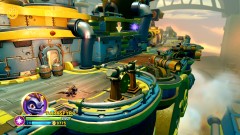 |
Battle Gong |
|---|---|
| Just past the last clamp. There's not much space for this 40 enemy fight so try not to get cornered by the jetpack vultures while fighting for your [Imaginite Chest]. |
If you carry on a little further along there's another [Selfie Spot] but nothing else. Go back to just before the clamp and press the button. It'll lower two sections, run onto the first, wait for it to rise before quickly transfering to the second and waiting for that one to rise too. If you want the XP ball you'll probably have to press the button twice.
12/12 - Command Bridge
The Knight Doomlander begins the fight with a swipe combo, move out of the way but quickly turn to attack as he doesn't have a rest point he'll just turn and attack again.
The second stage gives him a different attack, he'll glow and slam his sword down once. So pretty much the same tactics as the first part.
The final part keeps the same attack as the second part but also adds a wrecking ball, you can lure the Doomlander into the dotted path to get it hit. It does quite a lot of damage so be careful not to be too close when you do that.
The initial set rewards from the [Imaginite Chest] are the Knight Secret Technique "Mighty Cleave", Catchphrase Start "Party With", Catchphrase End "My Wrath", "Doomlander Knight Leg Armor", "Doomed Knight Helm", and the Knight weapon "The Doomblade".
Battleship Bridge
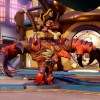
That's the level complete but before you can get back to the M.A.P. you've got to take down the Guacamole Monster. For the first part just keep on shooting him while dodging up and down whenever he picks something up to throw at you. You can shoot the barrels but they didn't seem to do all that much.
For the second part make sure to move out of the line that the arms are on when they begin to swing, they do a lot of damage if they hit you. Otherwise just concentrate on one arm at a time as it moves back and forth between two pipes. There is also a powerup that you can pick up that'll make your attacks stronger for a short time. Don't bother attacking the smaller monsters.
And in the third part concentrate on the head, don't bother with the arms or the little monsters at all as they just come back anyway.
Repeatable Imaginite Chests
- Defeat Squawk and Awe
- Snail Challenge inside Squawk and Awe room
- Defeat enemies next to second clamp
- Defeat enemies between second and third clamp
- Battle Gong
- Doomlander (x3)
Comments


All off-topic comments will be deleted. Please do not use the comments system for conversations, instead use the provided forums for the game.
Please login or register a forum account to post a comment.


 darkspyro
 net
net