Mushroom River
| Story Goals | Collections | Dares | |||||||||||||||||||||
|---|---|---|---|---|---|---|---|---|---|---|---|---|---|---|---|---|---|---|---|---|---|---|---|
|
|
|
 |
 |
 |
 |
 |
 |
1/13 - Mushroom Hollow
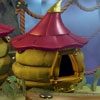
Walk into the mushroom house ahead of you to the right.
2/13 - Mushroom Room
 |
Egg Rescue |
|---|---|
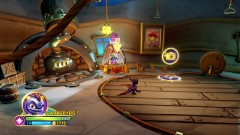
| In the back of the room is a claw machine that you can play. |
Egg Rescue is a minigame where you're tasked to save three eggs from being destroyed by some trolls. Move the claw over the purple eggs and then grab them with the claw. For the one with a shield around it you'll first have to destroy the machine next to it before you can grab it. The gun moves along the edge at the same time as you move the claw, it'll take a few hits before the shield generator explodes. Don't worry about hitting the egg with your own attacks, you can't do any damage. You get an [Imaginite Chest] for completing it, but only for the very first time you do.
And to the right of the claw machine is a preset [Selfie Spot] which gives a few coins if you take a selfie there.
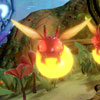
Back outside go to the left where you'll be attacked by some fireflies. These are the level's Chompy equivalent and take no more than one hit to defeat.
Slightly further down there will be some more fireflies coming out of little red hives. Destroy the hives to get the flies to stop appearing much like you did with the Chompy Pods.
Go into the doorway that has opened up next to where the hives were.
3/13 - The Old Mill
In here you can play a game of [Creation Clash] against Buddy if you went to the Card Shack in the M.A.P. before coming to Mushroom River. You'll get an [Imaginite Chest] for beating him.
 |
Troll Radio |
|---|---|
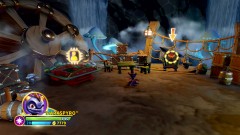
| To the right of the game of Creation Clash, unlocks Rock Music and Gassy Effects. |
Troll Radios are a minigame where you need to press the button when the hand is in the lit up section of the dial. The tougher ones will have smaller lit up areas but this first one has quite a wide area to introduce you to the concept. Successfully completing the puzzle will get you a set Imaginite Chest that contains music and effects for your Imaginators. If you fail you can just keep retrying until you succeed. This is a once and done puzzle, once you've solved it it will remain solved on return visits.
Back outside jump on the large blue mushrooms to the right that appeared when you smashed the hives, they're bouncy!
 |
Treasure Chest 1/3 |
|---|---|
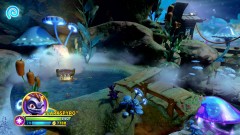
| At the third blue mushroom bounce to the left, you'll find the Treasure Chest in a little pond. |
Continue up the bouncy mushrooms to the top.
4/13 - River Raft Junction
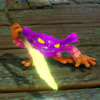
Another new enemy, this purple guy carries a spear and will leap into the air before slamming it down into the ground. He'll get stuck for a few seconds so it's a good time to hit him. Another couple will appear from the water after you defeat the first.
 |
Soul Gem 1/3 - Chopscotch |
|---|---|
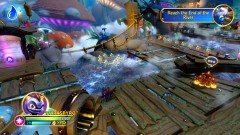
| After defeating the enemies jump onto a raft and quickly cross over to the back left end of it to reach Chopscotch's Soul Gem. |
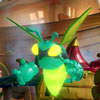
Get back onto the raft and let it carry you along the river. At the next stopping point there are some more hives and some new green bug enemies who fire a long ranged shot up into the air with a target marking where the shot will land. Move out of the way of that target to avoid getting hit while you take them and the hives out.
Once they're gone the fence on the side will automatically break to let you continue onwards but before you do so go into the doorway at the back of the boat.
5/13 - Pirate's Hideout
 |
Soul Gem 2/3 - Pit Boss |
|---|---|
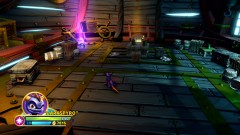
| Just sitting on the left side. |
 |
Treasure Chest 2/3 |
|---|---|
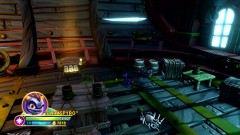
| And next to it at the back. |
Go back out to continue along the river.
6/13 - River Mist Apartments
On the second wooden platform if you walk towards the screen you can find a hidden [Selfie Spot]. Carry on to the next boat platform with another enemy ambush, you'll be introduced to the Splatterpillar.
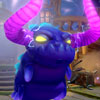
This large horned enemy will walk towards you then jump in the air and smash down causing three energy balls to fire out on both sides. That means if you're in front of him you'll only get hurt if you're right up against him from the slam itself. You can jump over the energy balls if you happen to have moved around to his side. He's not that big of a threat by himself like this but once you start adding extra enemies to the mix (there are none here though) it gets a little trickier to keep in front of him as well as away from other enemies. Defeating him will get you an [Imaginite Chest].
Go inside the door at the back of the boat.
7/13 - Forger's Retreat
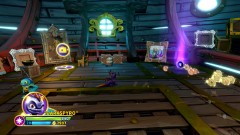
There's a [Selfie Spot] by a painting.
 |
Soul Gem 3/3 - Brawler |
|---|---|
| Hidden inside a wooden crate on the right side of the room is this Soul Gem. |
8/13 - Rolling Barrel Bay
You can attack the first two sets of barrels but the third one seems to be made of stronger stuff so just avoid them as you pass by on the raft - standing at the very front seems to be perfectly safe.
 |
Treasure Chest 3/3 |
|---|---|
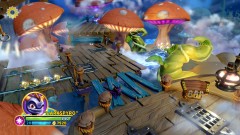
| At the next wooden platform with some enemies on it, walk towards the screen to find the Treasure Chest. |
 |
Ninja Shrine |
|---|---|
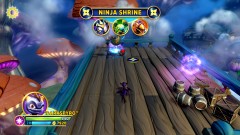
| And at the back of the same platform is the Ninja Shrine. |
Don't forget to grab the ball of XP by the Shrine.
Get on the raft again and ride it down the slope (you can get the Achievement/Trophy "I'll Take the Next One" if you jump into the water once Eruptor jumps on). At the bottom you'll have to take out some more hives and four of those purple spear enemies to open a Monster Gate that's blocking a bounce pad.
9/13 - Lilypad Lagoon
You can just jump over the logs as they roll by, no need to do any waiting around. At the other end you'll get to a larger ship where you'll be attacked by a few enemies. The main enemy is the Splatterpillar but he's very predictable so perhaps just focus on the green bugs first. Defeating this group will net you an [Imaginite Chest]. Go through the door at the back.
10/13 - Sunken Schooner Docks
 |
Battle Gong |
|---|---|
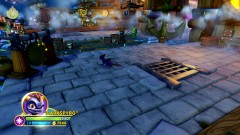
| You'll land right next to the Battle Gong. |
Should you choose to take part, the Battle Gong fight has 40 enemies but the fireflies count individually so it's not as many as it might seem. I'd recommend leaving the Splatterpillar until last if you've got a melee attacker as getting in close with so many other enemies around is just going to get difficult to see clearly. Claim your [Imaginite Chest] once you win.
Over the stationary raft you'll come across a water pipe puzzle. This involves pushing the blocks into the gushing water stream so that it is focused on the waterwheel to the left of them. Simply push the one on the ground into the stream then jump up onto the end and push the two on top off. Doing that will lower the fence and unleash some more enemies to defeat. Clearing them out will get you another [Imaginite Chest]. Go through the door at the back.
11/13 - Bugwood Banks
Another 2D style area, use the bounce pad to get up then across some moving platforms working your way up to a door in the top right. There are a few enemies in here but you can just bypass most of them.
Smash the crates out here then nudge the two large cannonballs onto the platform that Eruptor is standing on to open up the water gate.
12/13 - Whitewater Plunge
Jump on the raft (another spot to get that Achievement/Trophy) and wait to reach the bottom.
13/13 - Toadstool Landing
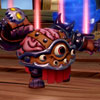
On the right is a Snail Challenge to get an [Imaginite Chest]. Bounce up the blue mushrooms to the top where you'll get to fight the Brawler Doomlander.
His first attack is very obvious, he has a long wind up before he punches and casts a large red circle around himself as he prepares to do so too. Just stay away from him the moment he punches to avoid taking damage in the first part of the fight.
Once he learns the Secret Technique he'll have a new wind up that doesn't have the red circle, this will be a ranged attack so once he starts doing that move a little to the side as he won't turn very far once he's started.
The fight will barely change in the third act, you'll just have to smash three hives and continue as before, they'll keep reappearing after a while so just keep smashing them to keep them out of the way as their use as a shield is kind of negated by them creating fireflies.
The set Imaginite Chest will contain the Brawler Secret Technique "Wave Fist", the Catchphrase Start "Unleash", the Catchphrase End "The Monkeys", "Hardcore Arm Guards", "Doomed Dome Shoulder Armor", and a Brawler Weapon "Skullclap". And as always a repeat victory in this fight will get an [Imaginite Chest] with three random items in it.
Repeatable Imaginite Chests
- Defeat first Splatterpillar
- Defeat the second Splatterpillar, just after the rolling ships
- Gong Battle
- Defeat the third Splatterpillar, just after the pipe puzzle
- Snail Challenge before the Doomlander
- Doomlander (x3)
Comments


And this is my favourite level
All off-topic comments will be deleted. Please do not use the comments system for conversations, instead use the provided forums for the game.
Please login or register a forum account to post a comment.


 darkspyro
 net
net