Scholarville
| Story Goals | Collections | Dares | |||||||||||||||||||||
|---|---|---|---|---|---|---|---|---|---|---|---|---|---|---|---|---|---|---|---|---|---|---|---|
|
|
|
 |
 |
 |
 |
 |
 |
 |
1/18 - Scholar Town Square
The door at the back on the left is open so head inside for a quick visit.
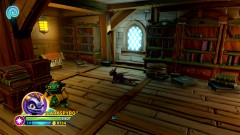
2/18 - Scholarville Library
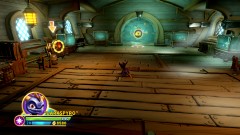
 |
Treasure Chest 1/3 |
|---|---|
| In an alcove at the back of the building. |
Opposite the library is a pile of crates with some TNT in them, if you destroy them (brush up against TNT to trigger it) you can reveal a [Selfie Spot] next to an Eon statue. There's an Achievement/Trophy "Demolitionist" for blowing up 15 TNT in this level, while there's loads more than you need you might as well get started here.
Go along the path between the statue and the library to meet some troll enemies, the ones with two axes will spin and the ones with the yellow bow and arrows will shoot arrows at you. Stand back from the spinners when they spin but if you've got a ranged attack you can actually hurt them while they're spinning.
The TNT here is quite useful for hurting the enemies if they're standing next to it when it explodes. After they've been defeated the Monster Gate on the right will open, enter the building there.
3/18 - Aquatic Studies
 |
Troll Radio |
|---|---|
| The Troll Radio in here will reward you with Animal Effects and Radio Voice Effect. |
There's a [Selfie Spot] at the back in front of a fish tank but nothing else of note.
Outside there's a rolling barrel to cross over, you can jump up on top of the TNT to get past quicker but be careful not to be standing too close when it all explodes. Then there's a second barrel with a few spikes on that you'll have to walk around to get over.
As you advance to the right through the cannonballs keep doubling back after igniting the TNT to avoid their explosions.
4/18 - Philosopher's Fort
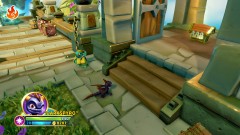
On the right after the cannonballs is an optional Lock Puzzle to solve. To get the shards to join for the [Imaginite Chest] you can go Down, Left, Up, Left, Down. And to solve the rest from there go: Up, Right, Down, Left, Up, Left, Up.
 |
Treasure Chest 2/3 |
|---|---|
| Solving that Lock Puzzle will give you access to this Treasure Chest. |
Try to walk towards the cannon and the ground will collapse beneath your feet.
 |
Soul Gem 1/3 - Tri-Tip |
|---|---|
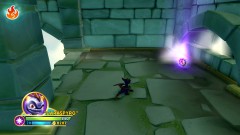
| Go backwards to the left after you land to find the Soul Gem. |
Defeat a couple of spinning trolls and a few Grinnades that pop out of the boxes then step onto the little flying boat and it'll take you back up to where you can get into the cannon for real.
Do not fire straight away, instead turn the cannon so that it is aiming at the second location "Secret Island".
5/18 - Hermit's Hideaway
 |
Treasure Chest 3/3 |
|---|---|
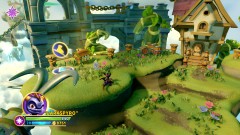
| Defeat a few Grinnades and grab the Treasure Chest next to the chain. |
Ride the anchor chain to the ship.
6/18 - Command Ship A
After sliding to the ship jump down to fight a few trolls, there's a new operatic troll who charges an energy ball attack above her head before throwing it down in front of her. It'll stick around for a second or two so don't go near it. Defeat a few more enemies that join in from the ship in the background until you get introduced to the Air Burn enemy.
Air Burns have two types of attack, one where it'll walk up to you and pounce causing a mini shockwave, and one where it'll fire three missiles up into the air to hit the ground around it. Keep attacking it until you defeat it and the floor collapses and you get an [Imaginite Chest].
 |
Battle Gong |
|---|---|
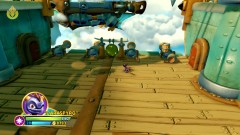
| Available after defeating the first Air Burn enemy. |
After the collapse you can start the optional Gong Battle with 30 enemies to defeat. Quite a few are Chompies with the rest made up of the spinners and bow and arrow trolls, no Air Burns or the operatic trolls at all. Try not to let the spinners corner you. As usual that's an [Imaginite Chest] for your troubles.
Make sure to go through the right-hand door first.
7/18 - Spar Deck
 |
Legendary Selfie Frame - Bazooker |
|---|---|
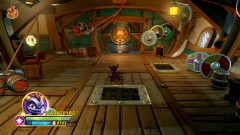
| In the back right of the room. |
On the left is a game of [Creation Clash] with Hanks.
8/18 - The Engine Room
Going through the left door will lead you to a quick electric circuit puzzle, easily solved by pushing the two red blocks forwards to move them in line and turn them green. Use the bounce pad that activates. Slide down the chain outside.
9/18 - Academic Islands
If you detonate the TNT over by the waterwheel you can get the [Imaginite Chest] from on top. Behind that pile of crates is an emblem on the floor, later on in the game you will be able to come back here to use it to get over to that cannon you can see in the distance but that's strangely not a new area and there's little over there so it is not 100% necessary to do so.
Jump back over and use the ship's wheel on the wall, tap it several times to get the platform to move all the way down.
 |
Sorcerer Shrine |
|---|---|
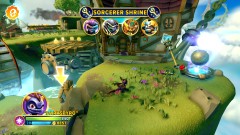
| Jump off to the right as the platform starts going back up. |
There's a door up here you can go in as well.
10/18 - Insect Studies
 |
Soul Gem 2/3 - Ember |
|---|---|
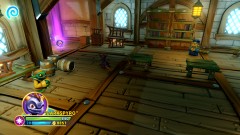
| In the back left corner of the room. |
Repeat the wheel platform but this time ride it all the way up. Defeat a few Grinnades before igniting a TNT on top of the minecart tracks on the right, it'll explode the rocks below it allowing you to enter the mine.
11/18 - The Mine
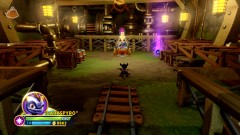 |
Egg Rescue |
|---|---|
| Inside the mine. |
This time you've got some enemies to contend with. If they manage to throw bombs at the eggs (even ones that are shielded) they will damage them, if they hit them enough they'll get destroyed which will mean you lose. So just make sure to shoot them with the gun before they get a chance to try.
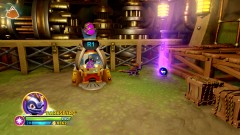 |
Soul Gem 3/3 - Bazooker |
|---|---|
| Just to the right of the Egg Rescue machine. |
Same sort of thing with the next wheel platform, there's just a jump over a beam in the middle to make. Climb into the cannon which, as with the previous cannon, you want to turn it to fire at a "Secret Island" rather than the Command Ship.
12/18 - Forgotten Islands
Use the wheel platform to go up to some spinner trolls (you can jump off to the left for a few extra coins) by the chain back down to the ship. In the back there's an XP ball behind some TNT before you do that though.
13/18 - Command Ship B
Jump down to defeat a few waves of enemies, Kaos arrives with his Bazooker Doomlander once you defeat the Air Burn. His first attack is three waves of rockets going along the ground in an arc in front of him, easy to jump over or simply walk through the gaps. You'll also find that the occasional spinner troll will get in the way.
The second stage introduces a Secret Technique which involves creating a line of targets across the area to air strike after a few seconds. Stay out of the way of that and if you're in the right position you can actually get the Doomlander to place the line so that he hurts himself.
The third stage adds in large cannonballs to avoid (that will also damage the Doomlander) as well as a load of spinning trolls, he'll go back to doing the first attack as well.
The [Imaginite Chest] for the first time will include the Bazooker Secret Technique "Artillery Strike", Catchphrase Start "Nothing Better Than", Catchphrase End "The Pancake House", "Horned Arm Guards", Bazooker Weapon "Fossil Fury", and "Horn Skull Shoulder Armor".
14/18 - The Cannon Maze
In here is a simple maze where the buttons rotate the walls around, just go to each one in turn to get through. There's nothing special in here so head straight on out the other side and then down a chain.
15/18 - Cloud Shroud Lookout
The jumping chest is a Snail Challenge that will lead you a short distance around the circular section on the left for an [Imaginite Chest].
Another pair of barrels to cross over, smash through the wood on the second one to get over.
16/18 - Vine Grind Gulf
The green vine ahead is a [Grind Challenge], that means if you collect the three bits of imaginite on the way down you'll earn an [Imaginite Chest] (and you get one every time you do it so well worth trying to get them all every single time you replay the level). You'll have to switch back and forth along the vines to avoid taking damage but all three of the pieces are on the right side and you'll need to jump to get them.
If you do miss a piece of imaginite unfortunately there's no way to restart the challenge (at least on this one, later ones will have points where you can fall off on purpose) so you'll have to go through the entire level again to have another go (only important for the Bonus Goal).
17/18 - Vine Down Landing
On the left where you land is a [Selfie Spot].
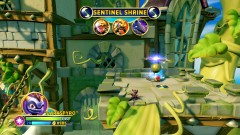 |
Sentinel Shrine |
|---|---|
| On the right are some vines that you can smash through to get up to the Shrine. |
The Lock Puzzle at the front gate adds a new mechanic, to break the cracked blocks you need to first pick up the hammer. To get the shards to join for the [Imaginite Chest] you can go: Left, Up, Right, Down, Left, Up, Down, Right, Up, Right, Down, Left, Left, Down. Be careful not to go to the left when at the top with the hammer before you've joined the shards. And from there to finish go: Right, Up, Left.
18/18 - Castle Sewer
After the cutscene inside walk forwards and stop when the Evil Sea Monster pops out of the water. You can attack him a little but it's not really worth it, instead just stand back and let him bite at nothing before he dives back down again.
As you approach the rolling barrel he'll jump up again and start biting so stay back again. Cross over the two barrels and as you start going to the left he'll swipe the platform with his tail so get ready to jump over the attack. Getting knocked into the water will return you to the beginning of the room but he won't pop out again when you pass by the original spots.
At the end go up the steps to get to the first part of the fight. He'll jump up out of the water and cause a wave, if you move to be in line with where he jumped up you'll avoid the wave. After three waves he'll climb up onto the edge and allow you to attack him. He'll keep repeating this until you damage him enough and a platform rises out of the water.
Another section of walking. He'll bite just before the first barrel and then again just after it, and then swipe on the second one.
The second stage of the fight will have the waves double up with a quick second wave that you'll have to move quickly to avoid. After resting he'll now also pop out on the corners and start biting, you can attack him during this but if you're melee it might not be worth it. Repeat till you can move on again.
On the first barrel he'll swipe with his tail, then again at the end of the second barrel, and right at the end he'll do some biting before you can go up the stairs.
As you might expect the third stage has the waves in threes but he'll also do the bite attack three times in a row before going back to wave splashing. On your first victory the [Imaginite Chest] will contain the Cyglobe head.
Skylander Academy
Before we go to the next level it's off back to the Academy again. Head into the Library and push the first bookshelf down into the gap to cross over to a set of three. Push the smallest shelf forwards so that it sinks into the hole in the middle, then move the tall one on the left so that it's in line with the other two to climb up to the first button.
To get to the second button move the two still moveable bookshelves to the left, the first of the Vortex Destroyer Parts is also up here. Then move them over to the right to reach the third and final button.
Move the two shelves ahead into position in line with the two sloped platforms that just lowered before doubling back and pushing the shelf at the bottom of the sloped platforms into place to jump up it.
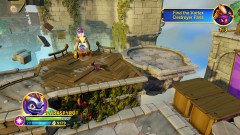 |
Egg Rescue |
|---|---|
| Now we get introduced to missiles, you can pick them up with the claw and drop them on enemies or shield generators. |
Make sure to play this one now as you cannot return here at a later time.
Going down the ramp to the left pick up the second part of the Vortex Destroyer then down onto a tilting platform. Chase the snail up the stairs for an [Imaginite Chest]. Double back a short distance to the top of the stairs to pull the lever, that'll lower another [Imaginite Chest] for you as well as a path to the locked gate you passed by a bit earlier.
Push the bookcase into position along the wall so you can use the bounce pad on top of it to get the key for the locked gate to the right in order to get the third piece of the Vortex Destroyer.
To get to Shellmont Shores head to the cannon just over the bridge next to the Card Shack and go to the "Vortex Island".
Repeatable Imaginite Chests
- Defeat the first Air Burn
- Battle Gong
- On pile of crates after first command ship
- Doomlander (x3)
- Snail Challenge after second command ship
- Grind Challenge
- Evil Sea Monster
Comments


All off-topic comments will be deleted. Please do not use the comments system for conversations, instead use the provided forums for the game.
Please login or register a forum account to post a comment.


 darkspyro
 net
net