Monster Marsh
Haunted Wreck
Immediately to your left is a  Traptanium Crystal with a
  Winged Sapphire hidden inside. After talking to Gomper go past the Troll Radio to a pair of blocks (ignore the Soul Gem that you can see for the moment), push the left one twice to get past and go smash down a fence.
Haunted Approach
To the left is Cali with a Quest for Eye Scream  Paranormal Captivity.
Cross the bridge and you'll find the first ghost in the pottery to the left. Go up the slope and then up the slope at the back, go along to the left around and down to an area with bones and a super bounce pad, as well as two ghosts. Head to the right in the area where you land and there's a fourth ghost in the pottery just around the first corner and a fifth in some pottery further towards the back. In the next room is a Grave Clobber and a bounce pad as well as a sixth and final ghost in the corner. You can only take four at a time so you'll have to double back in a moment to get these last two.
Bounce up to the left to reach the area with the ghost's ship in to deliver them. If you do get hit while a ghost is with you you'll have to go all the way back to where you found them to pick them up again.
Go right past a closed gate and then ignore a breakable fence to get to some pushable blocks. Push the right block away twice, the far left block left once to fall into a hole, then the near left block forwards to where the other left block originally was and then finally push the first block into line with them. That'll create some steps to get up onto the back of the Haunted Wreck area where you could see (and can now collect)  Soul Gem 1/2 - Krypt King.
Spirestone Graveyard
Carry on past the blocks and on the right side of the area jump off the edge.
Spirestone Cliffs
Go inside the cave down here.
Spirestone Grotto
Smash though one fence and then a second one at the back to find  Treasure Chest 1/3. Head out and bounce back up.
Now go into the Undead Elemental Gate at the back.
Spirestone Crypt (Undead)
Watch out for a few eyeballs running at you as you enter. Push the block on the right off the edge and jump up to the right to push a block up there to the left (eyeballs behind it!) all the way off the left edge. Jump up it and push a block there to squish some more eyeballs (with more behind it). Jump up to the top layer and cross over to the right to drop down and open up  Hat 1/3 - Dragon Skull.
To the left of the Undead Gate is a Lock Puzzle. Solve it with the following directions: Left, Left, Up, Left, Up, Right, Down, Up, Left, Right, Up, Up. Behind there you'll find  Soul Gem 2/2 - Fist Bump and a Super Bounce Pad. Use the bounce pad.
Hungry Isle
Time for an Earth Villain named  Chomp Chest. This treasure chest has teeth! His attack pattern is to run in your direction, pause and then charge forwards biting. Move out of the way when he does that and you should be okay although he doesn't give much time to attack afterwards so melee only characters are going to have a tough time getting out unscathed. 600 Bounty on him. Use the Super Bounce Pad that appears after defeating him to get back.
Go back up past the blocks and smash through the fence to get near to where Headwick is trapped.
Spirestone Mausoleums
A few eyeballs will run towards you along with that crawler that Headwick mentioned, it just runs towards you and then swipes with its large hands, jump over it before it can do that. A few more waves of enemies will pour out to fight you along with a blue enemy that fires a line of energy along the ground that you'll want to jump over or go around. After that Headwick will be freed.
We've already explored so follow Headwick up to the closed gate to the left of the fence you broke through and cross the bridge. Watch out for the Eye Screams on the other side as they'll roll barrels down the bridge for you to either smash or avoid entirely.
Windmill Hill
The path here is closed so go inside the cave.
Supply Room
You're going to have to defeat Millington in here at a game of Skystones Smash to get that gate open. His stones are fairly weak so the ones you've collected so far should be able to win without too much of a hassle.
Go outside and start going up the slope, watch out for the windmill's blades as they will damage you as they pass by if you bump into them. Before jumping into the elevator go around the back of the windmill where you'll find the  Story Scroll. Directly beneath you you should see a doorway, drop down onto the ledge there to get inside.
Secret Basement
In here you'll find Persephone giving out her usual upgrades but nothing else, it's mostly just an area for the "dare". Go out and go back up to the top of the hill again and jump into the elevator by pulling the lever.
Little House on the Misty Marsh
Eye Scream will run off after sending out a few eyeballs so all you need to take down are a few of those crawlers along with a resurrected one when a Masker Mind appears. A few more eyeballs will rush out and be joined by some flying enemies that drop balls all over the place, after they spit out a few they'll drop the ground exhausted which is your opportunity to attack them (while avoiding the balls, obviously).
The Misty Marshes
Cross over the little bridge past the monster gate to chat with Headwick and meet Marsha, you'll have to solve a Lock Puzzle to get her out of the cage. To solve the first board: Down, Right, Up, Down, Left, Up, (left here will finish it), Right, Down, Left, Down, Up, Left. The second board can be solved by the following: Left, Right, Down, Up, Down, Right, Left, Right, Down, Right, Left, Down, Up, Down.
Start the marsh walking process (don't leave the protective bubble while you're in the marsh otherwise you'll take damage!) and follow along with Marsha (there's a Trophy/Achievement for collecting 20 coins here so watch out for those along the way - there are three in this first section). At the first stop don't start going again straight away instead go to the right to a block puzzle.
Push the first block off to the right and then use it to jump across to another block. Be really careful here as falling off will land you in the marsh and really hurt. Push the next block off as well and make your way over to  Legendary Treasure - Legendary Golden Frog (note that you will not be able to find the Legendary Golden Frog in the Skylanders Academy until later in the game). Jump back along the blocks (you might need to jump diagonally onto the first one as it's a big high) and start moving with Marsha again.
Marsha will pause at a Dark Elemental Gate (after seven coins, that's 11 so far).
Dark Hollow
Pull the levers to try to hit the two flashing sections at the back, once they're open fire the ball in again to get it in the holes behind them, a new ball will appear after each one goes in. Once they're both in a third ball will appear and the middle ramp will rise up, you've got to fire the ball up the middle of the ramp, you can do that by hitting the lever when the ball is right at the top edge of the bumper. Once in the gate will open and let you get  Hat 2/3 - Shadow Ghost Hat
Get moving with Marsha to another island where you can pause for a moment (three more coins in that part, ones inside barrels and stuff don't count apparently), and finally move on along a larger section (with a few more coins than needed to finish the Trophy/Achievement) to end this swamp crossing.
Smash the  Traptanium Crystal to find a Super Bounce Pad underneath.
Empty Isle
Use that hidden Super Bounce Pad to go fight a Dark element villain called  Eye Scream. She (he?) will summon loads and loads of the little eyeball enemies which you can squish with one attack, the only danger is there being too many and you miss a few. Otherwise Eye Scream doesn't do much else, just stay aware of any stray eyeballs running around as you defeat the villain for the 650 coin bounty.
Bounce back to get started on a block puzzle. Push the central block to the left once, then the back middle block back once and you're done.
Village Approach
A few eyeballs and a crawler await, a few more crawlers will appear along with that blue enemy. Once a few of them are down you'll be joined by the flying enemies too. More blue guys and then an Eye Scream along with a Masker Mind and a crawler. Busy busy. And then to top it all off here comes a Light element villain
 Eye Five. This guy's a bit tougher than Eye Scream was as not only is he joined by a few more flying enemies but his attack is actually difficult to avoid. He slams his fists down and moves towards you, changing direction mid pounding to keep tracking you. It's a 650 bounty for this villain.
Over in the corner is a  Traptanium Crystal to smash through.
Smuggler's Hideout
At the back is a Lock Puzzle. Up, Left, Left, Up, Right, Left, Down, Right, Down, Up, Left, Down, Up, Left, Down, Right, Up, Down, Left, Up. Behind there is  Treasure Chest 2/3.
Go out and up the slope behind the monster gate and defeat a couple of Eye Screams rolling barrels at you. Keep on going to the village where you'll need to wake up the sleeping mabu Winkle.
Sleepy Village
On the left is a mabu named Smeekens who has a Quest for Fisticuffs called  Outhouse Back-In House. The reward for completing the quest is
  Hat 3/3 - Clown Classic Hat.
Grocer Jack's
Head into the house on the right to find a mabu named Bing who wants to play Skystones Smash, it's just a 1000 coin reward for beating him.
Wake up Rip by the fence outside and then smash through it. Smash down the  Traptanium Crystal to reach a
  Villain Stash.
Now go up the wooden steps to the right and go into the first house on the left.
'Boots' the Cobbler
Krueger is found asleep on the floor, wake him up and then go out again.
Outside carry on forwards to the floating bed to wake up the mabu sleeping on it. Next start going to the right, jump over a small gap and wake another floating bed. Jump to the next floating platform and then a third (do not wake the mabu here yet!) before jumping towards the screen onto a stationary section, if you go further towards the screen and to the left you'll find a  Traptanium Crystal with
  Treasure Chest 3/3 inside.
Get back onto the moving platforms and wakeup another sleeping mabu and then once the platforms settle carry on to the right around the swirling vortex and then down onto a large circular area where Dreamcatcher starts an arena fight.
The first stage is mostly just eyeballs, crawlers and a few blue enemies. The second stage starts to break up the arena which is actually more of a help than anything as it blocks the beams from the blue enemies and the balls from the flying enemies fall off the edge easier.
Skylanders Academy
Another new area will pop into existence and Brock has another arena area open. The Academy Defense Tower is found next to Mags' weird slot machine thing, take the elevator up to get there. There's not much of interest in here except on some boxes to the left you'll find  Trinket - Pirate Pinwheel.
Auric has some new stock:
| Item | Price | |
|---|---|---|
| Skystone Cheat | 200 | |
 | Palm Hat | 200 |
 | Rude Boy Hat | 200 |
 | Pork Pie Hat | 200 |
 | Miniature Skylands Hat | 200 |
If you're looking for where the Legendary Golden Frog goes, well, give up. It's not anywhere here yet, you'll have to wait a few more chapters to place it. Time to go to Telescope Towers.
Comments
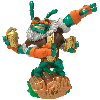

Eye Scream-Grand Duke of Owls (Rock-A-Doodle)
Eye Five-The Jester (Legends of Oz; Dorothy's Return)






The two areas are Spirestone Cliffs and Spirestone Grotto. They are accessed by going through the hole in the fence next to the lantern in Spirestone Graveyard.
Inside Spirestone Grotto is the missing chest.

All off-topic comments will be deleted. Please do not use the comments system for conversations, instead use the provided forums for the game.
Please login or register a forum account to post a comment.


 darkspyro
 net
net