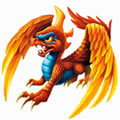

Chapter 12: Frostfest Mountains
Collectibles

Jump down to a slope on the right, follow it towards the camera and then across some spinning platforms to [Balloon Animal 1/5]. On the Wii version if you go back up and head backwards to the left you'll find [Treasure Chest 1/6]. Get back up and wander past Flynn and Sharpfin down a slope to a purple coloured pond, use the floating bits of ice to cross over it and meet a Cyclops Brawlbuckler. These are the larger enemy type that has a shield, nothing all that special about their smash attack.
Typhoon Trail (Earth)
You'll reach a thin frozen river, drop off the right side of it down to a door in the wall. That'll take you over to some stepped platforms that lead up past a couple of Gazermages to [Soul Gem 1/2 - Fryno]. You can jump off the ledge here to get back to the path at the purple pond.
This time go past the frozen river and through the windy faces, the first one is blowing away from it and the other is sucking towards it. Not a hazard right now but further on they'll become more of a nuisance. Take out the Coldspears and the Gazermage before talking to the yeti Fizzy at the end. Activate and then spin the lantern to open up the gate to the village below.
Hooplaberg
Talk to the yeti, Bozker, on the right side of the village next to the dog, he'll ask you to win a chew toy. The doors of the buildings in the village will suddenly open up and let you inside. In the Wii version the village is a bit different as you can only enter the Num Num Hall building to the left which has a Treasure Chest at the back rather than a Spark Lock.
Filbop's Fete
To the right of Bozker is this house with an apple bobbing mini-game. Bobbing for Apples is done by running around the area picking up the apples while avoiding the mines. If you look carefully you'll notice that just before the mines and apple appear there's a slight frothing of the water, watch out for this as standing on a mine when it appears is not going to be good for your health (although eating an apple will heal you). Plenty of time to get the ten you need to win your first chew toy. Take it outside and Wibbles will dig up some coins for you.
NikNak's Hobnob
A memory game in the building to the left of Bozker. Three symbols will apper over the fireplace and you have to turn the three devices so that they match the symbols given. Not too difficult unless your memory is quite bad. You can retry by talking to Puzzles again and get a different code if you weren't paying attention. Outside to give the chew toy over and get some more coins.
Brikabrack's Bash
In the building next to NikNak's Hobnob is a Shell Game, you've got to try to keep track of which cup the chew toy is under and then pick that cup. Just keep an eye on that one cup as it slowly gets moved around to win. Take the chew toy outside to have Wibbles dig up [Treasure Chest 1/7] (this whole sequence does not exist on the Wii version, the first Treasure CHest is found at the start of the level).
Num Num Hall
On the left side of the village is another building to go into, at the back is a chest with a Spark Lock, "Fan-Dango", on it. Switch to Bolt and press the green button to switch the fans to blowing horizontally, switch back to Shock and slide towards the fans where you'll get trapped bouncing between them. Using Bolt step off the button and then back on as Shock is headed towards the right side of the area, that'll push him down onto the orange button at the bottom. Still using Bolt step onto the lowered orange platform and then use Shock to press the orange button again to raise it. Move Bolt left onto the lone platform and have Shock press the button again to lower the orange platform and then go past it to get the blue bolt (pressing the green button as you go). Switch back to Bolt and go up to the fans, have Shock press it again to make Bolt go down to the left to grab the green lightning bolt. Shock press the button again and Bolt gets trapped, press again to bring him down to the bottom onto the orange button so that you can now bring the two together to open up [Treasure Chest 2/7] (in the Wii version there is no lock to get to the chest).
Out in the village again just to the right of the locked gate is a [Balloon Animal 2/5] on the table. Now time to solve another Spark Lock, "Near Miss". This one is about timing, have Shock go down as the blue lightning bolt starts to move upwards over the left slippery path, that should time it so that you hit the bolt. Now using Bolt do the same thing but with the green lightning bolt headed right over the top path. To join them together you need to switch back to Shock and slide upwards as Bolt starts going back towards where he started. If you miss just keep sending Bolt out and trying again. Go through the door.
The Glacier Hills
At the top of the wooden ramp you'll find a Sneak Swap Zone, and a few enemies to attack.
Nerves of Ice (Sneak)
If you want the first bonus gem then continue to ride the moving platform all the way to the left through the second camera, it's just down a small slope behind some lasers. Ride the platform to the door to open.
The second bonus gem is found by taking the platform going to the right, it's behind a load of lasers. Once you've got it ride the platforms to the left and when the camera on the track is moving away from the handle start turning it to open the door, you'll probably have to stealth again before the platform comes back and you can go through it.
Go down the slope and right through a camera track to get to a moving platform. The last bonus gem is a little trickier to get than the others, ride the platform to the right and onto the camera track, wait for it to start going away from you towards the gem and then quickly follow it over the lasers, you'll either have to very carefully find a spot that's not in the camera's view and not on the lasers to stealth if you don't want to be detected but a brief moment of detection may be more helpful than several seconds of laser attack (co-op makes this easy, just turn off the camera!). Get back to the moving platform and ride it along to another, through a camera and another platform to reach the end where the reward is [Legendary Treasure 1/2 - Yeti Teddy].
After defeating the Coldspears, Gazermages and the Chompies smash through some crates at the back on the left to go up a thin path to a trio of Gazermages guarding [Treasure Chest 3/7].
Now down the right path to a flowing purple river covered with ice platforms, instead of crossing directly jump along them to the right to get the [Balloon Animal 3/5] in the air. Get to the wooden platform and reach a Power Pod, oddly the checkpoint is a tiny bit further along, just up a ledge past the twirling purple blades, but there's some other stuff to get to before doing that. On the left is a Magic Gate. The Magic Gate is not here in the Wii version, you instead find the Winged Sapphire later on just after the second village.
Enchanted Bivy (Magic)
Talk to Yuks and then jump into the turret. Here you'll want to shoot the balloons but not the mines, so try to only shoot once for each balloon otherwise you're going to end up hitting a stray mine. The reward for getting 50 is a [Winged Sapphire].
Just past the Magic Gate is a Dig Swap Zone, watch out for the spinning purple blades as you go.
Glacial Descent (Dig)
There's loads of spikes coming out of the walls in here to watch out for. The reward for digging up all three crystals is [Hat 1/2 - Four Winds Hat].
Jump up the ledge by the spinning blade to reach the checkpoint. Up past a windy face to meet an Evilized Chillydog. Unlike other Evilized things they don't charge at you, instead they dig up a giant snowball and throw that at you before jumping to another spot to do the same again. They're entirely vulnerable to attack almost the whole time (during the jump you can't hit them) so as long as you watch for the snowballs they're straightforward to defeat. With the first one defeated a new pair of them will pop up to fight you.
Before you go through the monster gate go to the left and carefully grab the [Balloon Animal 4/5] from behind the spinning blades. Go through the monster gate now to meet a new obstacle, these begin to explode when you get close so walk towards it and then immediately back up out of the red circle around it to let it detonate safely. Jump down the ledge and go left.
The Tempest Maze
Careful of all the exploding mines as you get buffeted about by the windy faces, at the back behind them all you'll find [Story Scroll]. Go back through the wind and take the path to the right now, there's an enemy attack at a split in the path, you should see a couple of the Coldspears coming out from behind the trees on the right, go back behind there to find a couple of windy faces with Gazermages on top, trip the mines and go around to attack the mages. That'll let you open up the [Treasure Chest 4/7] behind them.
Go back and take the main path up to a Brawlbuckler and a couple of Gazermages, defeat them and pass by to a larger fight with a monster gate. Defeat the first of the Coldspears to trigger a couple of Chillydogs to join and then yet more Coldspears. Go through the monster gate and follow the path down past a windy face to another split. Take the left path into another fight to unlock [Treasure Chest 5/7] (in the Wii version this is actually a present with the Beacon Hat inside).
Head right to a Chompy Pod and a Gazermage before going past a few mines to a bend in the path where more enemies will run in. Defeat the Coldspears, the Chompies and the Brawlbuckler and head forwards to yet more enemies, you can go past the Brawlbuckler to get up to the Gazermages on the hill. Next to them is a small gap in the fence which you can drop down through to get onto the other side of the trees of the path you just went along. Follow this to the right a short distance to pick up the last [Balloon Animal 5/5].
Drop down and go back up the path and then up the wooden ramp next to the closed gate, it'll lead to another lantern to turn on. Before going down into the village you should go into the Dual Tech and Fire Gate on your left up here.
Fiend Furnace (Fire)
An all out battle here, attack the Gazermages up on their roosts as well as the three Brawlbucklers running about to open up the monster gate at the back and collect [Legendary Treasure 2/2 - Endless Cocoa Cup].
Now off down into the village.
Slushville
Another yeti village.
Gratis Geld Haus
For some free gold go into the house on the right side of the village, there's a Giant chest in here.
Talk to the kid on the table in the village outside to begin a quick quest to collect some yeti teddies. Again the village in the Wii version is smaller so the quest and other rooms do not exist, the chest is found later on in the level.
Griznak's Gala
The left building has a variation on the apple bobbing game, the variation being needing to collect 20 apples. You'll get a few coins for giving the teddy to Klizzy.
Howzit's Hootinanny
Another memory game, this time with four icons to remember. Put them in in order to earn your second yeti teddy.
Shorty's Shindig
And another shell game, this time it's much much faster so it'll be a lot harder to keep your eye on the cup. If in doubt just guess.
Delivering the third yeti teddy will reward you with [Treasure Chest 6/7]. To leave the village you'll need to solve a Spark Lock, "Circuit Breaker". There's a ticking noise which is just the fan at the bottom switching on and off. Switch to Bolt and slide down the right side to go through the fan when it's off, you'll want to move just as the fan switches off. Press the orange button to lower the platform above you and turn the fan to the left on. Get the green lightning bolt and then slide up to the top middle. Switch back to Shock and go down to the left, with the fan on it should take you towards the middle where you can slide upwards to get to the blue lightning bolt and Bolt.
Typhoon Trail (Earth)
Just outside the door is a pair of Brawlbucklers and a Chompy Pod to defeat, after those are gone start crossing the river to your right.
IceBreak Atolls (Water)
If you go directly across you'll get to an Air Gate. Again this gate does not exist in the Wii version, the hat was found earlier in the level where Treasure Chest 5 is found on the other versions. And in the Wii version partway down the river you'll be able to find the Winged Sapphire you missed out on earlier, it's to the left behind a Gazermage.
Gusty Gauntlet (Air)
Go right, avoiding the fans and up a vertical fan to the next layer. Go left, and use the second fan to get across over the ledge, jump up into the air being blown from it to be thrown over. The next layer has a moving platform which you need to cross over quickly otherwise you'll be knocked off, it's then followed by a more segmented similar situation but you'll want to jump over the first gap rather than wait for the other two to come in. Go up again and ride the first fan, the second one however will need timing to land on the moving platform, not very precise timing, if the platform's there you should get to it quickly enough. Open the present for [Hat 2/2 - Beacon Hat].
Jump back onto the ice blocks and ride them to the left, don't just sit on one though as it'll quickly disintegrate and you'll fall into the water. Aside from the Gazermages along the edges there's nothing special to do other than get to the end. Jump off onto the wooden platform and attack the single Gazermage standing in the middle, watch out for the blades as a horde of Chompies attack. In the Wii version off to the right of the spinning blade you can find [Treasure Chest 5/6].
Perilous Precipice (Undead)
Just to the right of the monster gate is a gap in the trees, go through it down to a platform below. Follow this along up a series of spinning platforms, keep doubling back to avoid the mine explosions, all the way to the top and [Soul Gem 2/2 - Trap Shadow]. With that picked up go back down the platforms and up through the monster gate.
Cross the bridge over where you just found the Soul Gem and defeat the Chompy Pod blocking you way, time to start jumping over a couple of spinning blades to reach a Bounce Swap Zone on the right.
Frosty Frolicking (Bounce)
The key difference here is the gusts of wind that you'll find partway through each section, jump into them to be bounced further upwards. You get [Bonus Mission Map 1/1 - Frigid Fright] for reaching the third balloon.
Go left, watching out for that blade, up the wooden path and off to the left at the curve to find [Treasure Chest 7/7]. Get back onto the path and defeat the small number of enemies at the end before going right through a mine, then some more enemies including a Brawlbuckler before reaching the final fight of the level at the top. Defeat the Gazermages and then the two Brawlbucklers at the back to cause another set of enemies to climb on in. After taking out those Coldspears you'll be joined by a couple of Evilized Chillydogs to finish it off. Light the lantern and you're done.
Chapter 13: Mesmeralda's Show
Get out of the way of the chorus members as they zip back and forth across the stage, their attack is a bit wider than the lines so you'll have to be quite a bit away from the lines to avoid damage. You can stay in the same horizontal position once you've worked out a safe part but will need to move back and forth to avoid the horizontal lines. After a bit they'll stop and two spotlights will appear on the stage, switch them on to light up the red eyes of Mesmeralda so that she comes down onto the floor. Attack while she's blinded by the light and keep on attacking until she goes back up again.
During the next line segment you'll also be attacked by those proximity mines, they can be triggered by damage here so if you've got a long range attack you can get them to blow up without getting anywhere near close. After avoiding all the lines hit each of the spotlights until you get Mesmeralda down again, attack her while avoiding the mines that are still arriving.
The next part just adds that you get several mines at the same time, avoid them and the chorus members until the four spotlights appear for you to switch on. And attack her again.
Now you'll have to jump over the pink rotating blade that's spinning around the room while still avoiding those lines although I just tend to stick to a corner as the blades don't reach there. Watch where the spotlights hit as Mesmeralda will move position if you take too long to hit the right one, which means the right one may have just become one that you've already tried.
Same for the next part except with two blades spinning around, the corner tactic still works just fine. The final stage adds back in all the mines and keeps the two blades so it's going to get a bit hectic if you're standing in the middle.
Woodburrow
Another empty visit, talk to Sharpfin to go to Fantasm Forest.
Comments
 Magna Charge. I picked up a guy and threw him off the edge and now it's all bugged out. So annoying.


All off-topic comments will be deleted. Please do not use the comments system for conversations, instead use the provided forums for the game.
Please login or register a forum account to post a comment.
 darkspyro
 net
net